You have to remember why I have been writing all this on My Forgotten Hobby III since October 31st.It’s the only way I have found to restart building my collection of unbuilt model airplane kits. By writing about it here each passing day motivates me to make progress.ICM He 111H-3 is quite challenging.
I will have to remember that calling it a day is sometimes the best way to avoid mistakes and to make notable progress.
As I was trying to add these parts yesterday morning I noticed I did not have to jam them through but just glue them gently.
I did one part at the time to let the glue set.
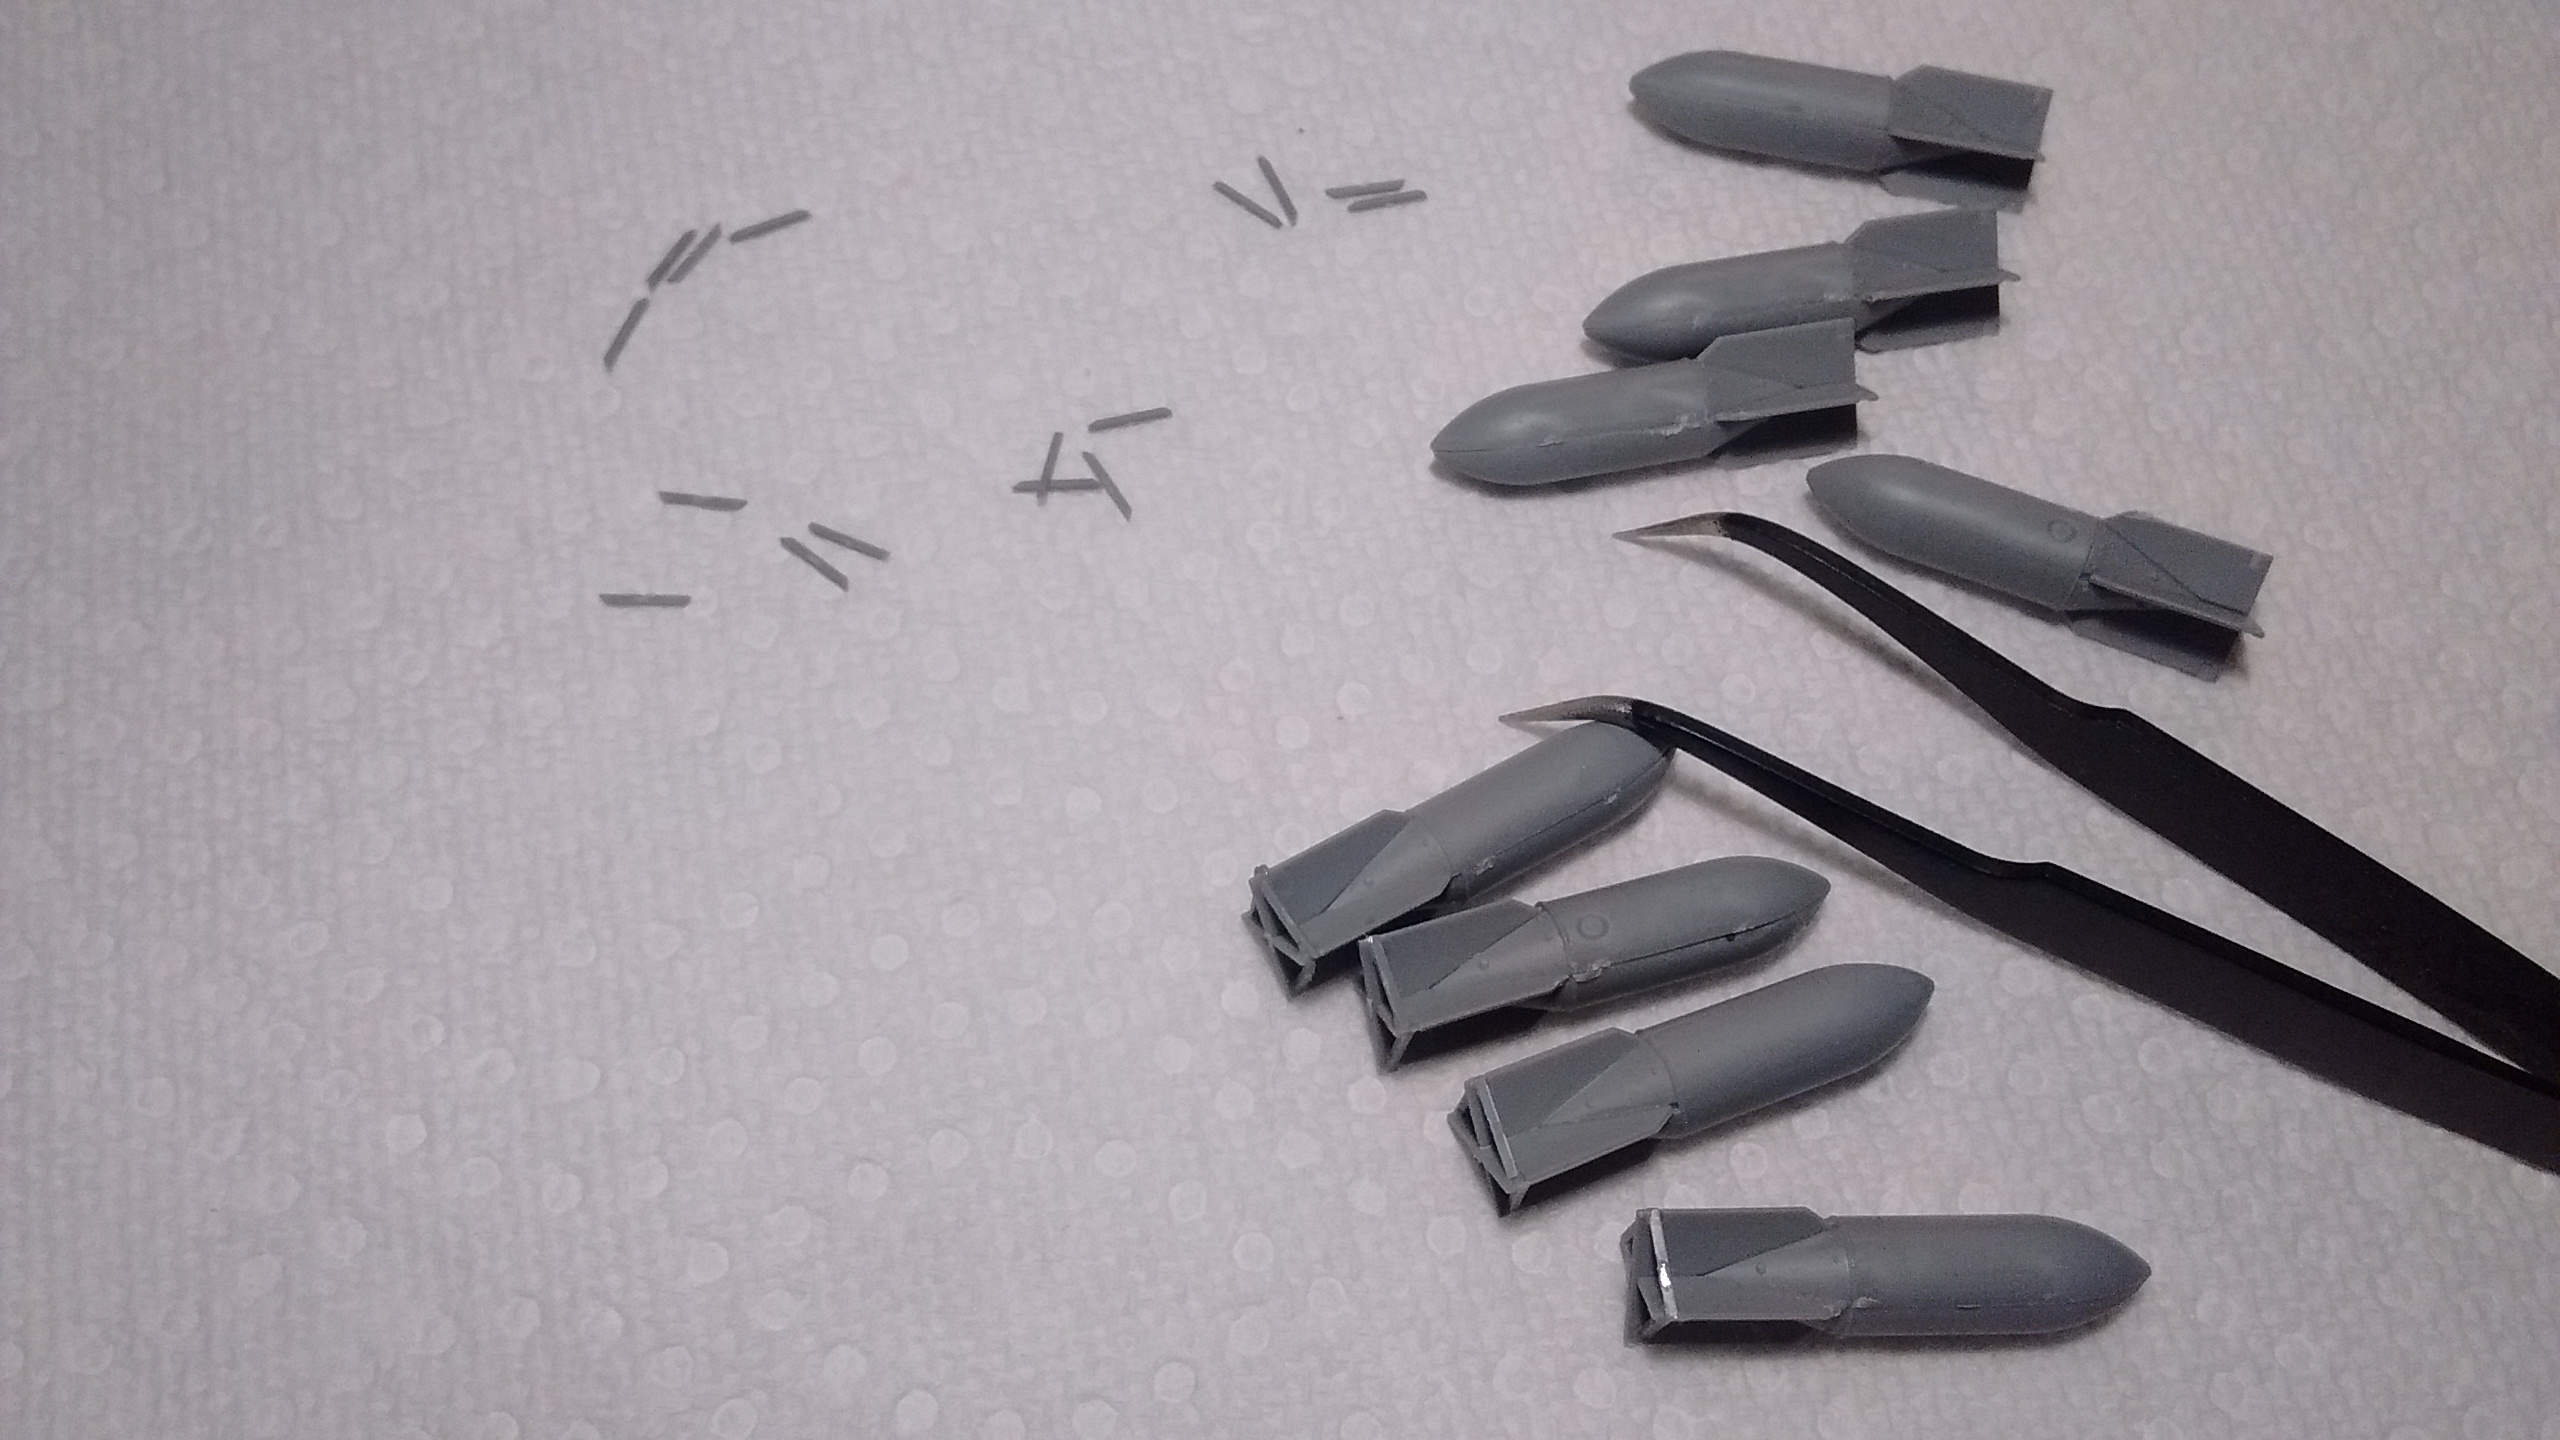
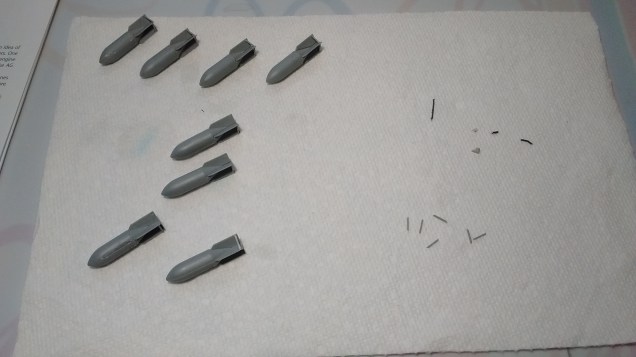
While at it I glued more bomb braces and managed to lose one on the floor.
I was then confronted with these parts. Even if I did not expect any trouble I opted to skip that step.
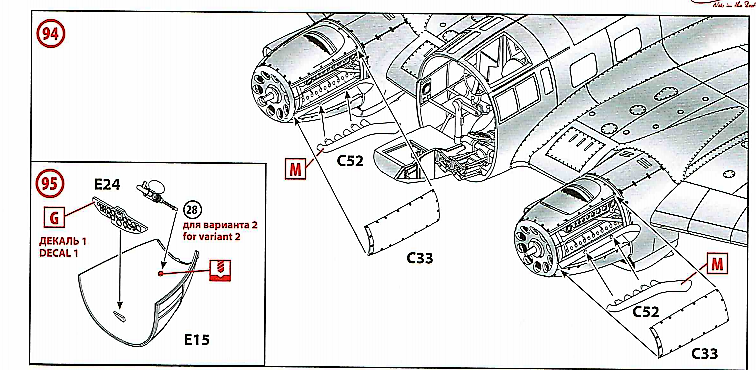
Then came the bomb bay doors and the fit was perfect.
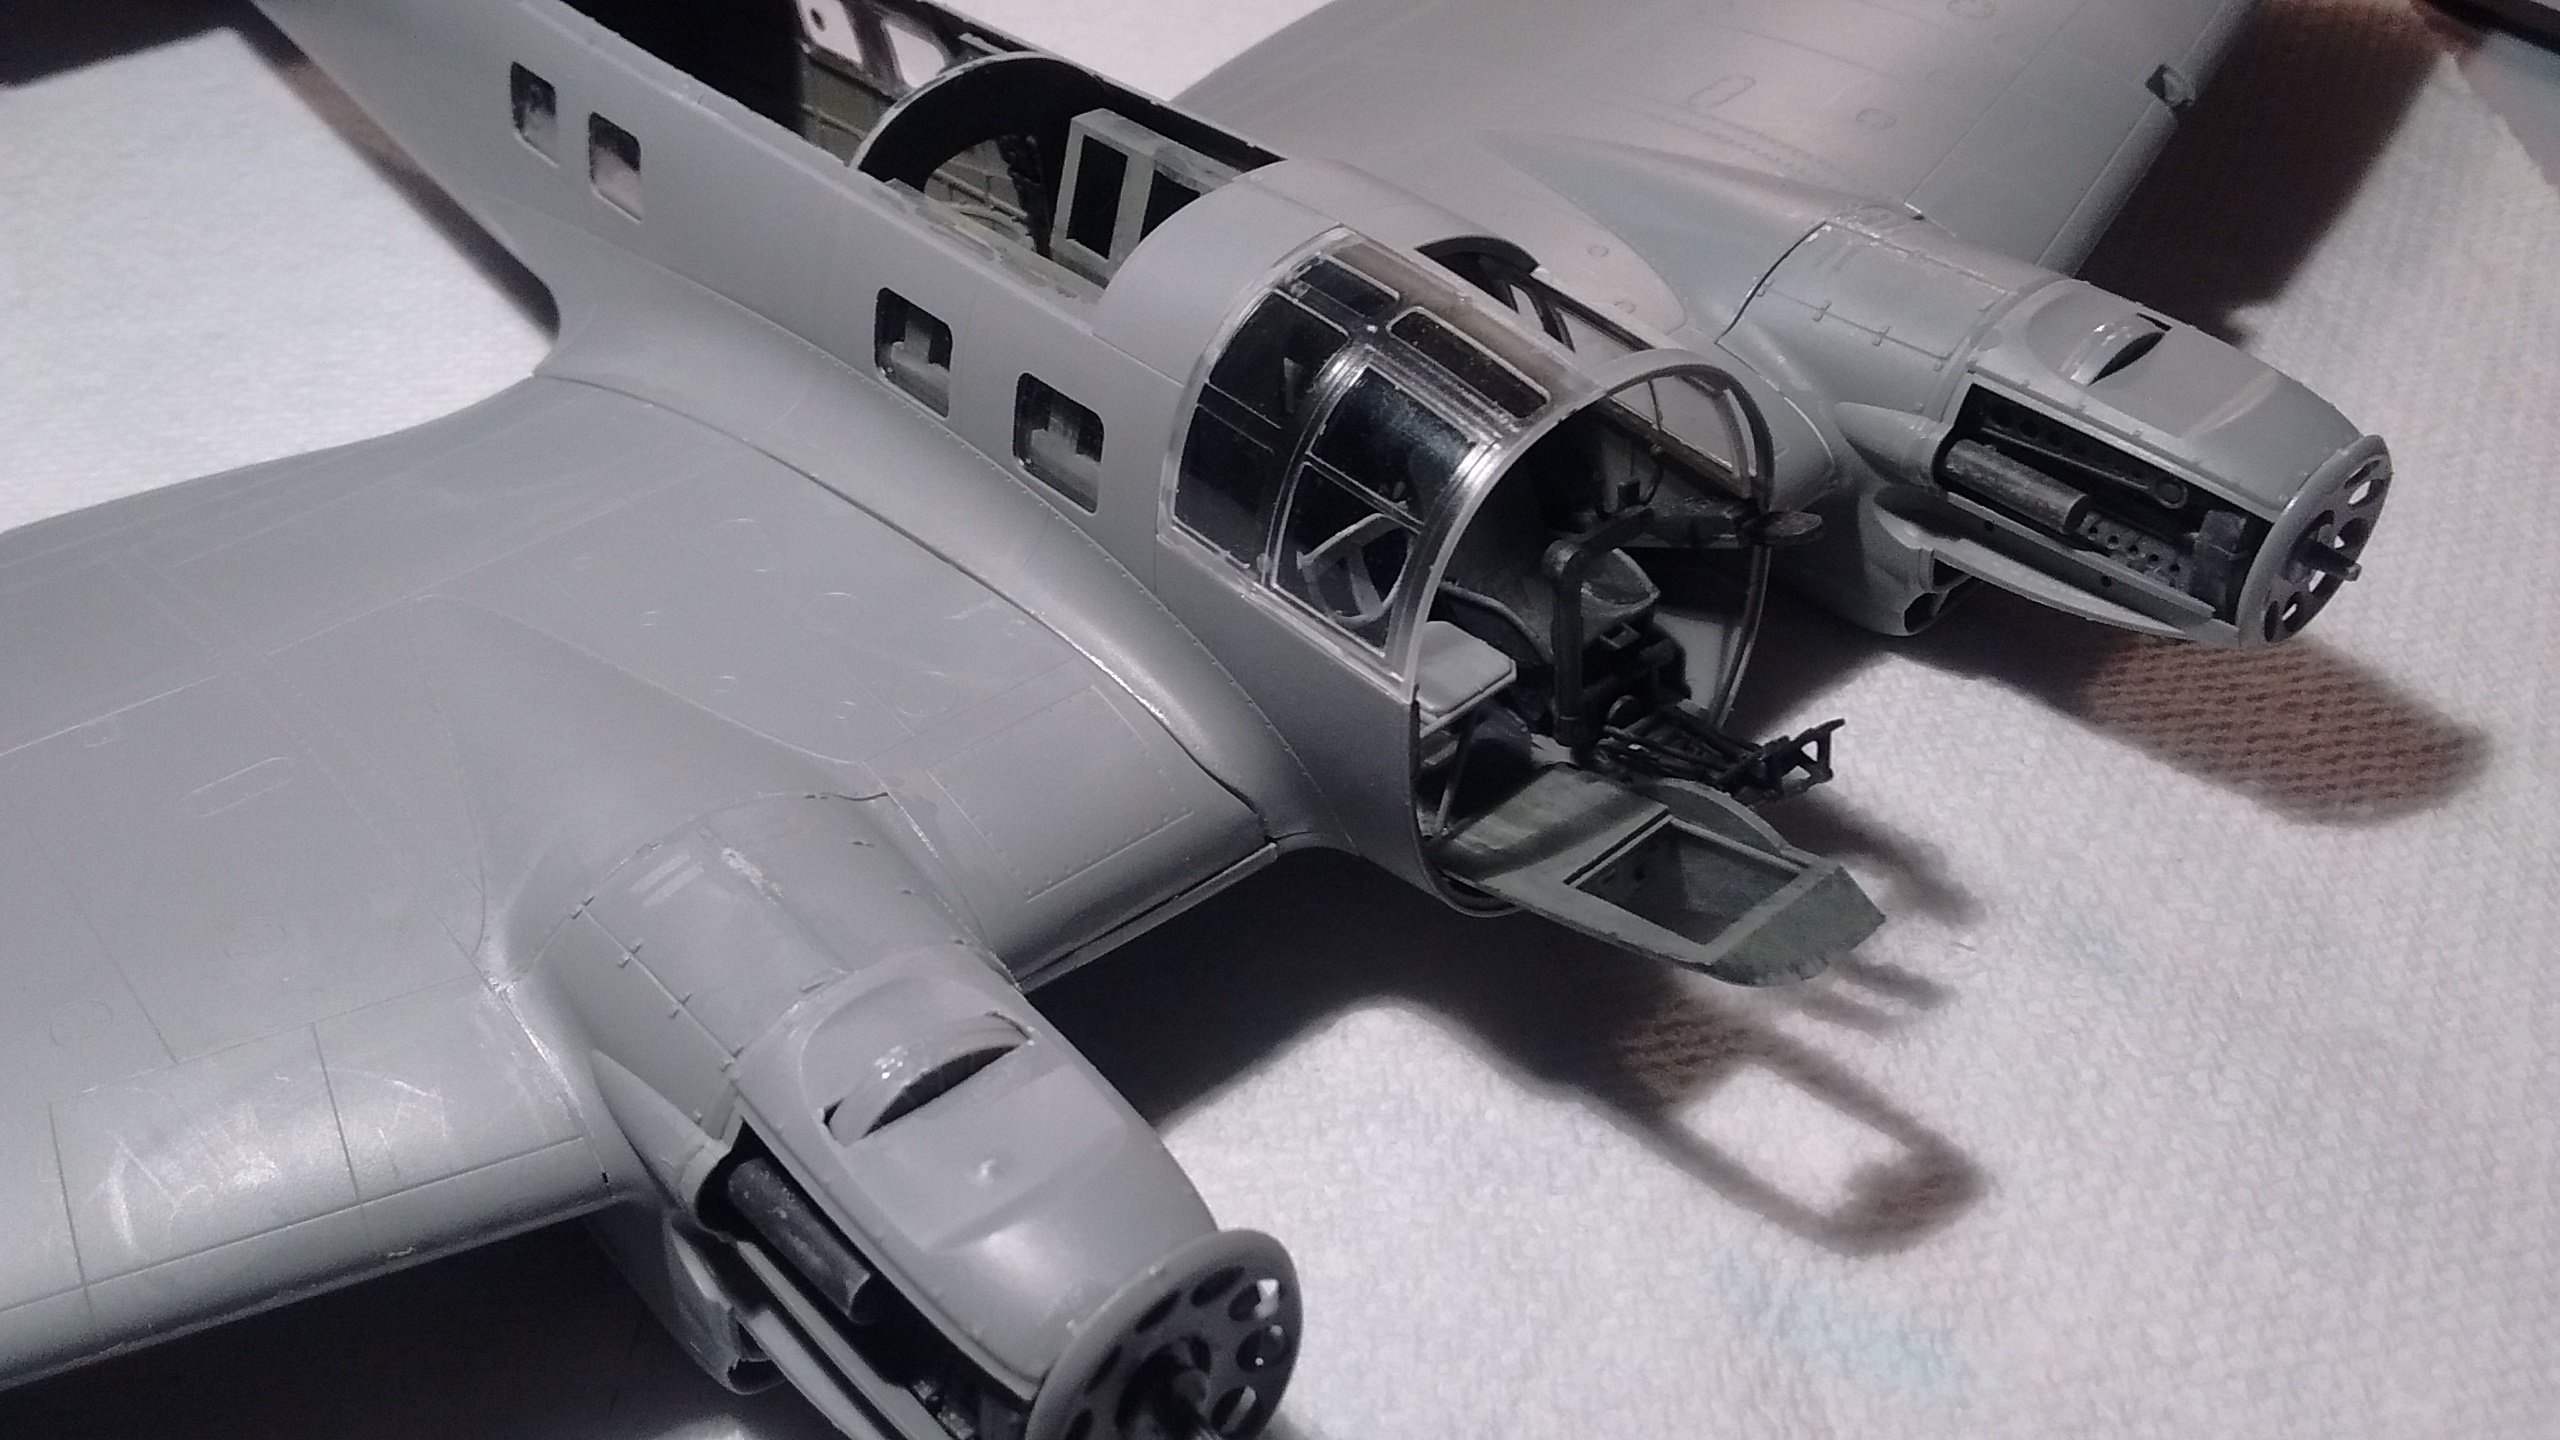
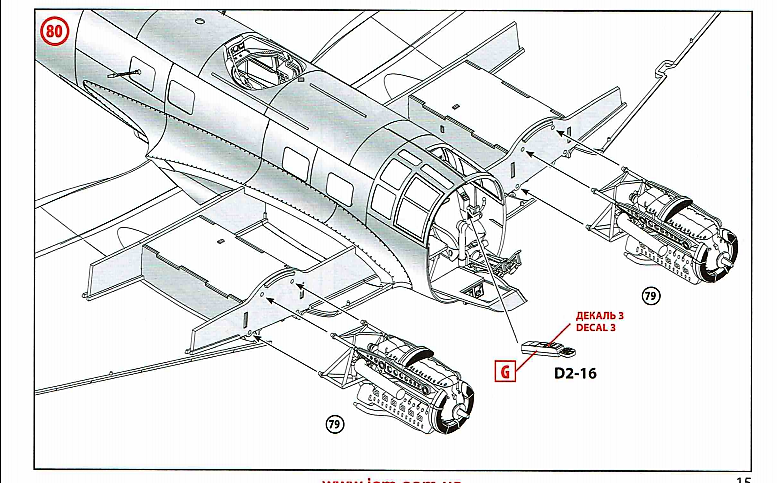
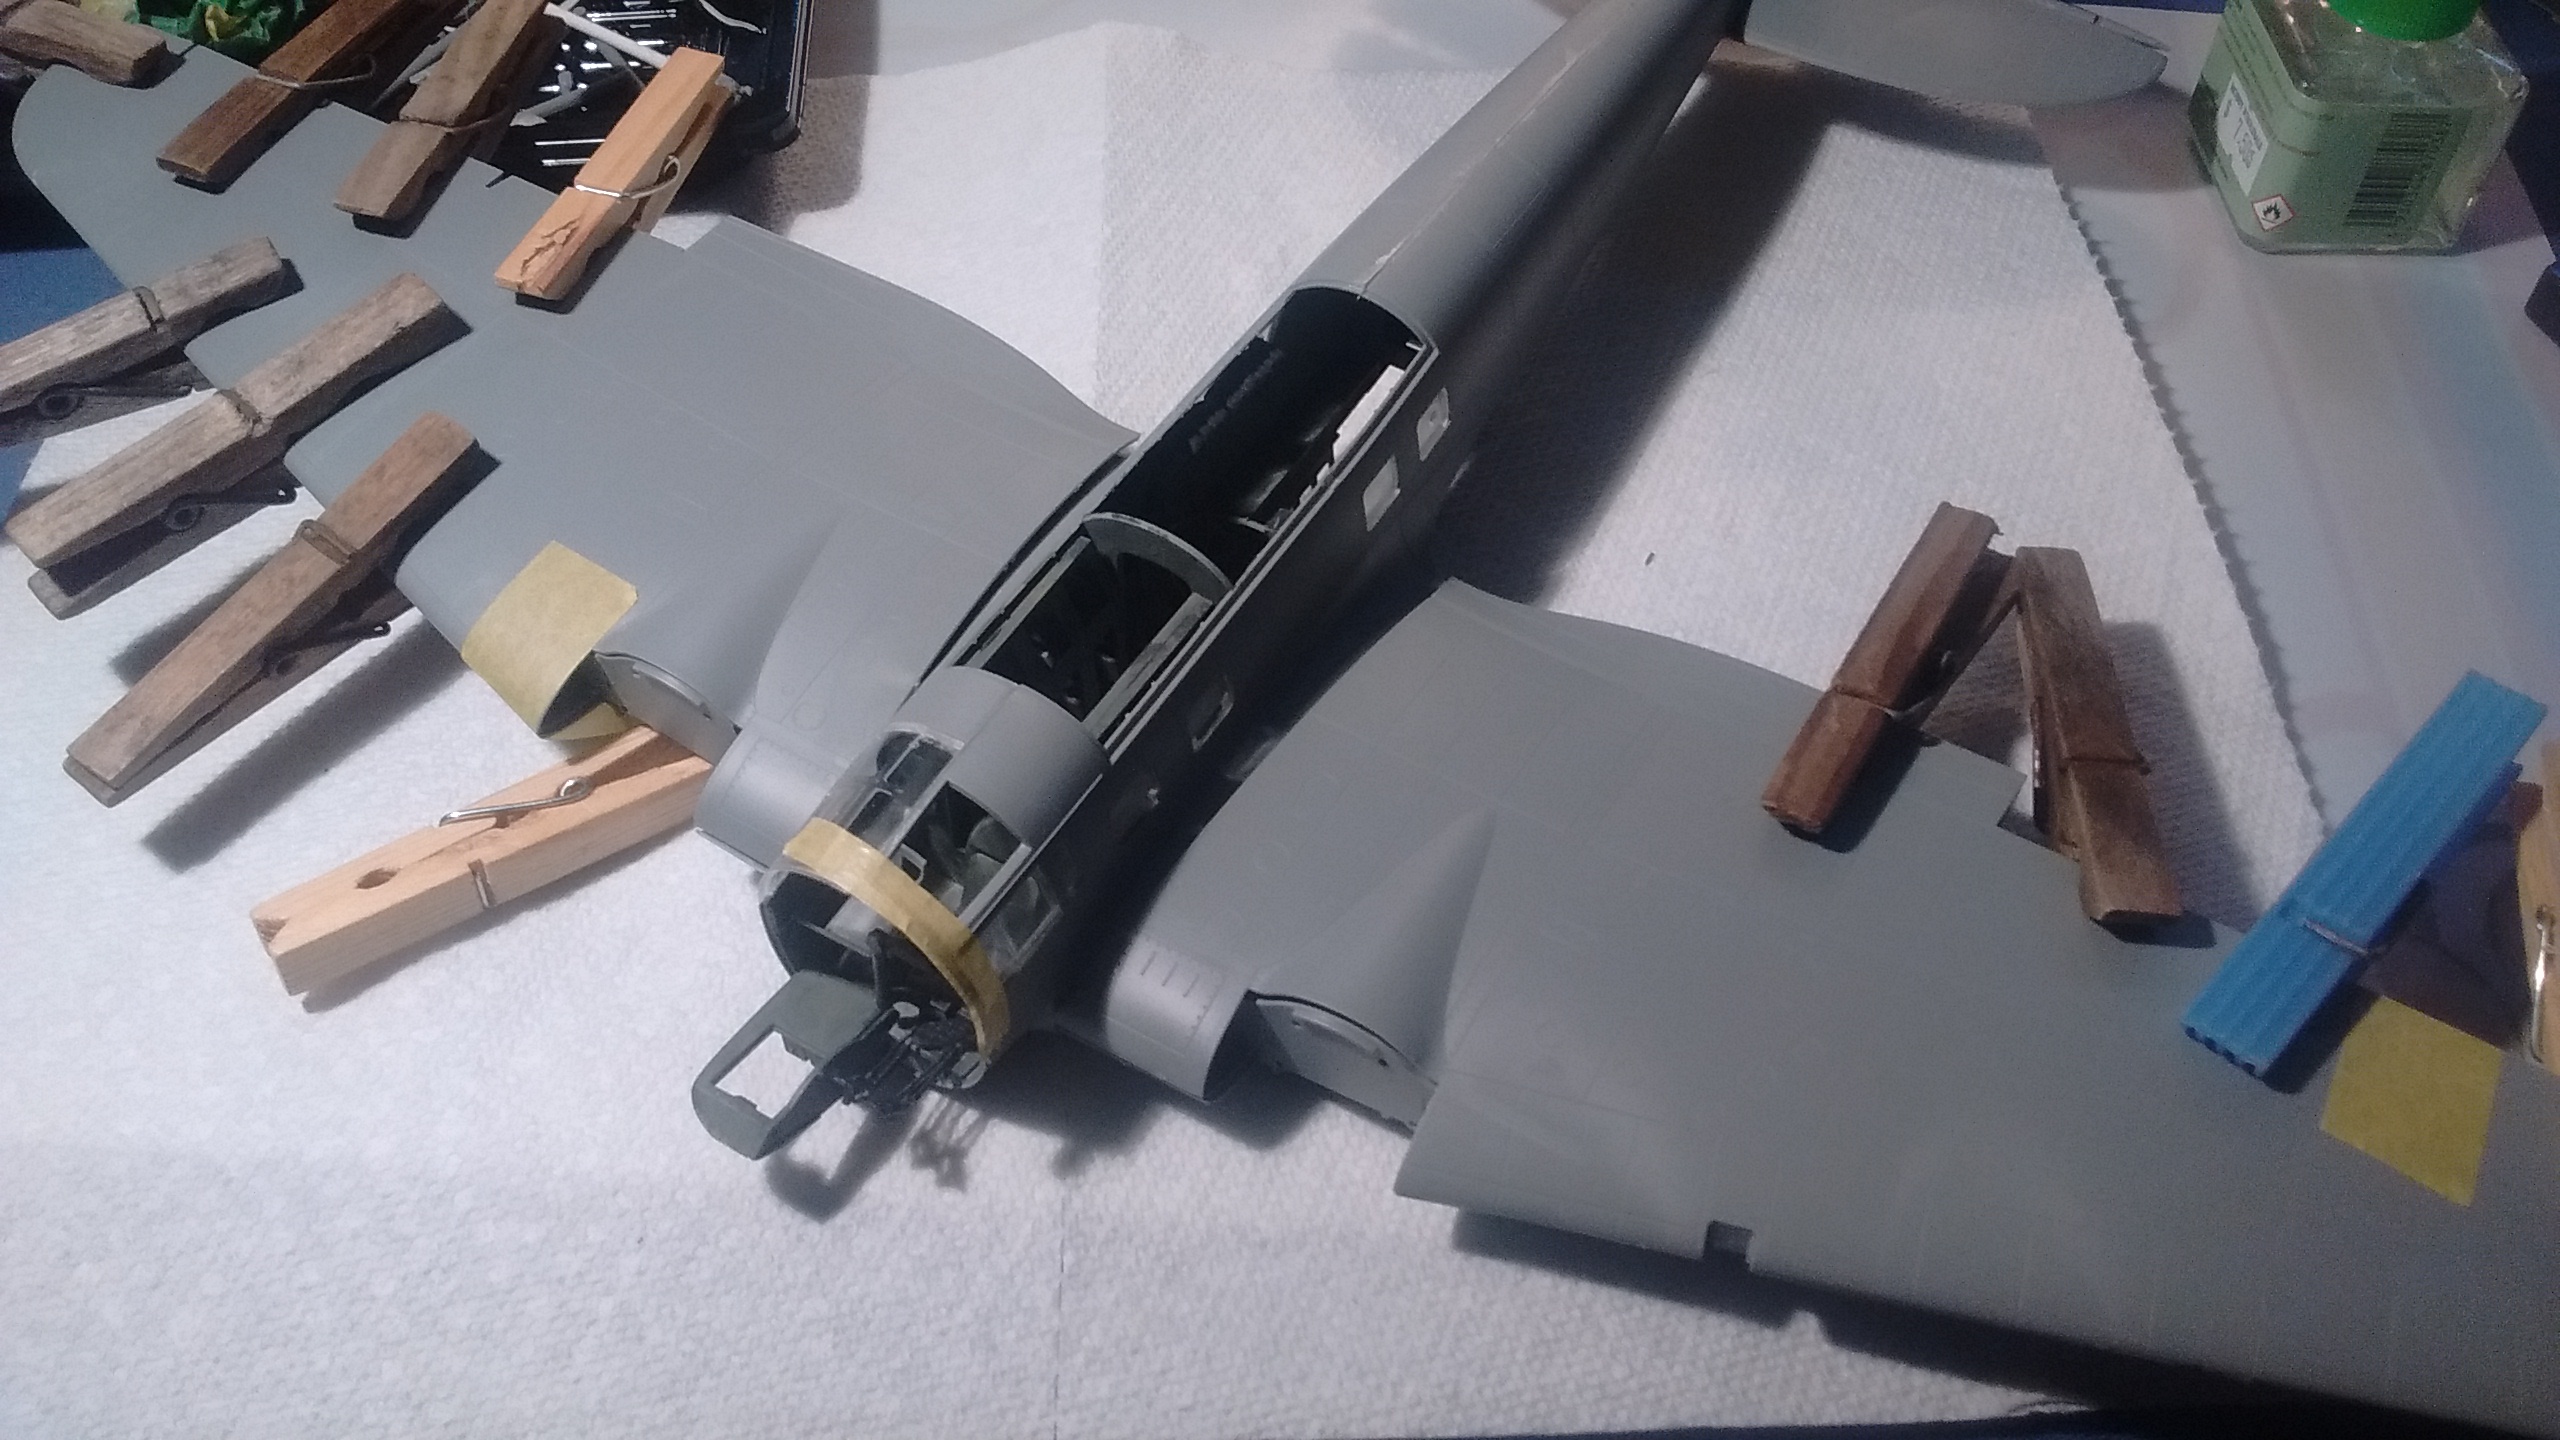
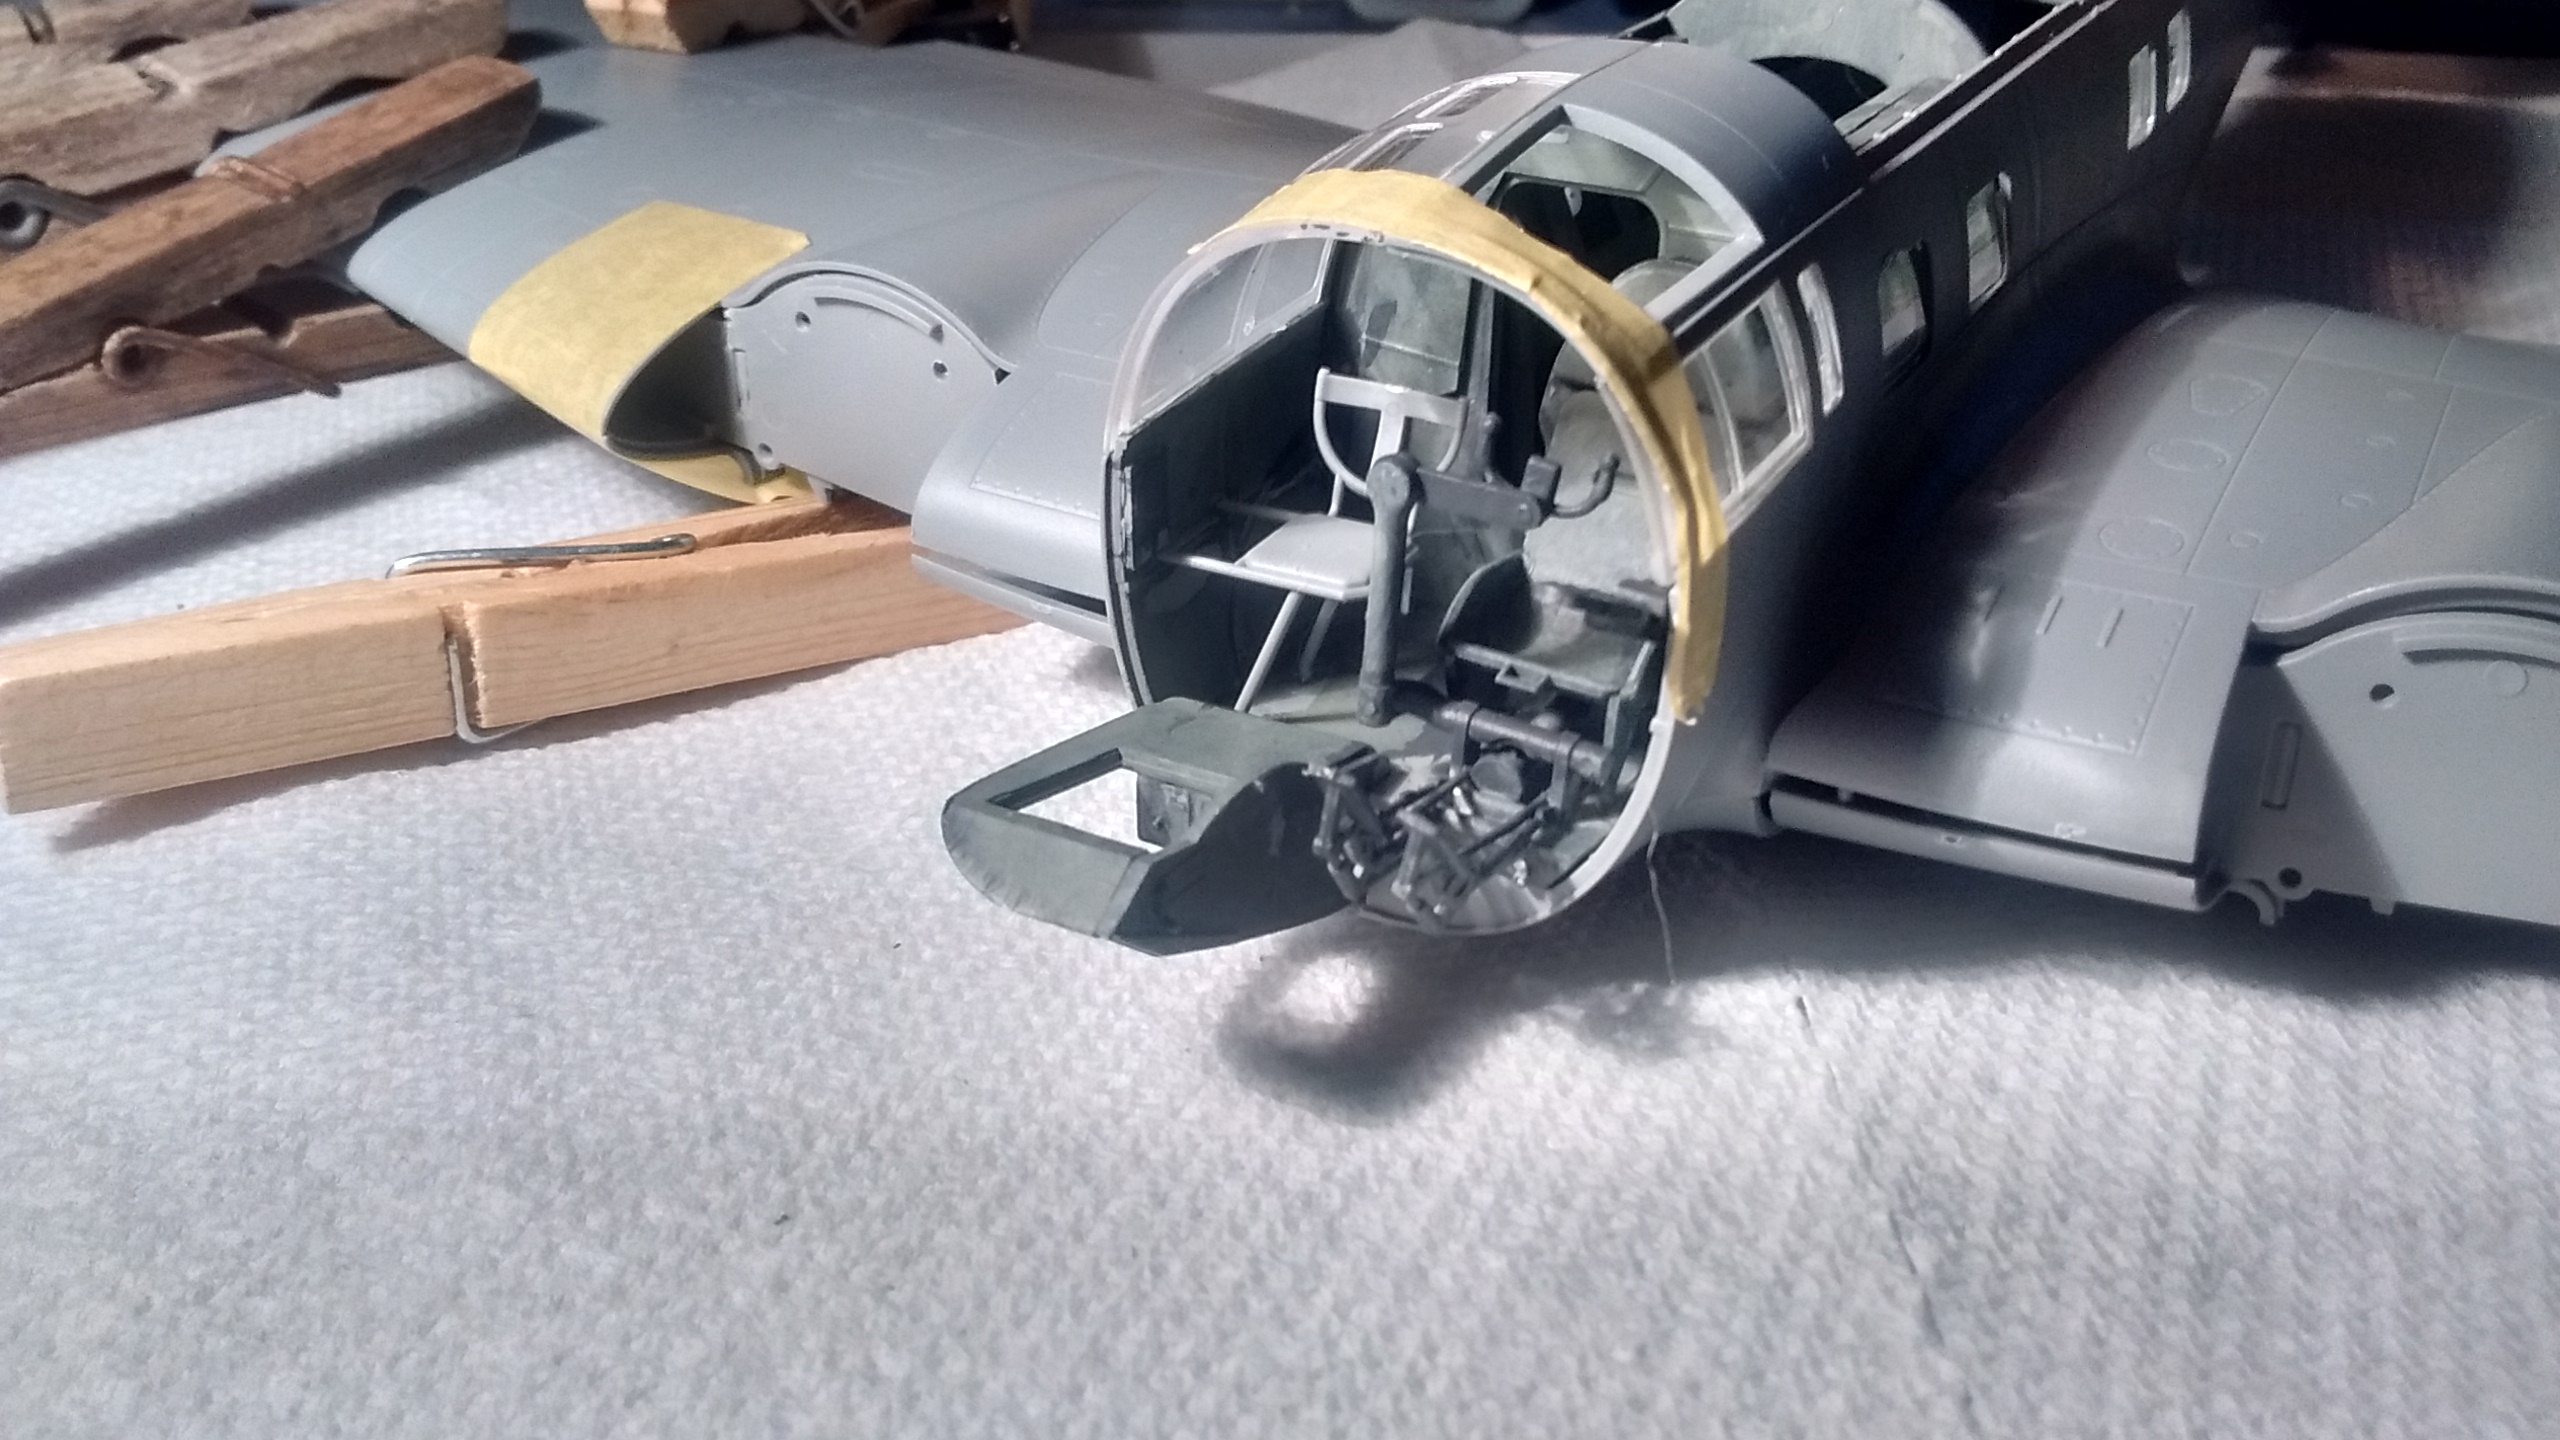
Looking around for the next step I reached for the clear part sprue and located E24 but I decided to skip step 95.The next steps seemed challenging enough to dry fit the parts first.That’s where I saw problems aligning each part and gluing everything. After careful consideration I glued just one part making sure it was aligned perfectly to the front of the plane.It was time to call it a day…
I haven’t done much on Day 24 except trying to figure out how to proceed with the instructions which were confusing.
I had checked the strut I had glued the night before. It was solidly attached.
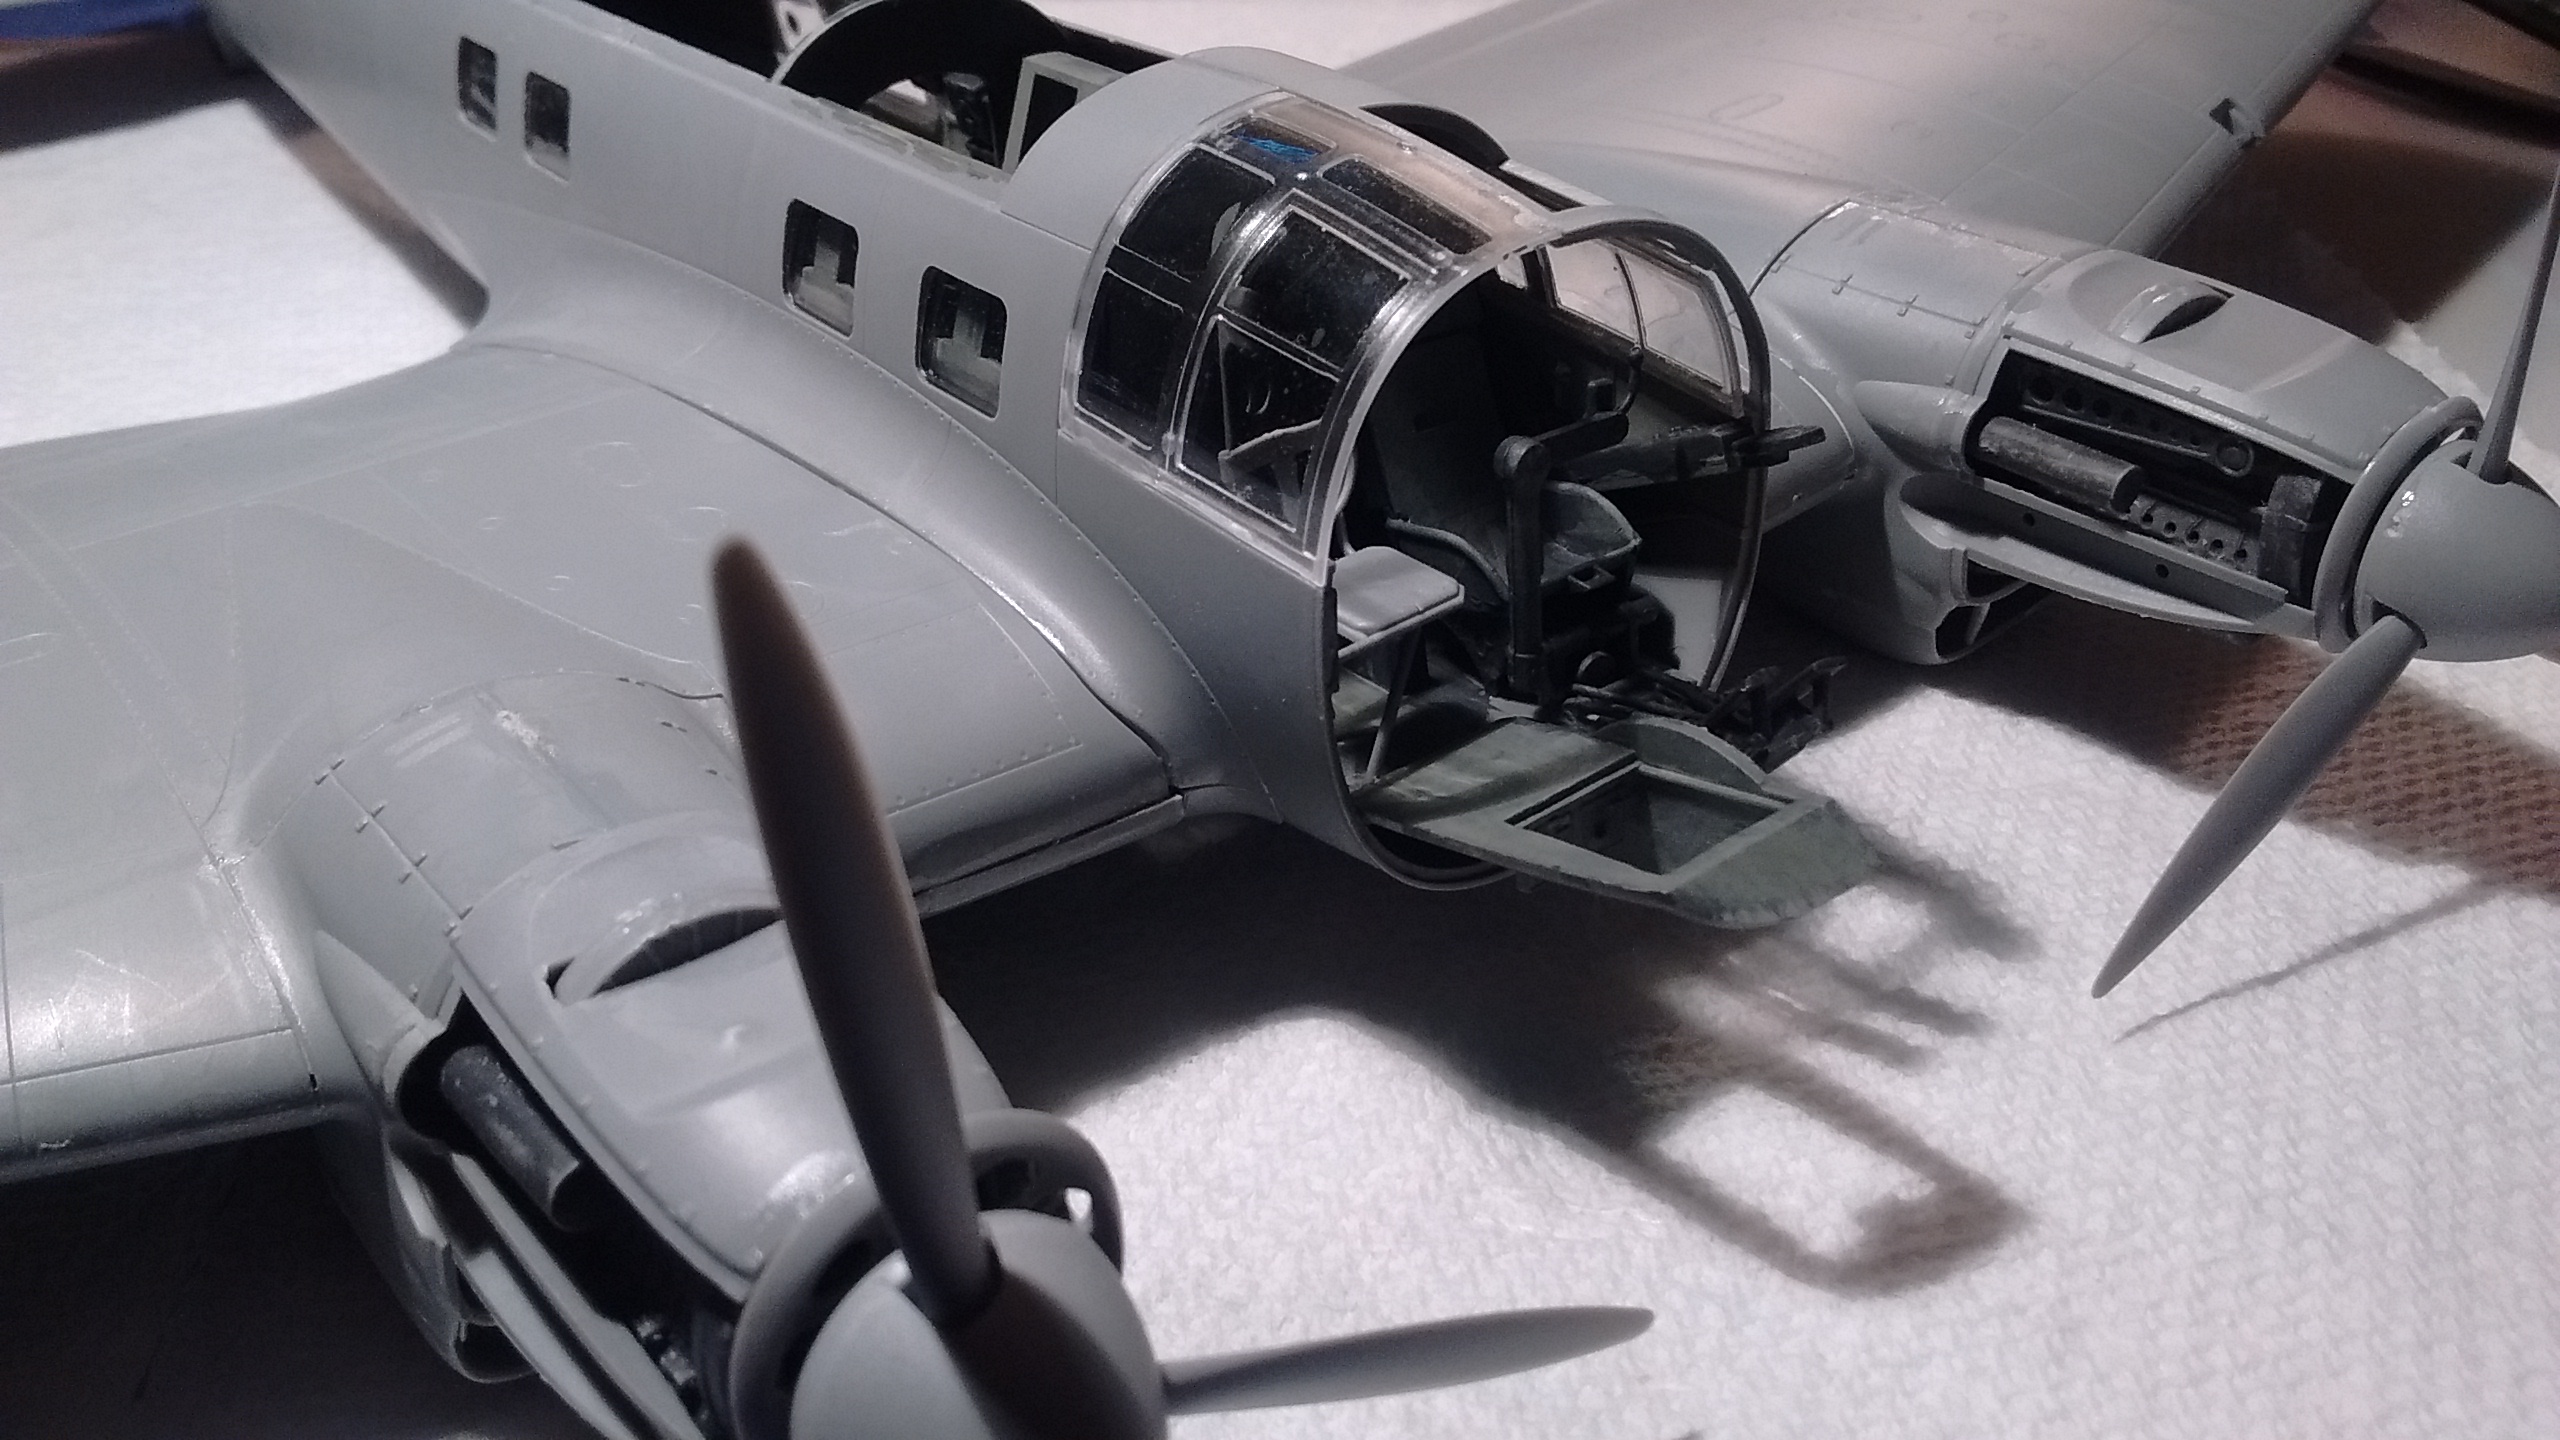
Then I tried dry fitting the parts using the images I had found on the Internet, working with tweezers…
Still unsure how to proceed I had decided again to call it a day since there is always a tomorrow on My Forgotten Hobby III. So until tomorrow here are some more pictures I took yesterday…
Overall, this is a great kit of this early German heavy dive-bomber. While I might not get to it in the immediate future, it will go on my shelf into the German WWII airplanes as one of them most highly ranked of them all. No matter where you’re coming from, the Revell of Germany/ICM Ju 88A-4 is going to be a great build. Also, the MSRP on this kit is about half of the price for the original ICM kit, so you’ve got yourself quite a deal buying the Revell of Germany boxing.
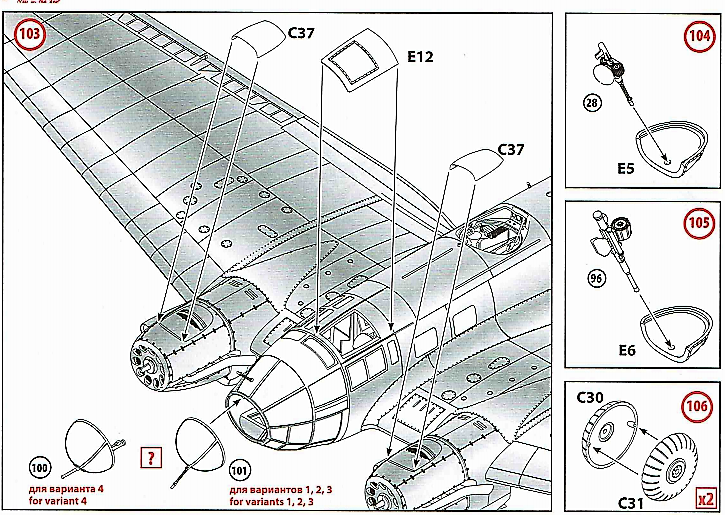
My Forgotten Hobby is all about learning like finding with Plane Dave that parts C37 and C37 were hidden in step 103.
Learning also that you can do whatever you want but then suffer the consequence.
I won’t be making another He 111H-3 so I will have to enjoy what I will do next which is using my airbrush inside thanks to Jeff’s advice.
I airbrush in the basement with the fan on, usually at the end of the modeling session. Big jobs go out in the garage but I usually find my airbrushing sessions only last a few minutes at a time anyway.
Building model airplanes has evolved since 1958 when I built my first model kit… I wrote about it on the original My Forgotten Hobby. Yesterday saw part of the landing gear glued. The instructions were well… again confusing to say the least so I took a few pictures when I dry fitted the parts to make sure I was doing the right thing.
Once the dry fitting was done I proceeded to glue the parts. We will see the results tomorrow.
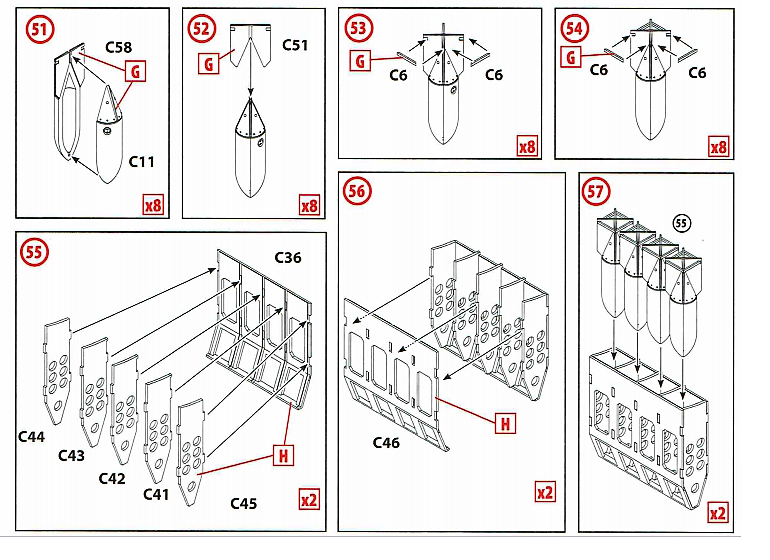
If ICM has gone to all this trouble with all these 32 minuscule parts, I don’t see how I could ignore finishing assembling the bombs even if no one will ever notice them in the bomb bay.
At least I will know they are there.
Which leaves me to reflect on why we go to all this trouble in the first place. It’s simple… because ICM has gone to all this trouble with all these 36 minuscule parts so the pleasure of building their He 111H-3 lasts forever.
Even if I had some problems with this build, which is far from being done, I was able to work around them.
Mind you my build won’t be perfect and several joints will still be visible when it is done.
However I am not going to fill the gaps with putty and start sanding.
Sometimes you have to stop because you will never finish a project.
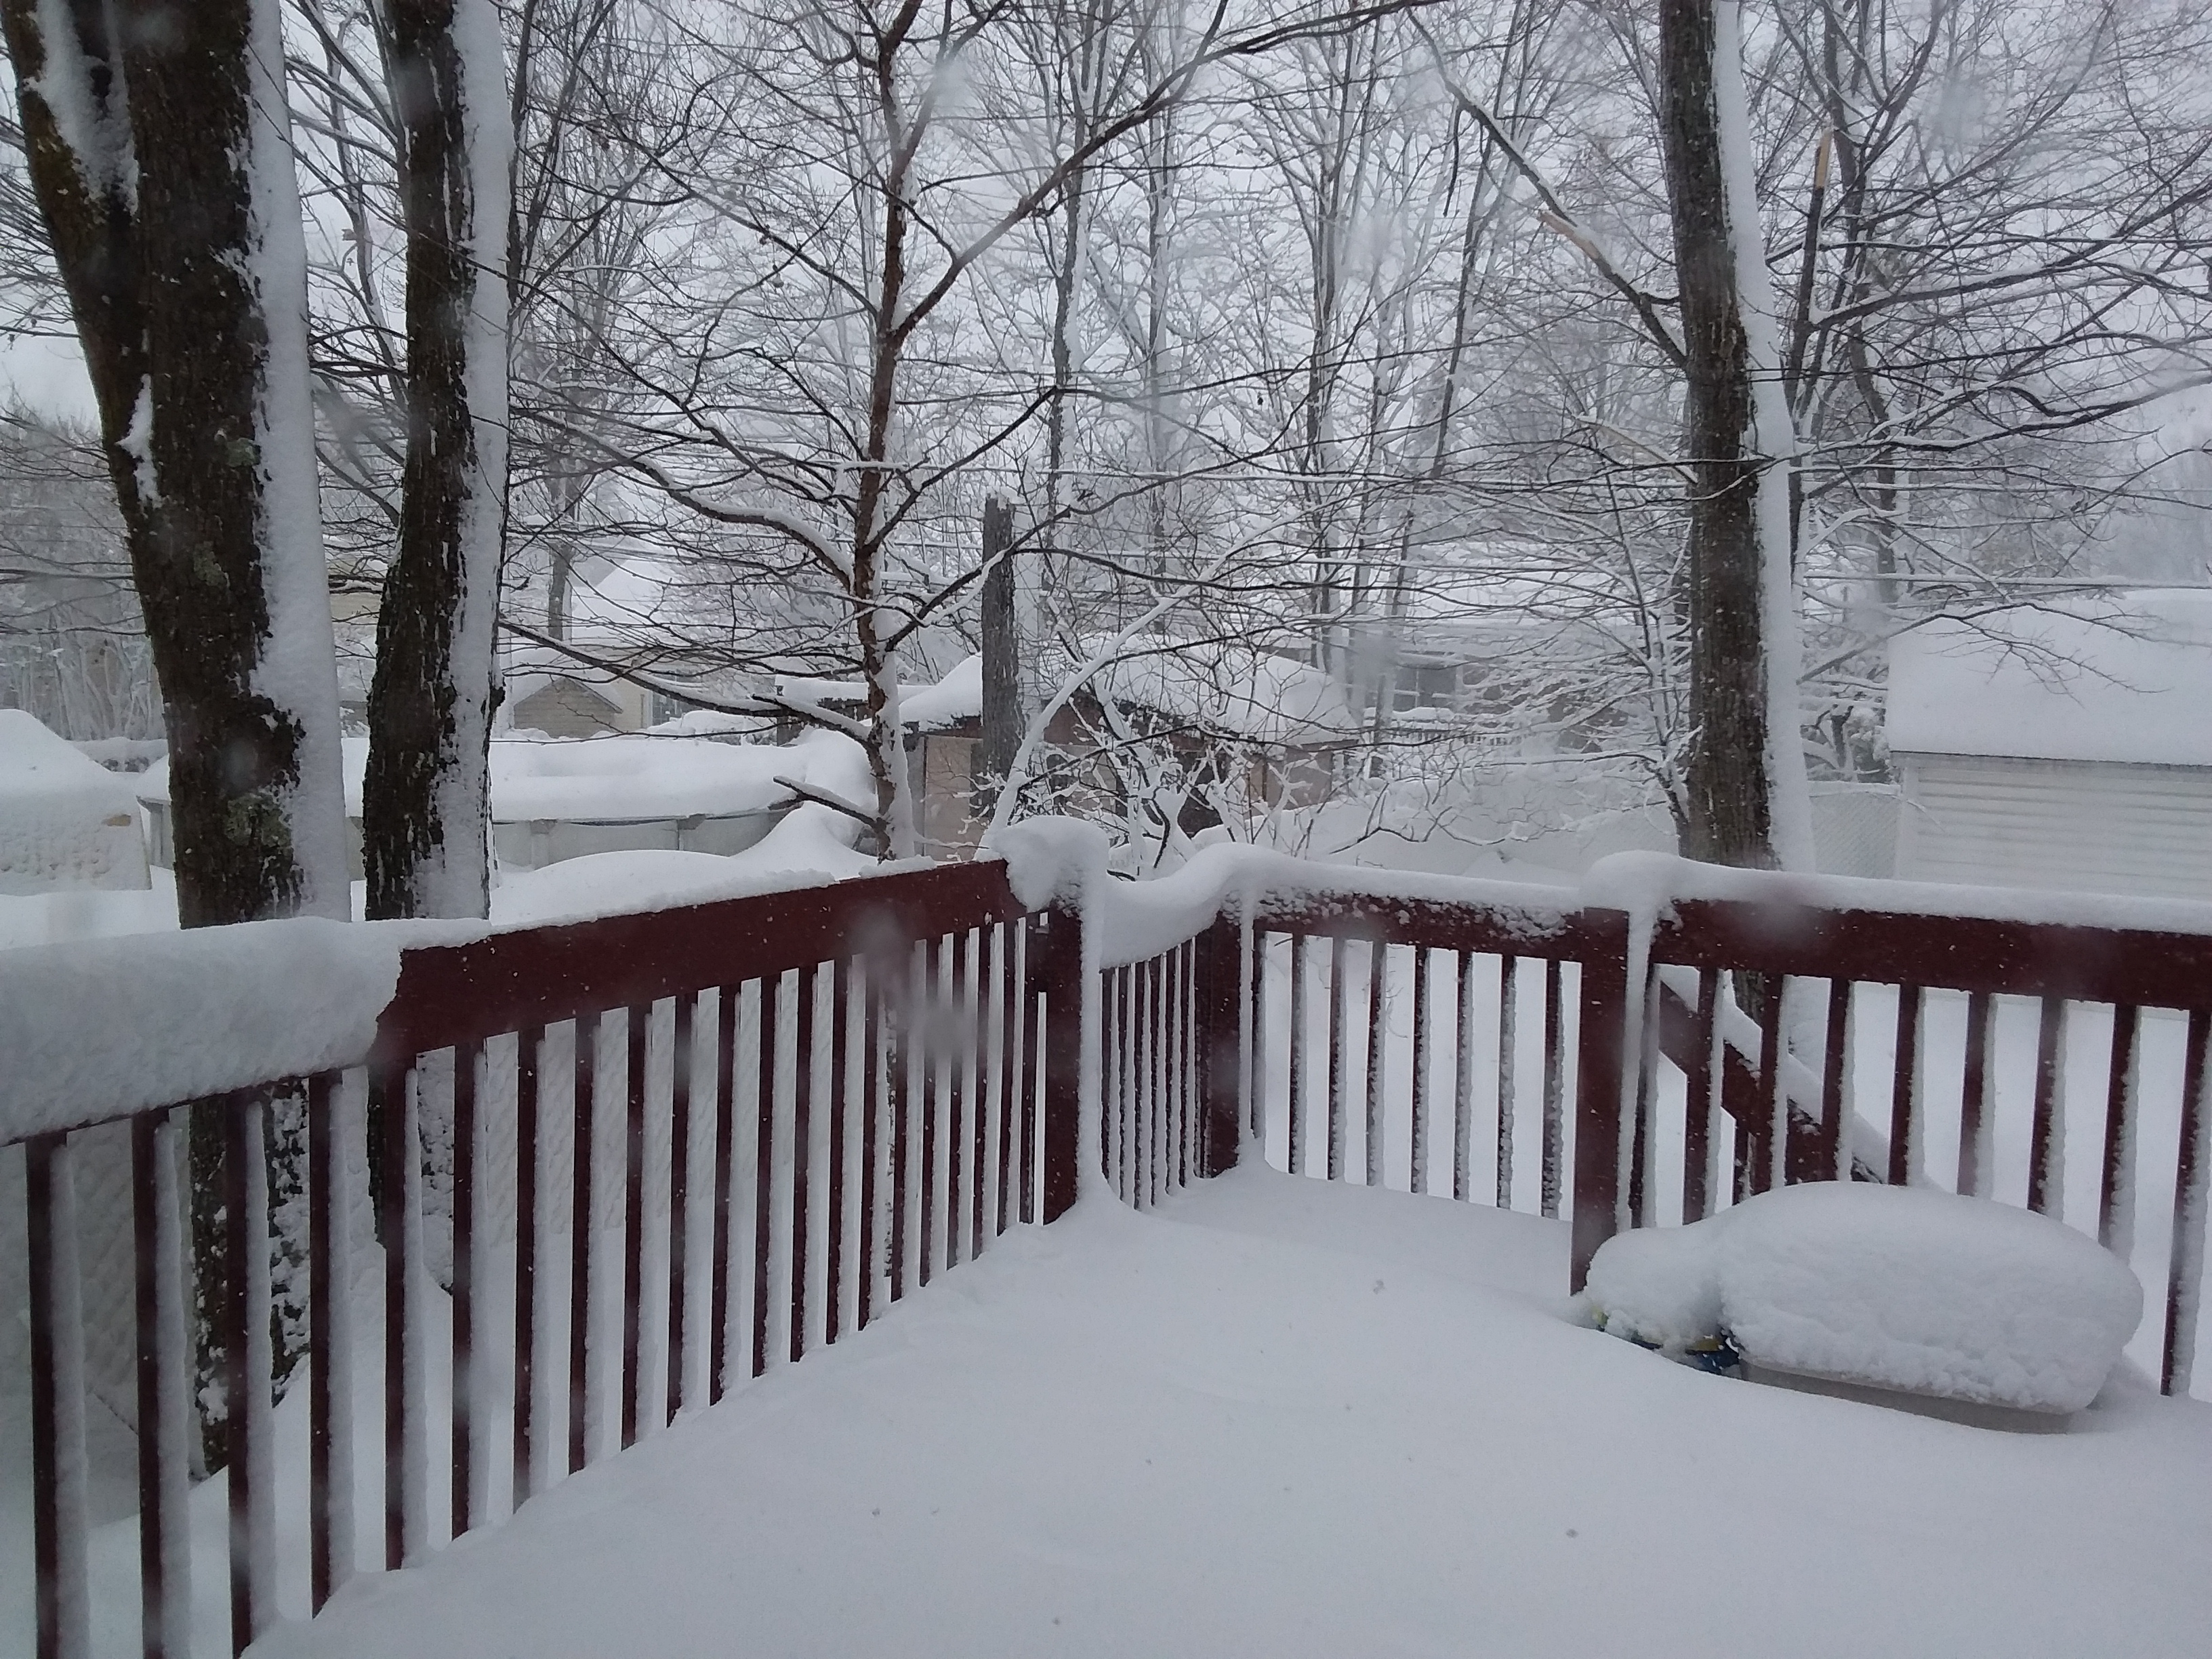
This is where one of two latest projects is right now waiting for spring to arrive.
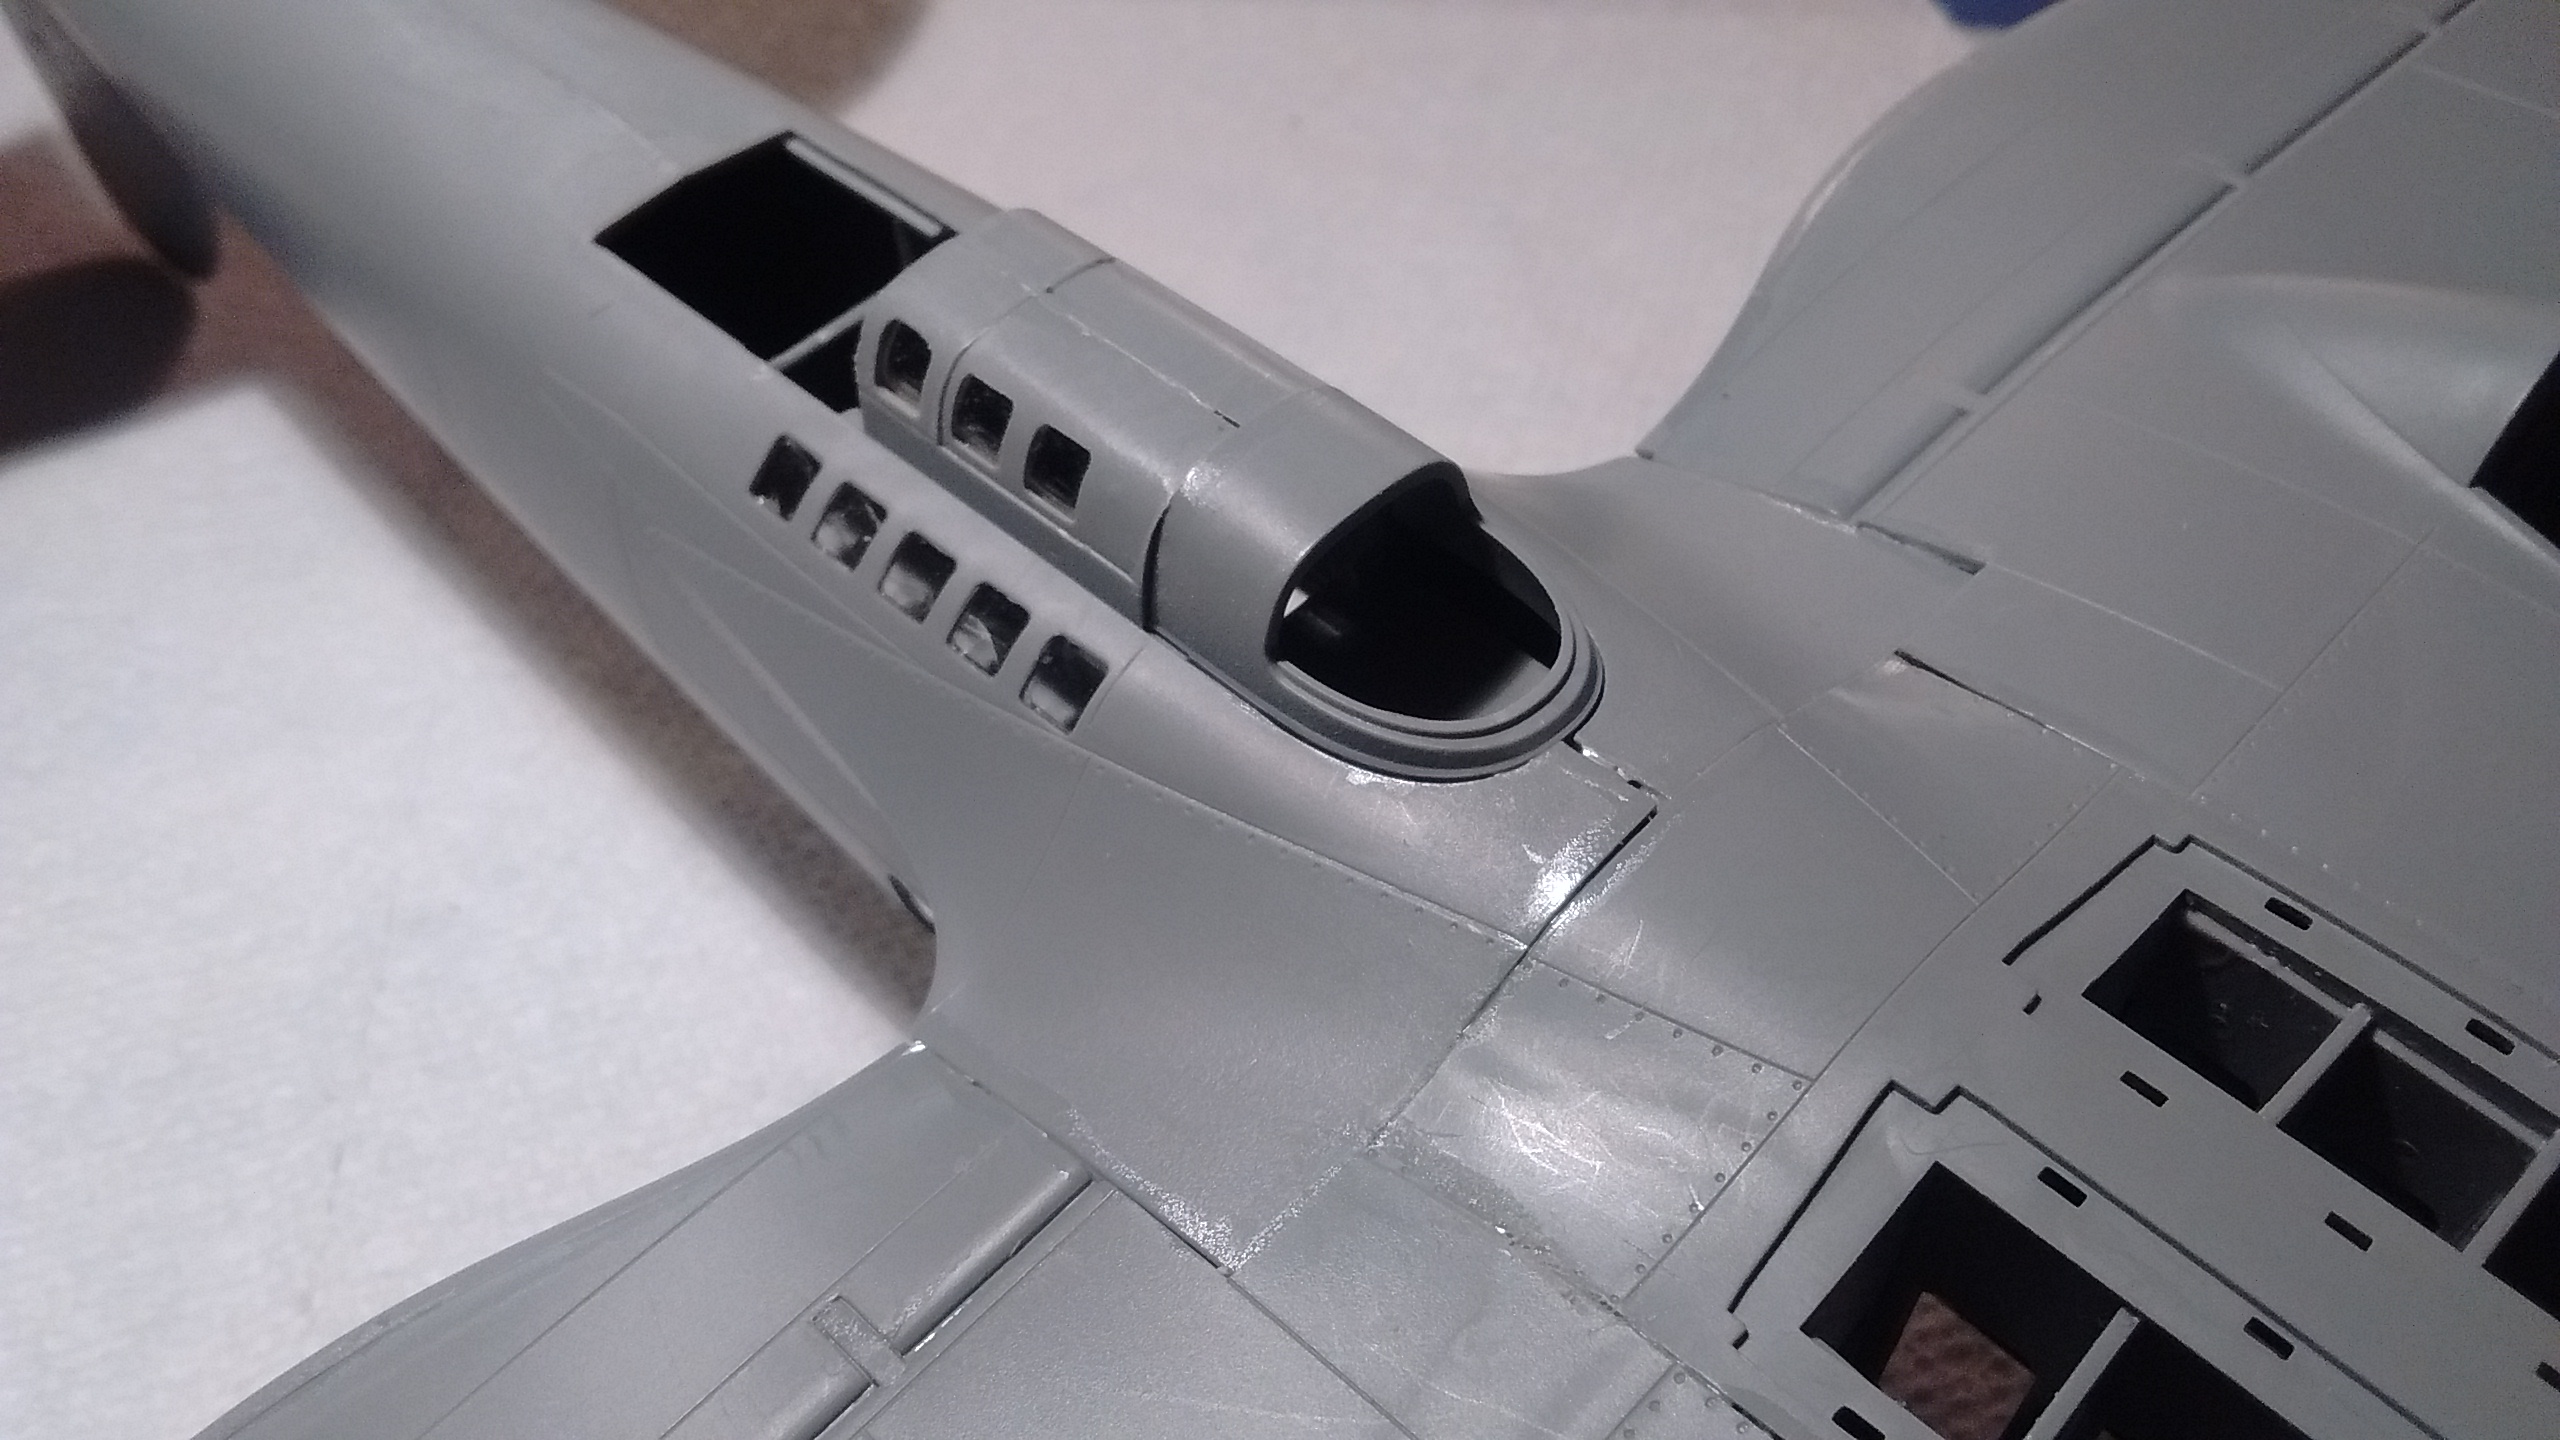
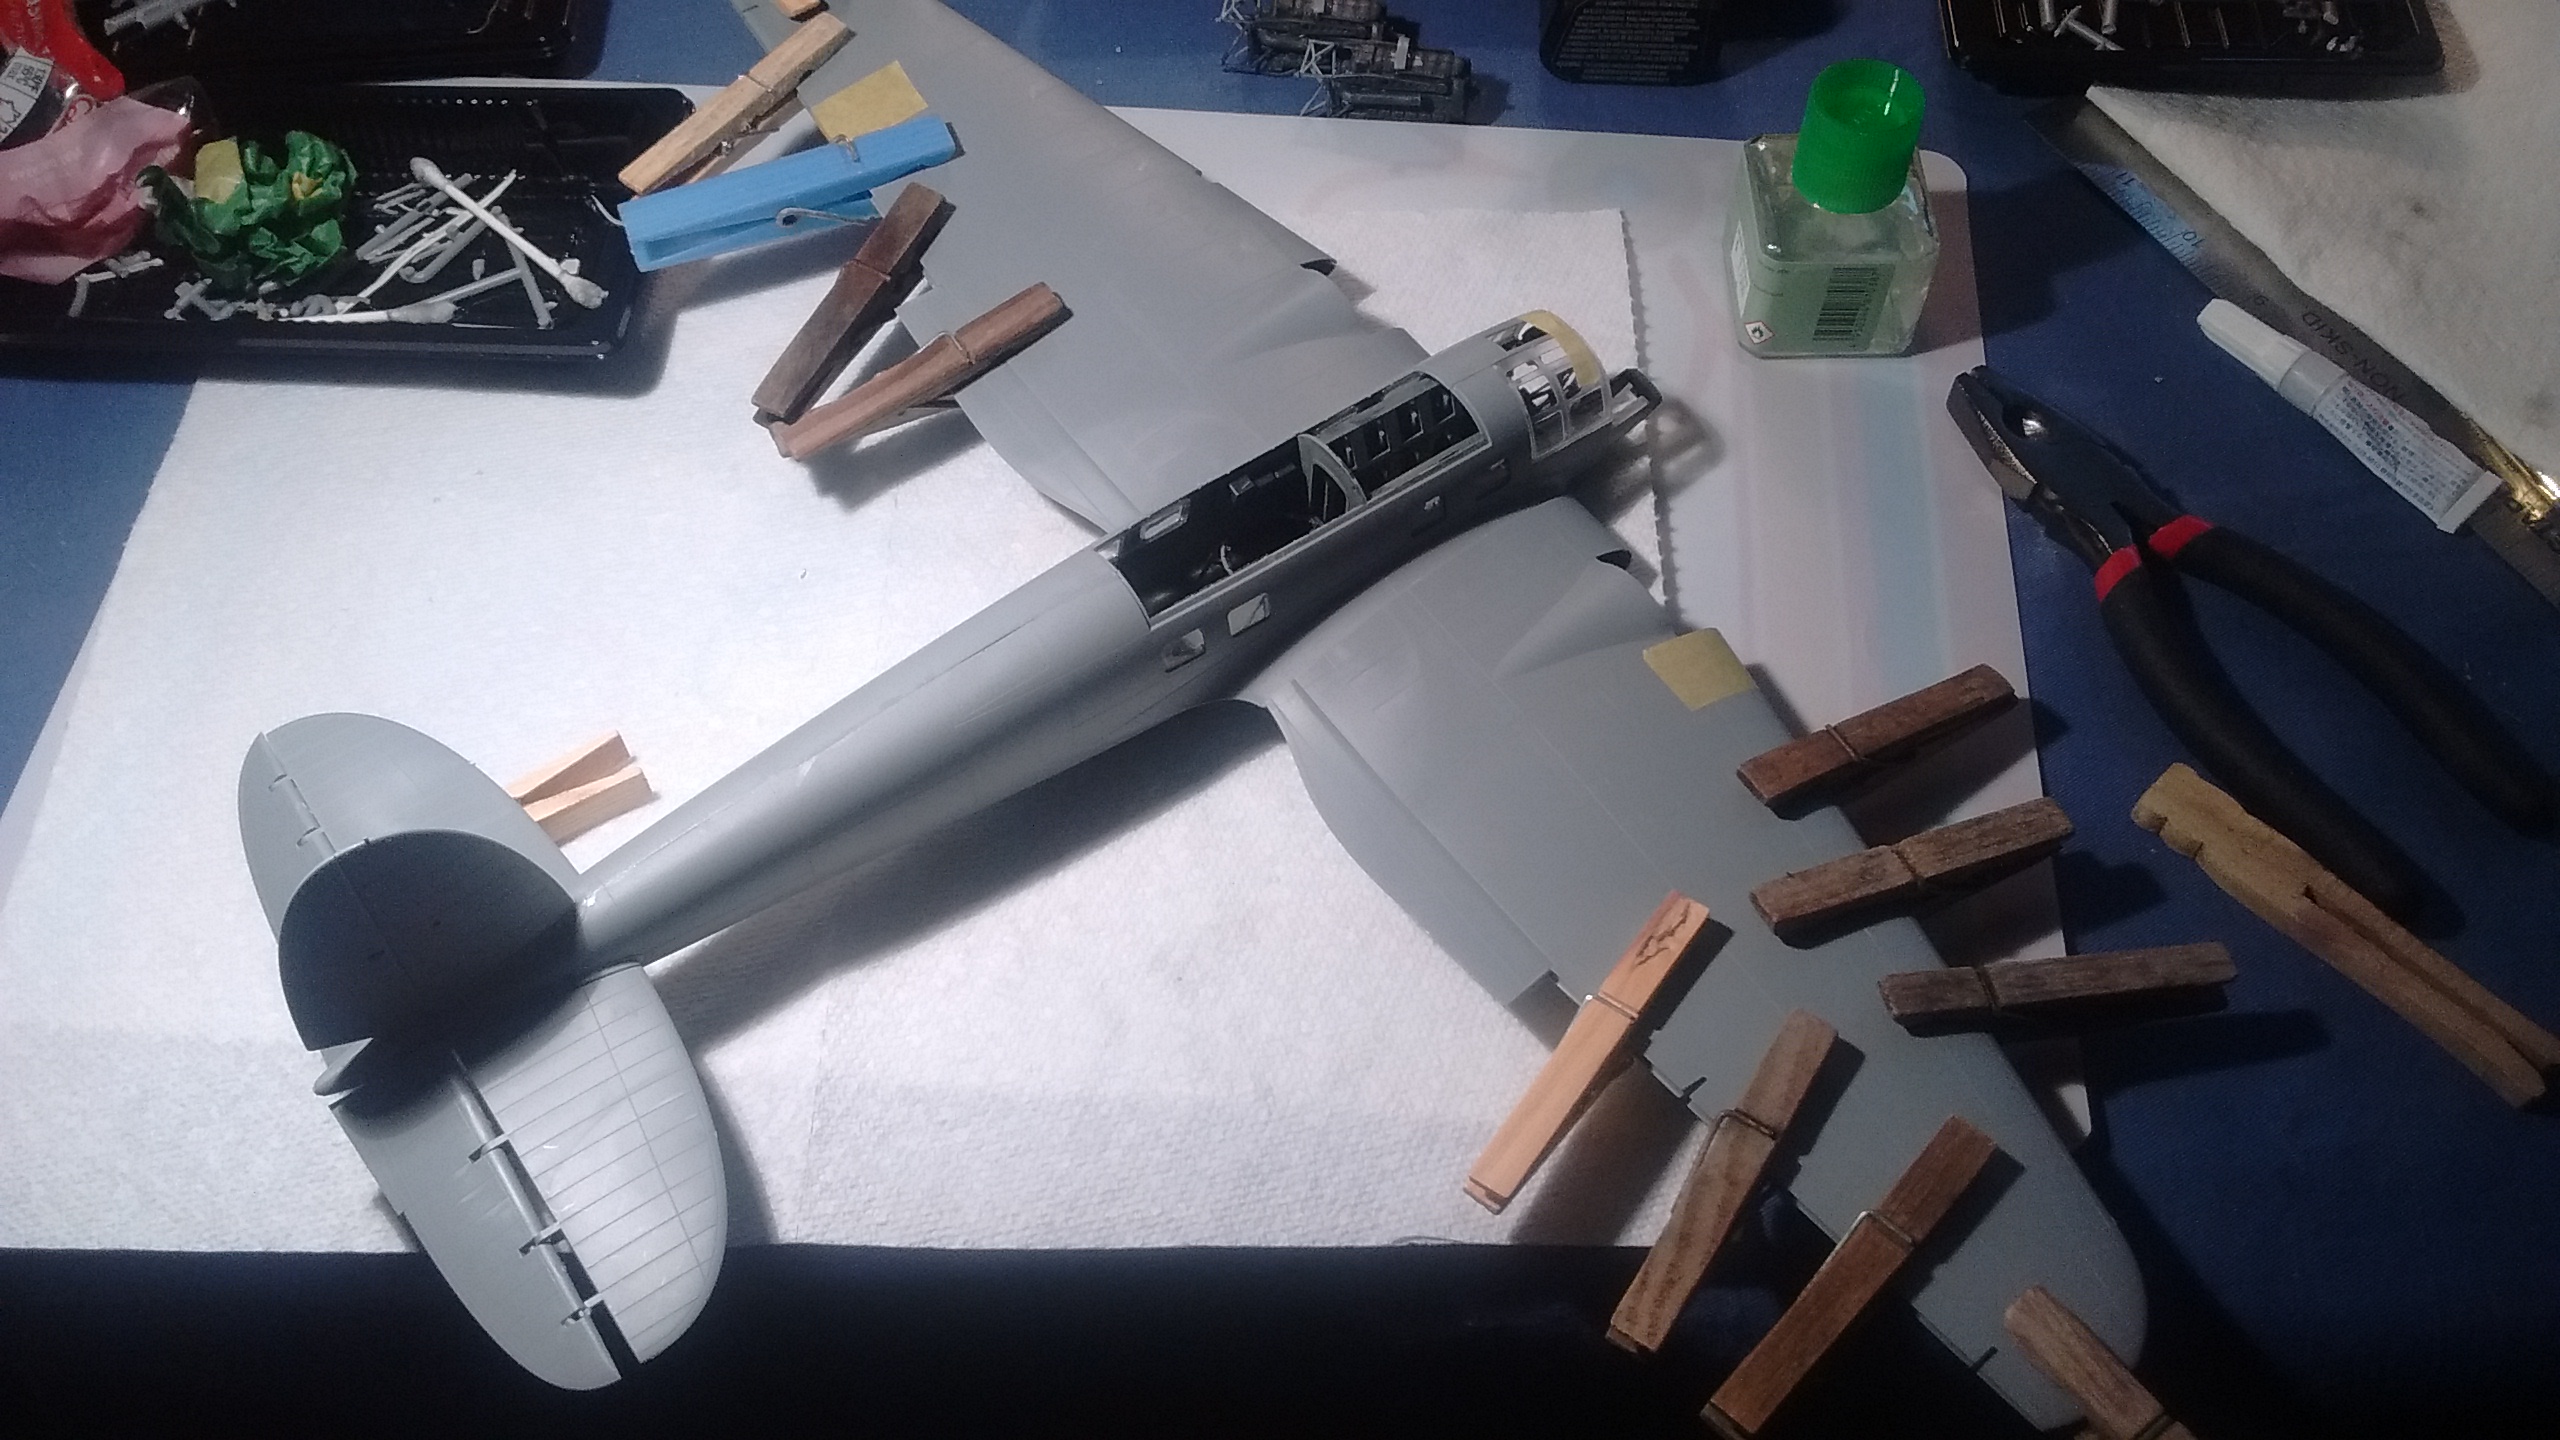
I have masked the canopy last September.
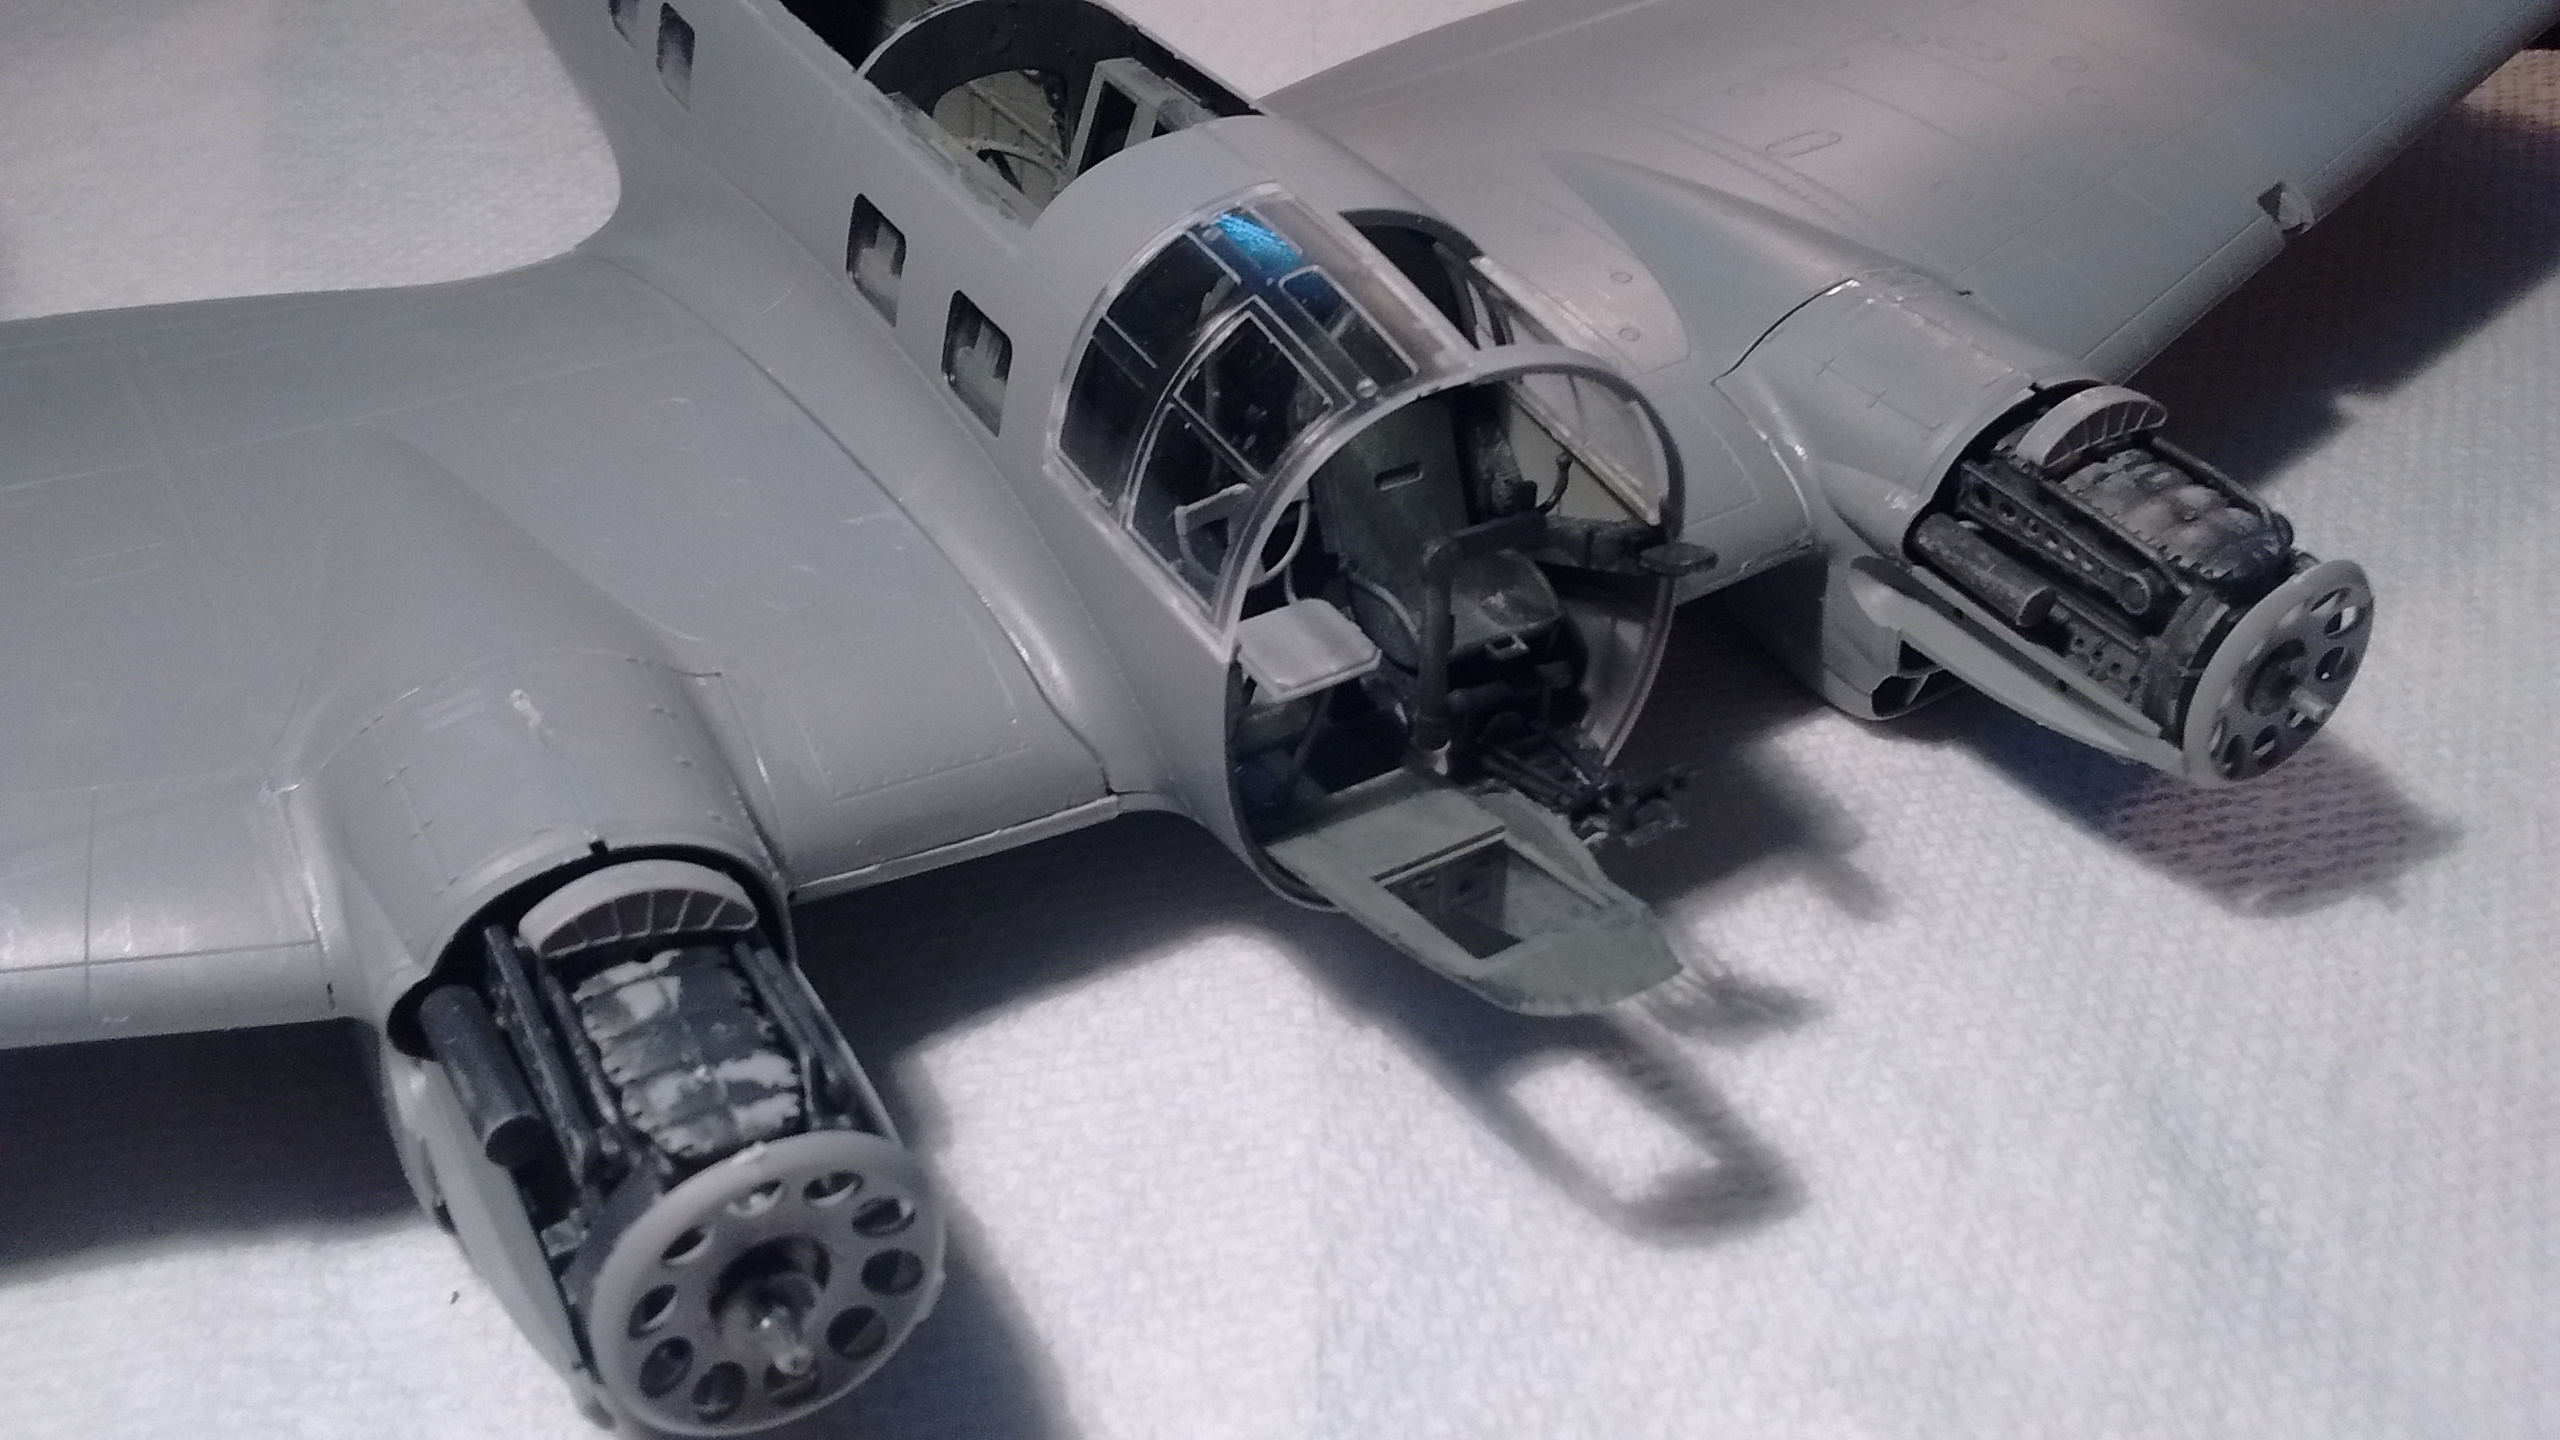
I really need to use my airbrush again because the He 111 is so big and has so many clear parts.
I could open up windows and start a fan like I did last winter when I had used my airbrush inside.
I still have my old N95 mask my wife had bought years ago… Maybe I could go this way in a few days since painting is what I like best as well as taking pictures of what I build.
Meanwhile I have watched this last Thursday night on YouTube. I just love how he works his airbrush!
This Revell Ju 88 is the same model kit of the ICM Ju 88A I bought early in January.
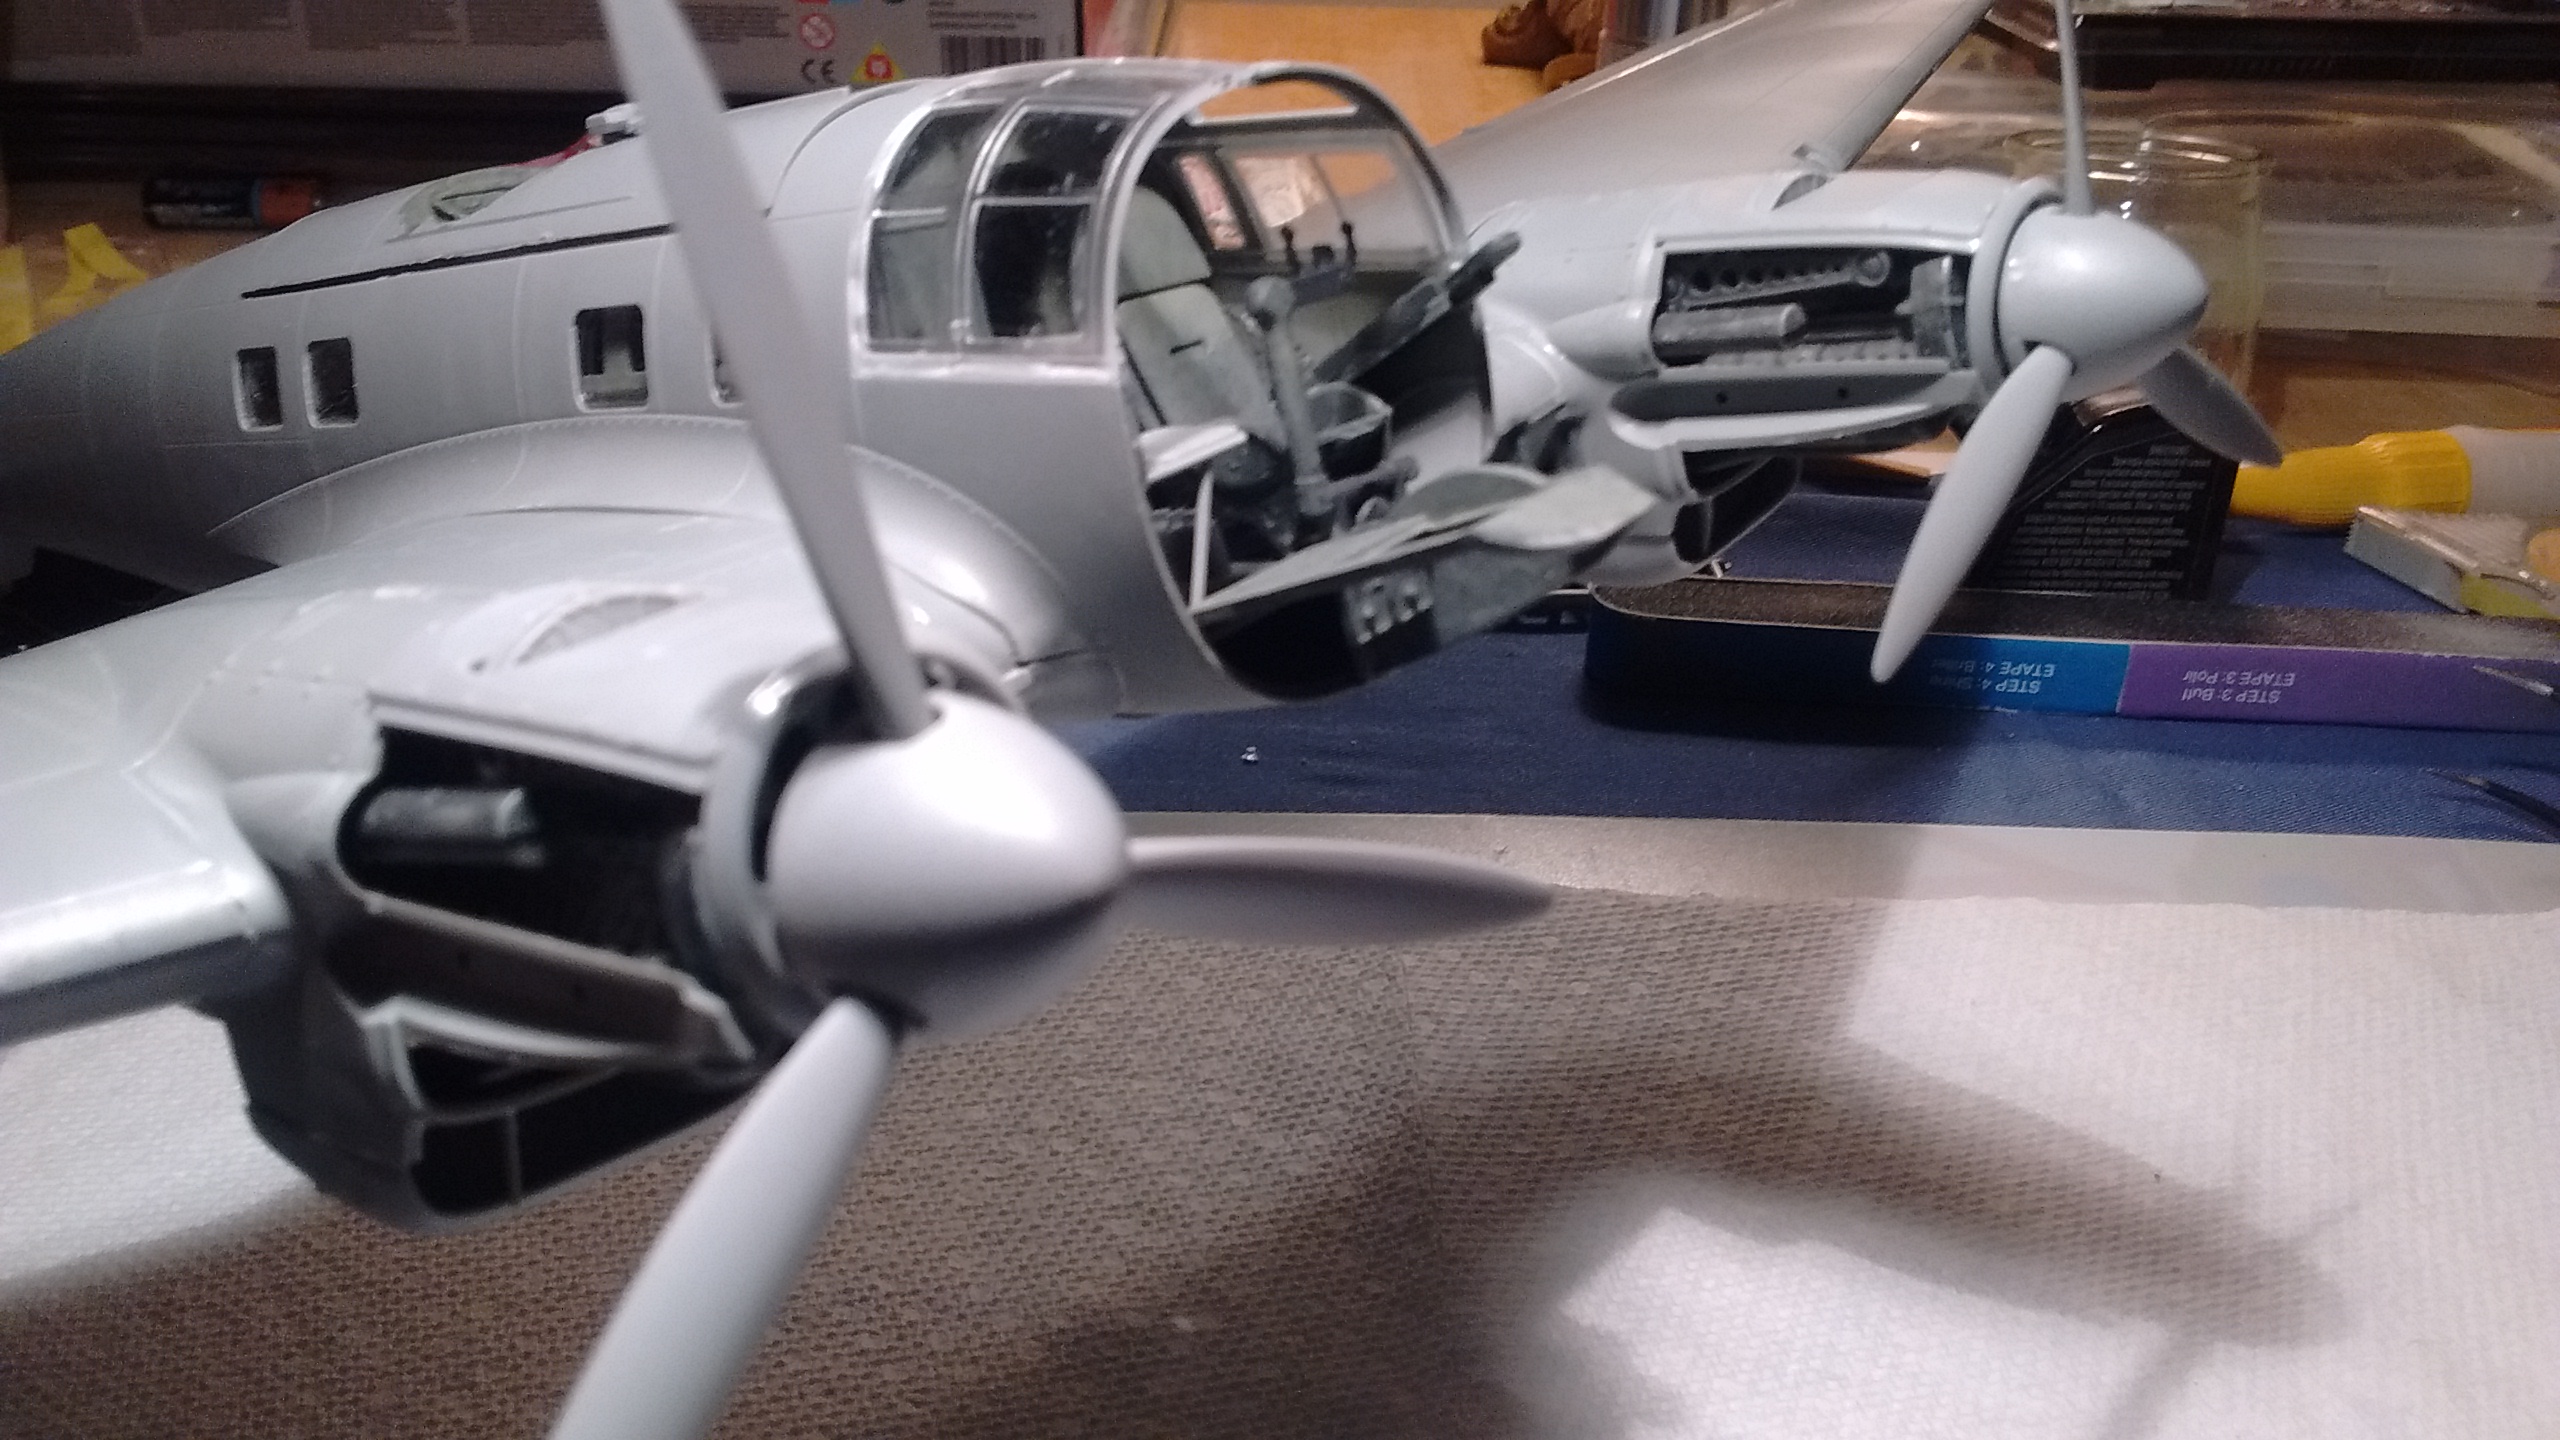
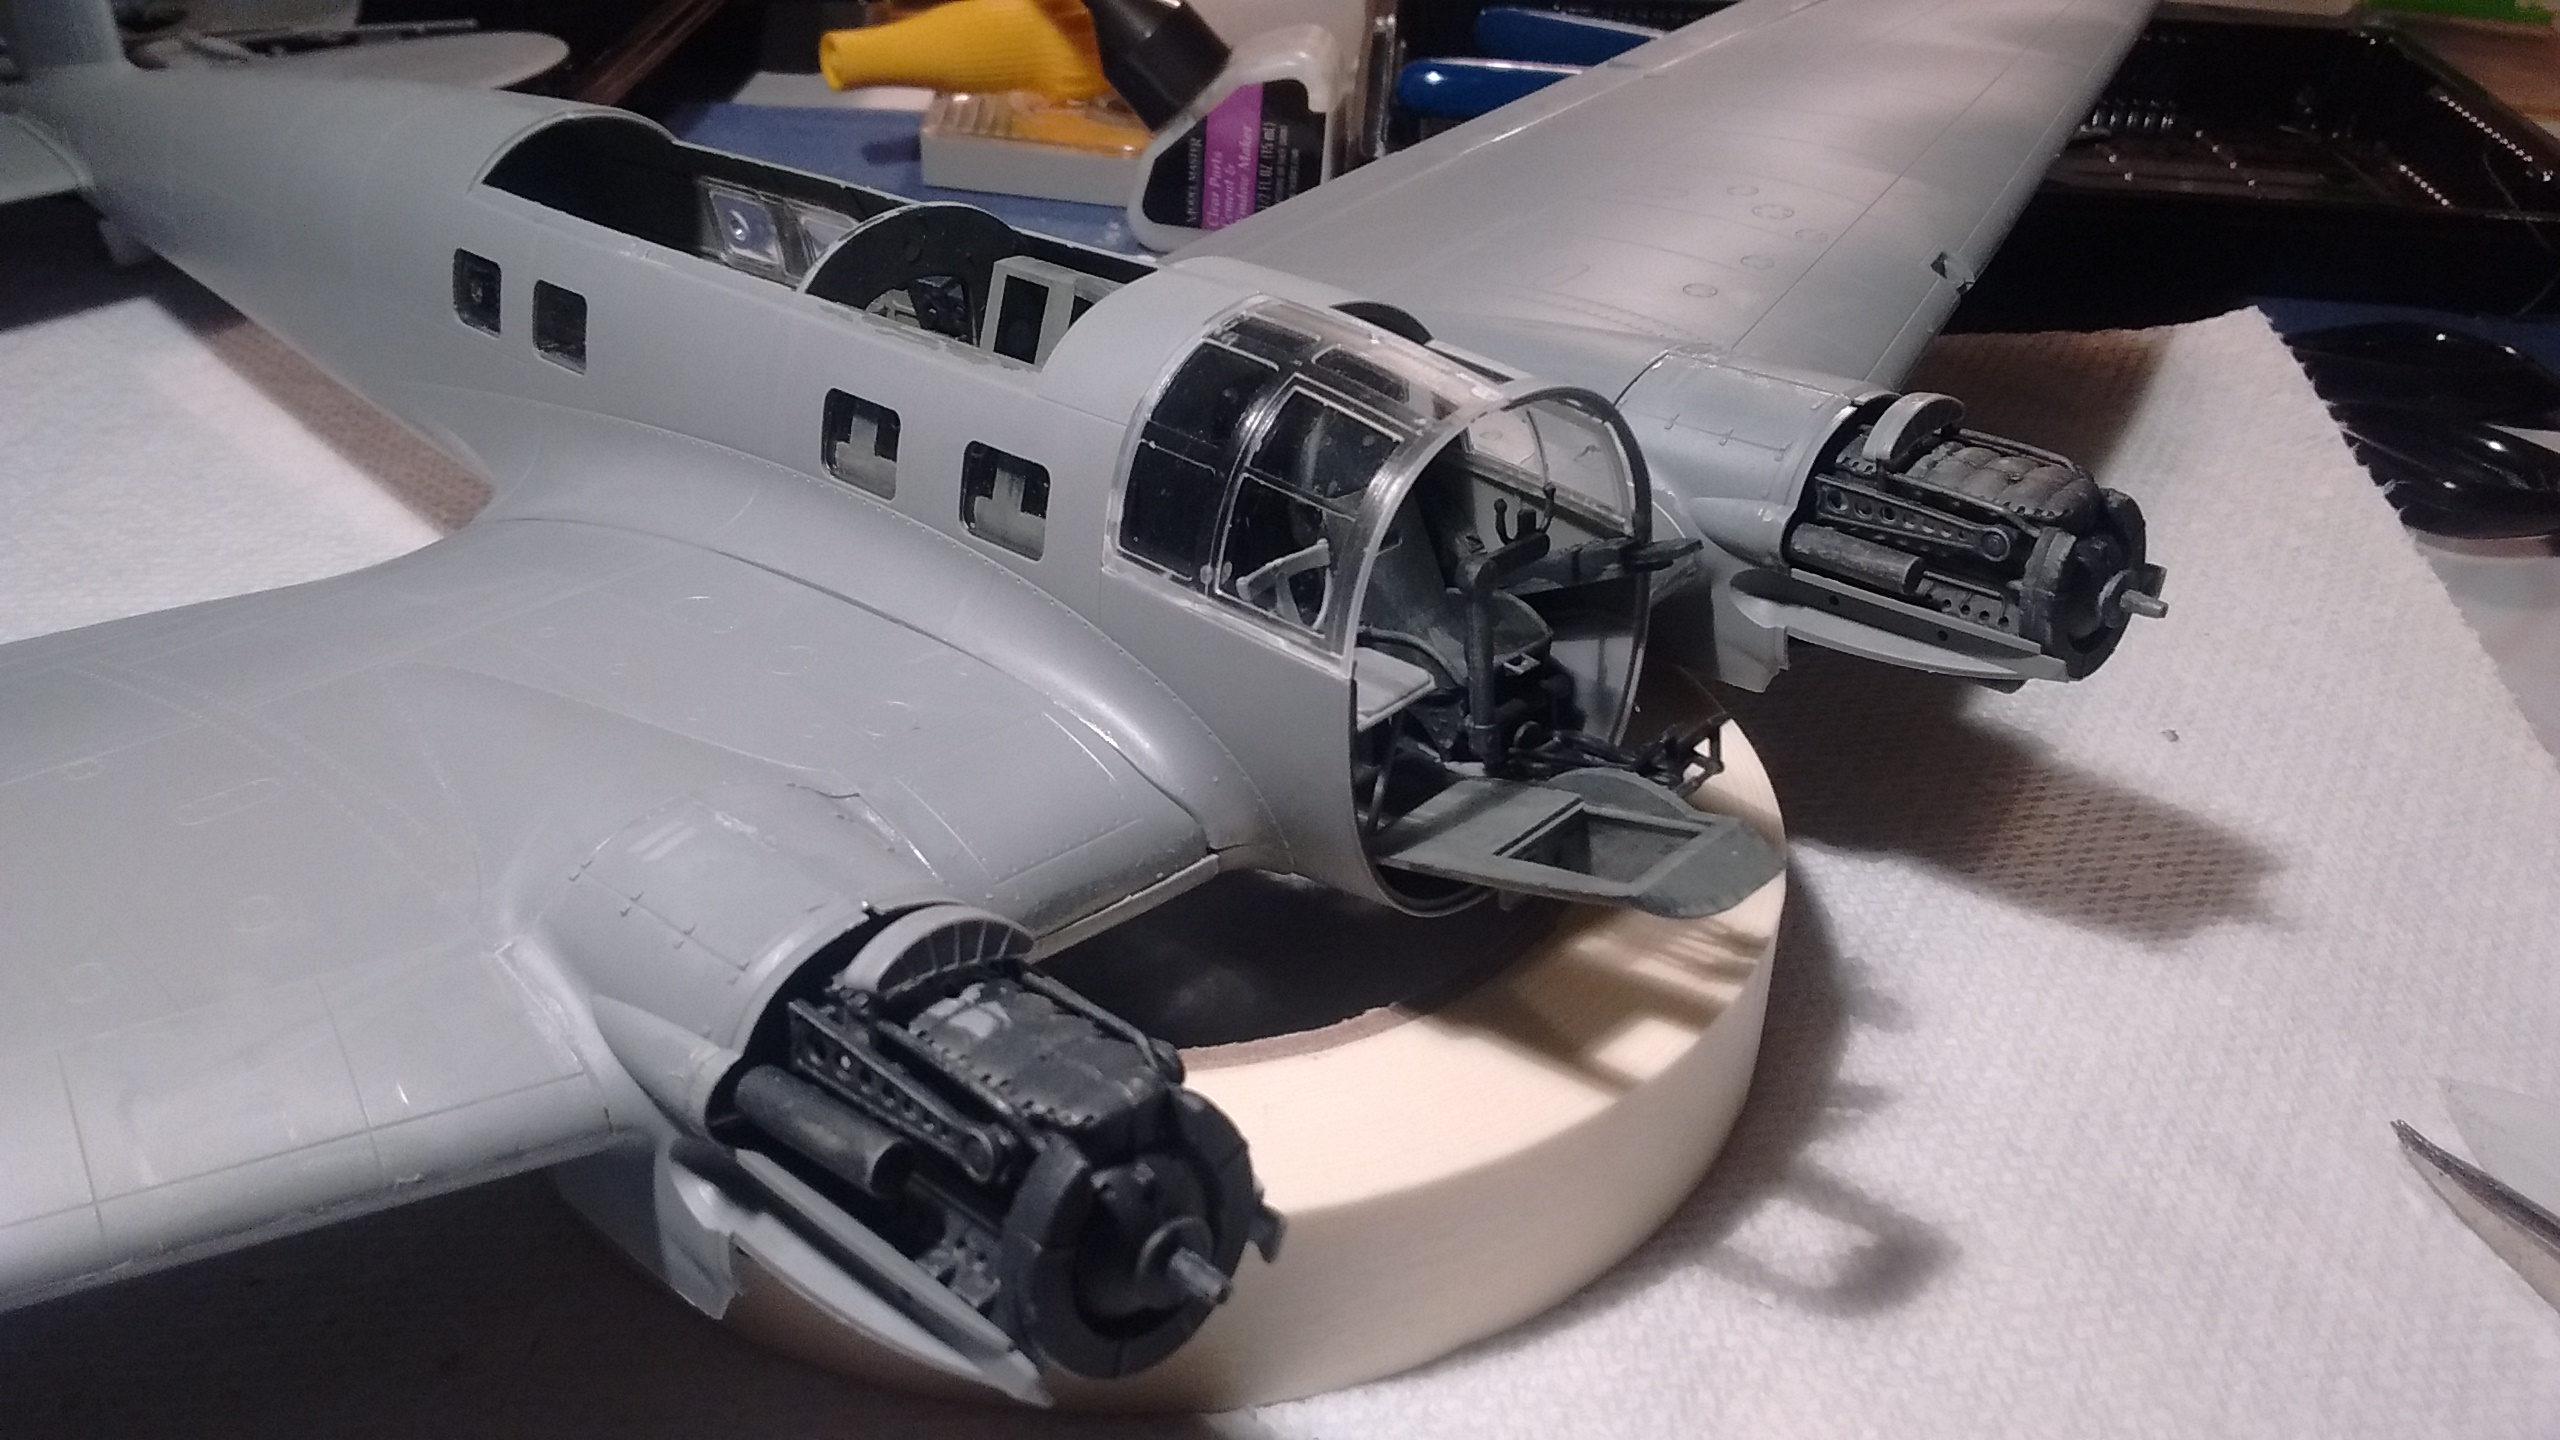
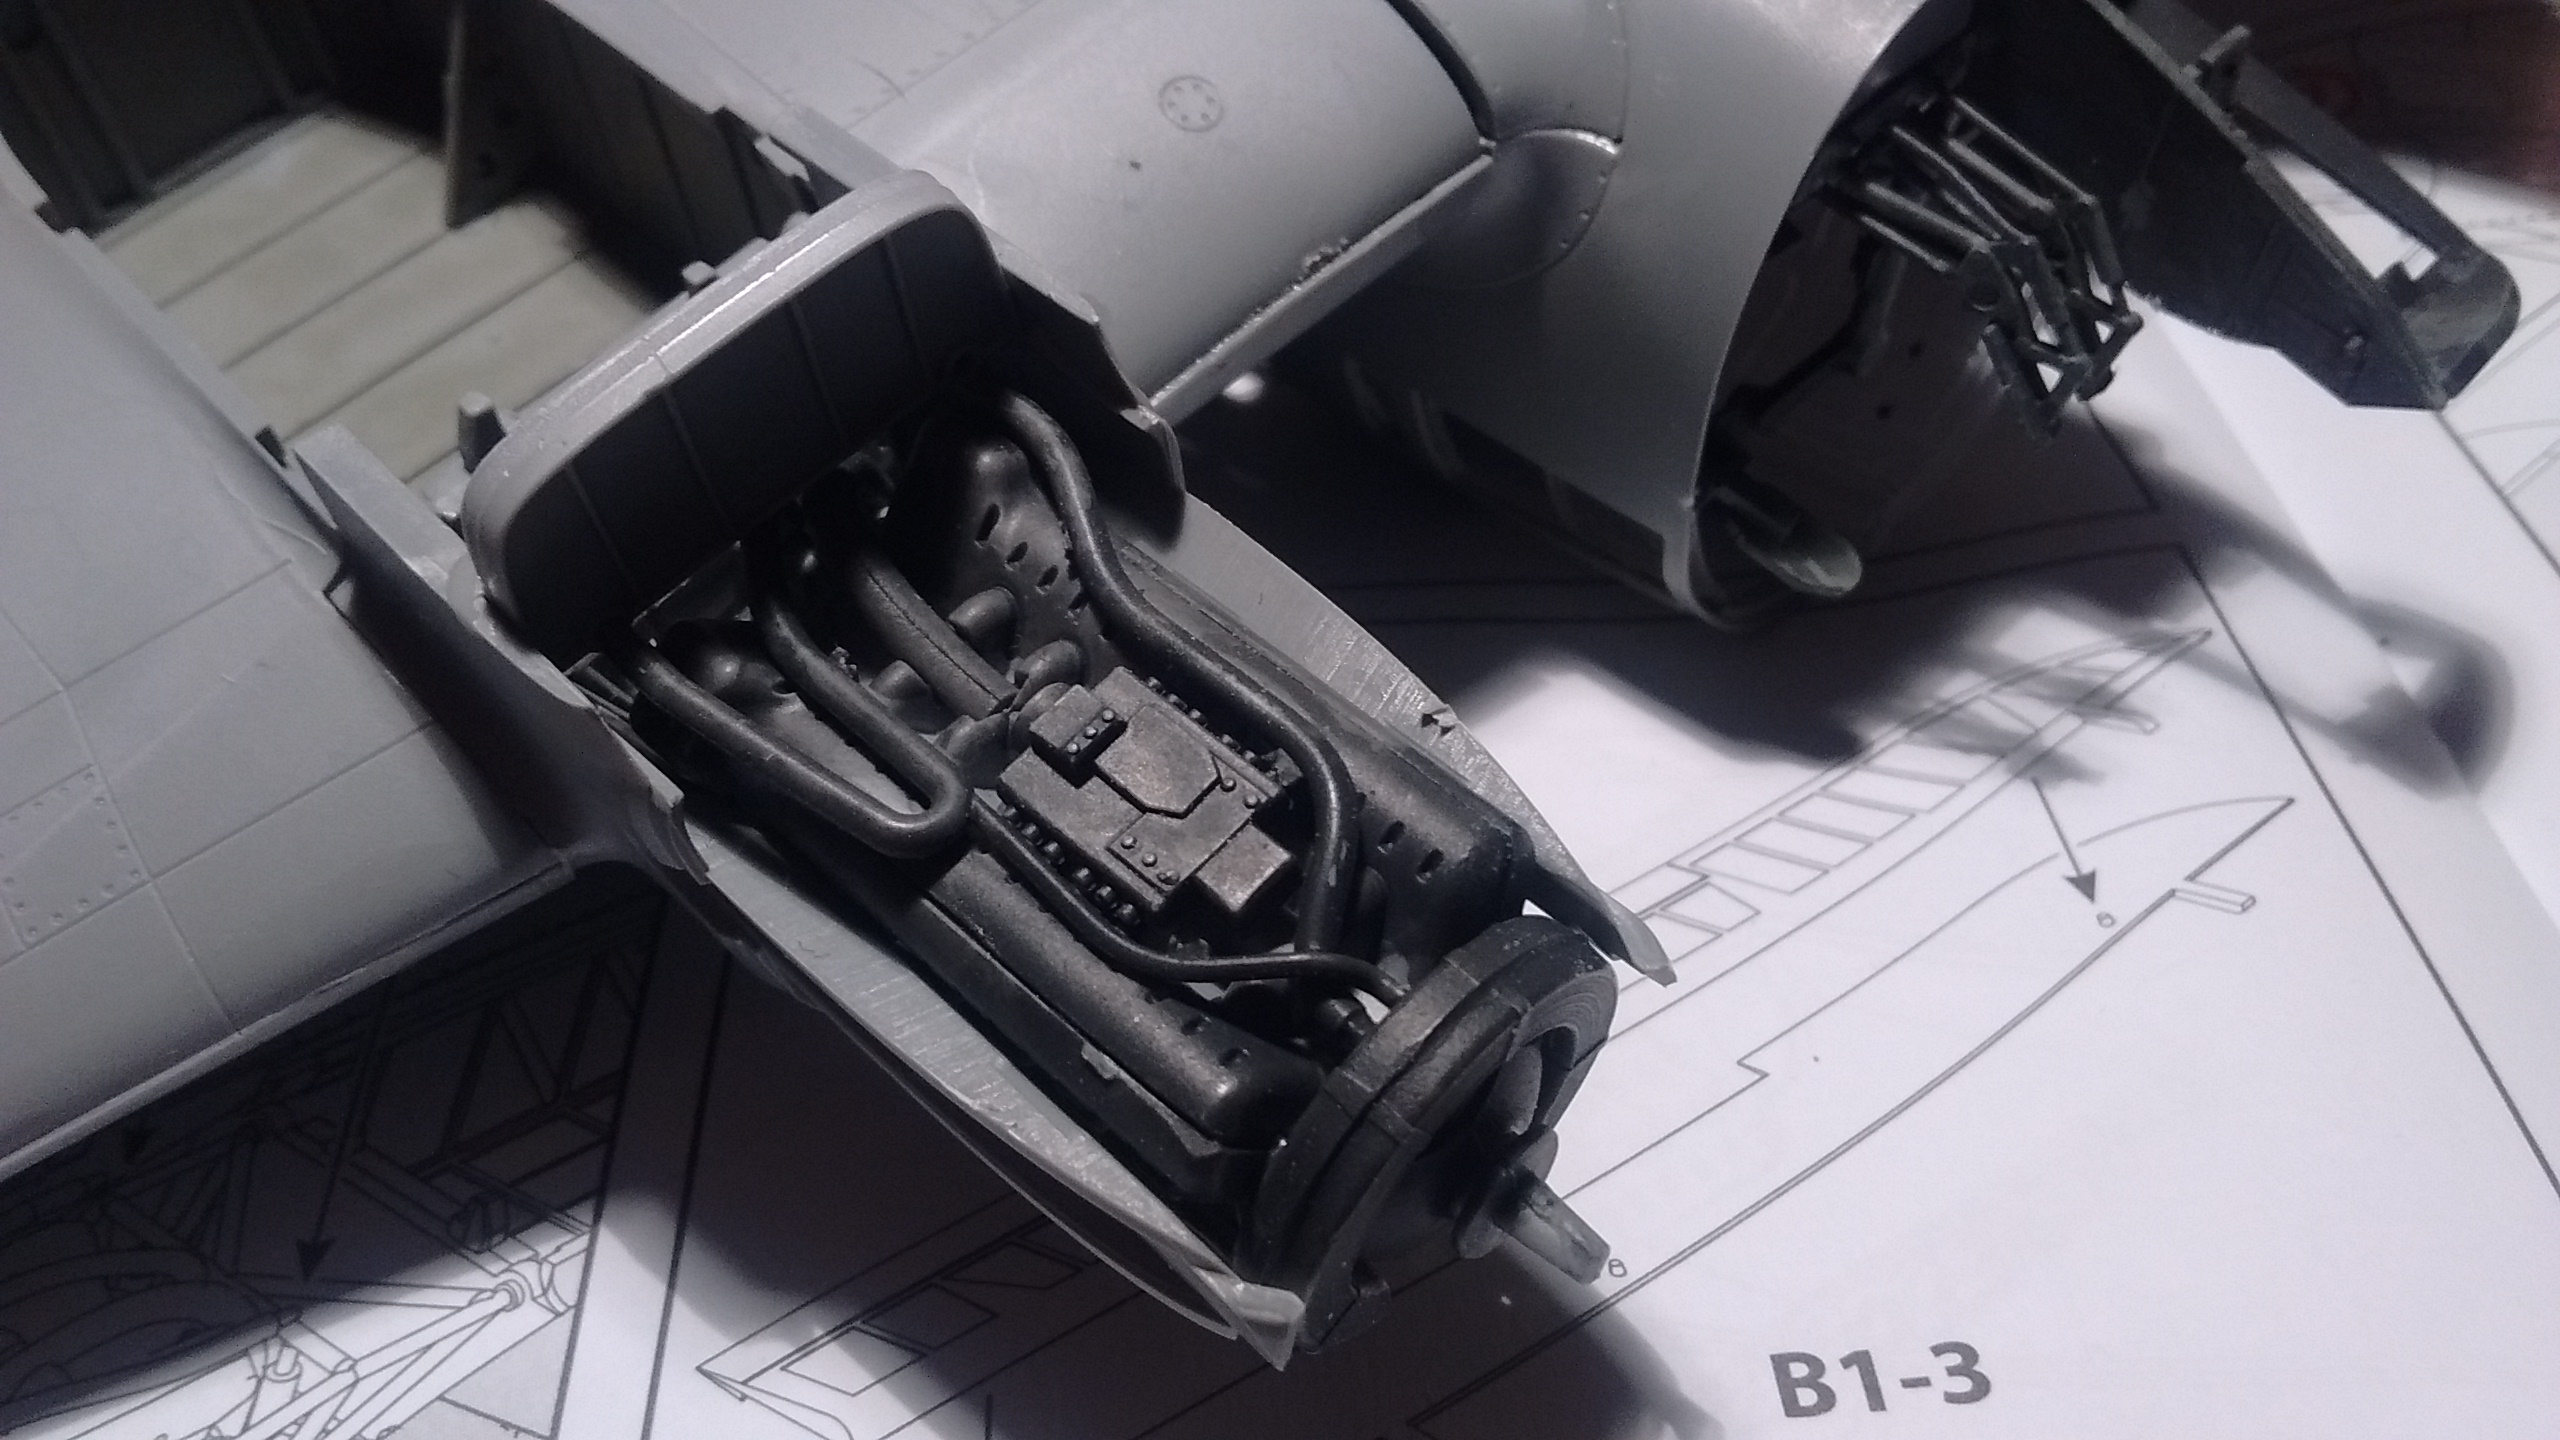
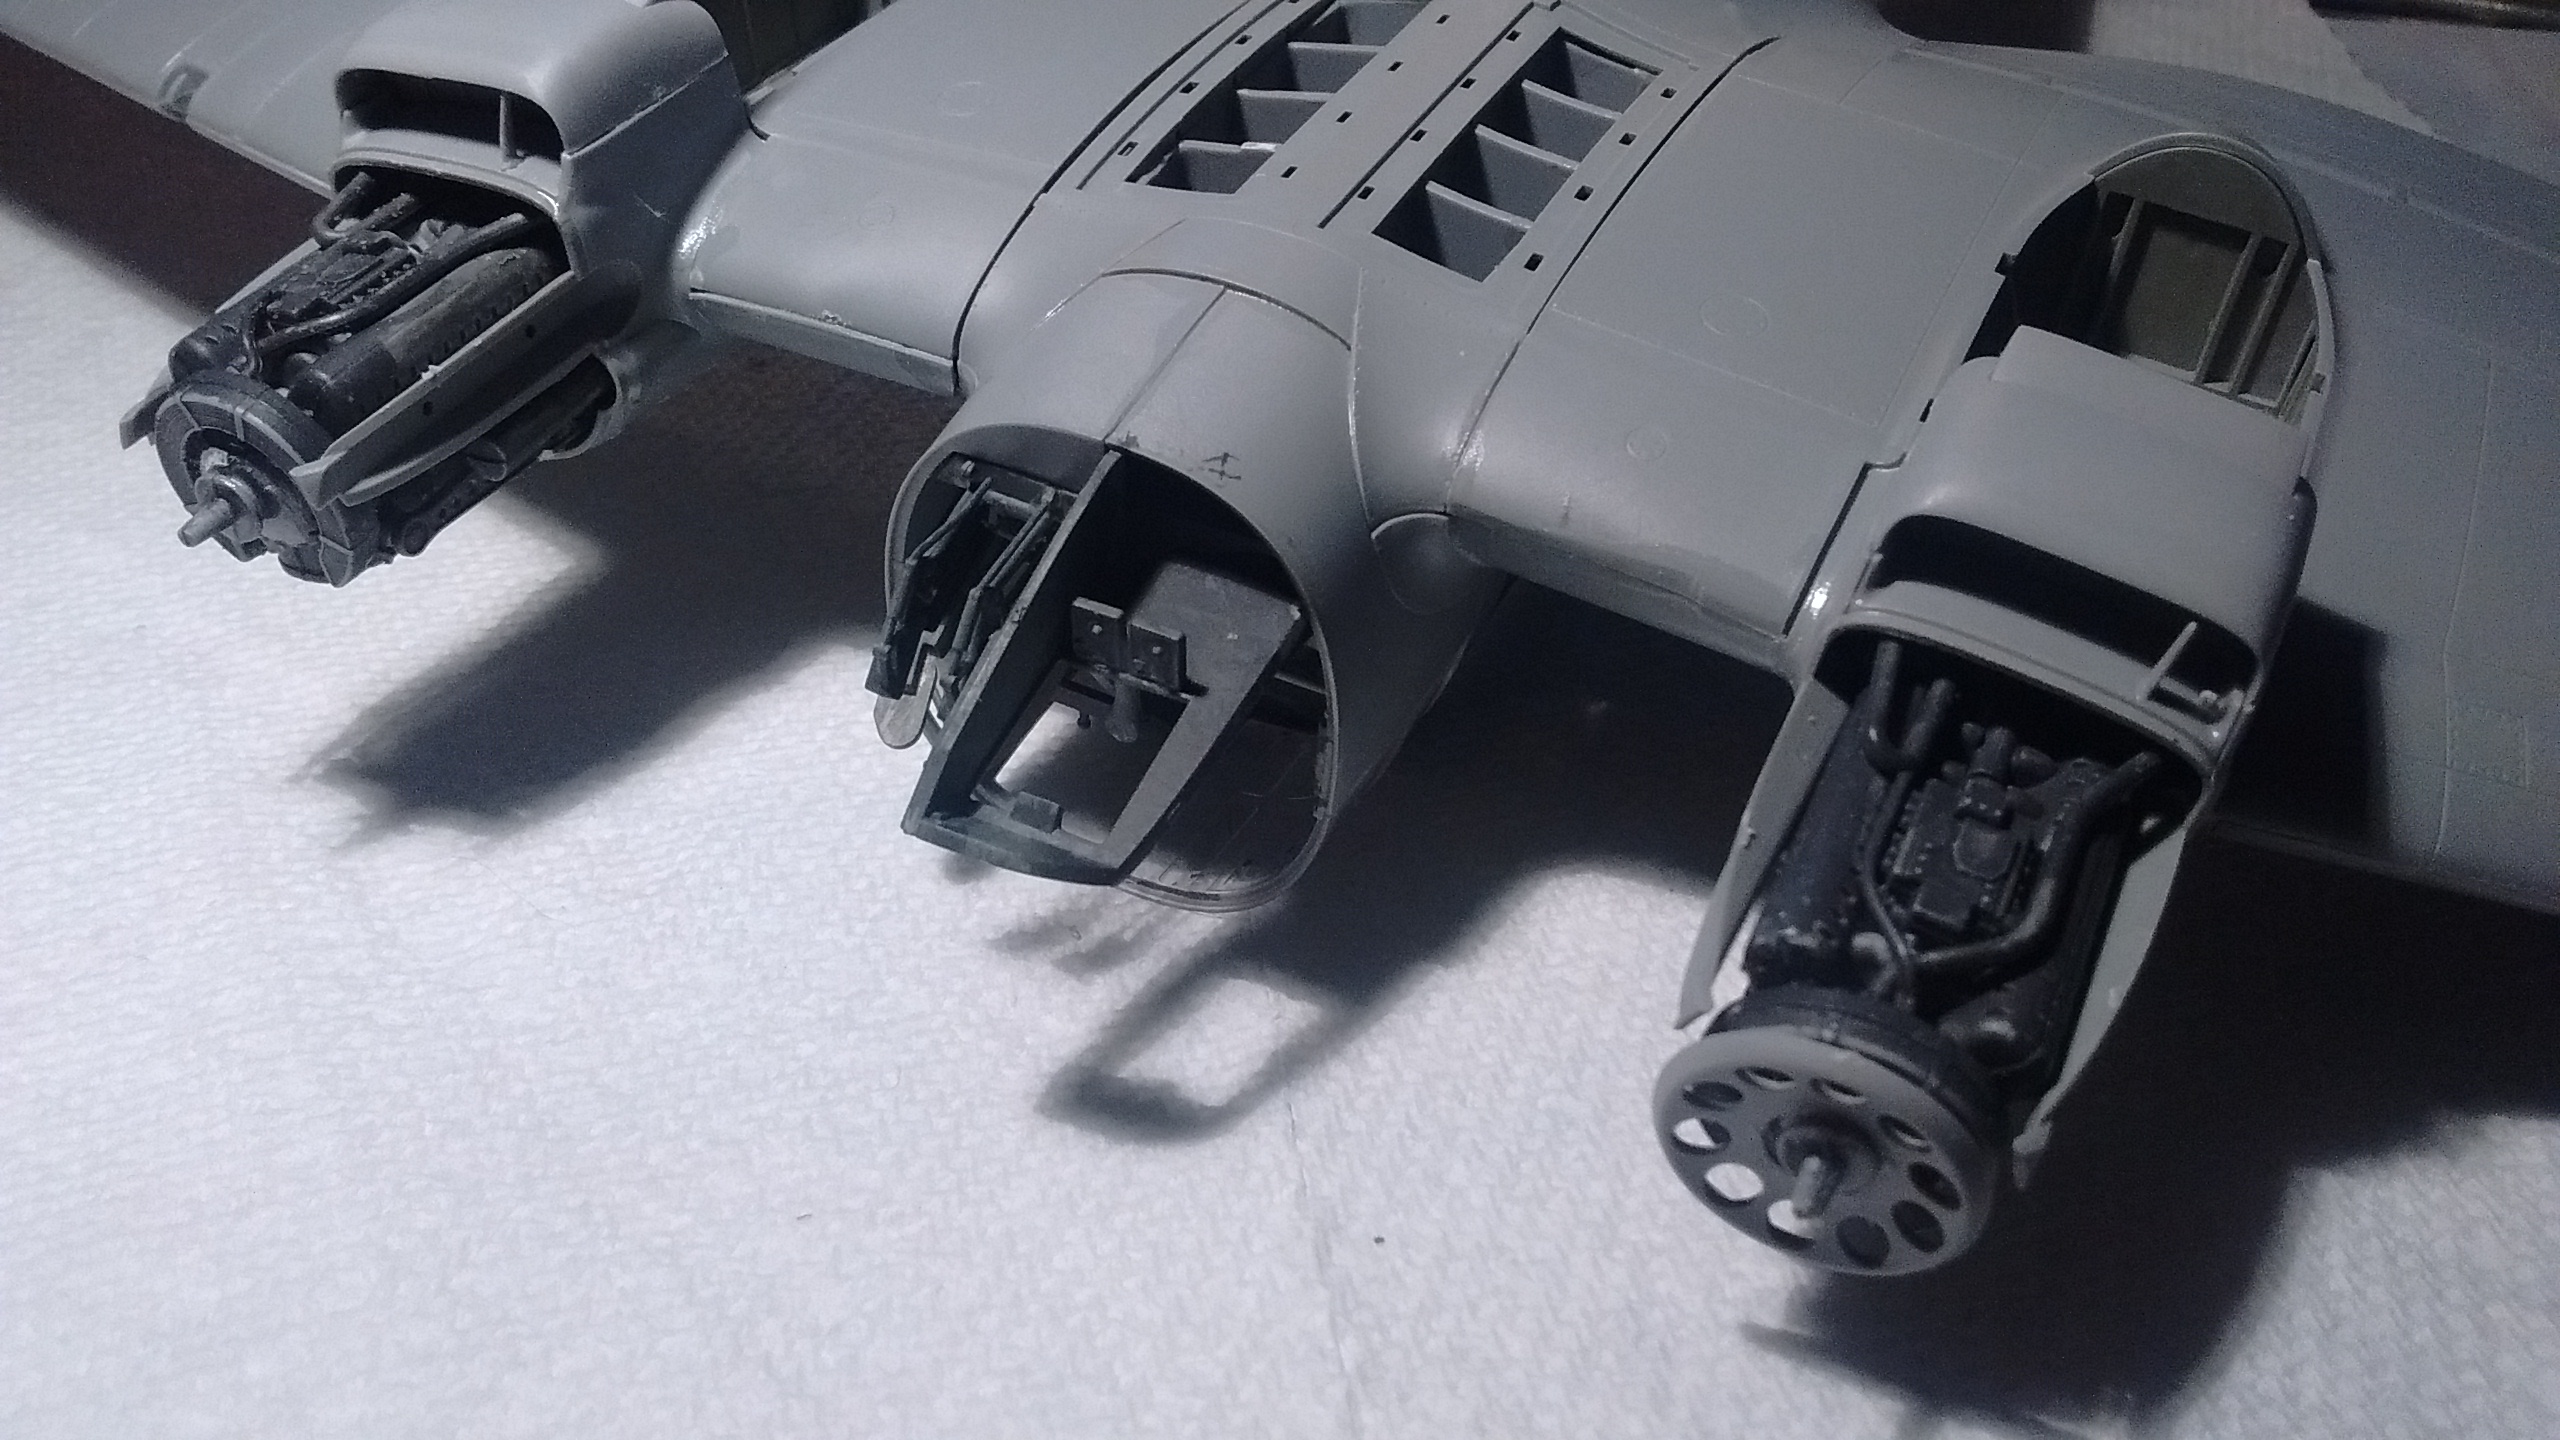
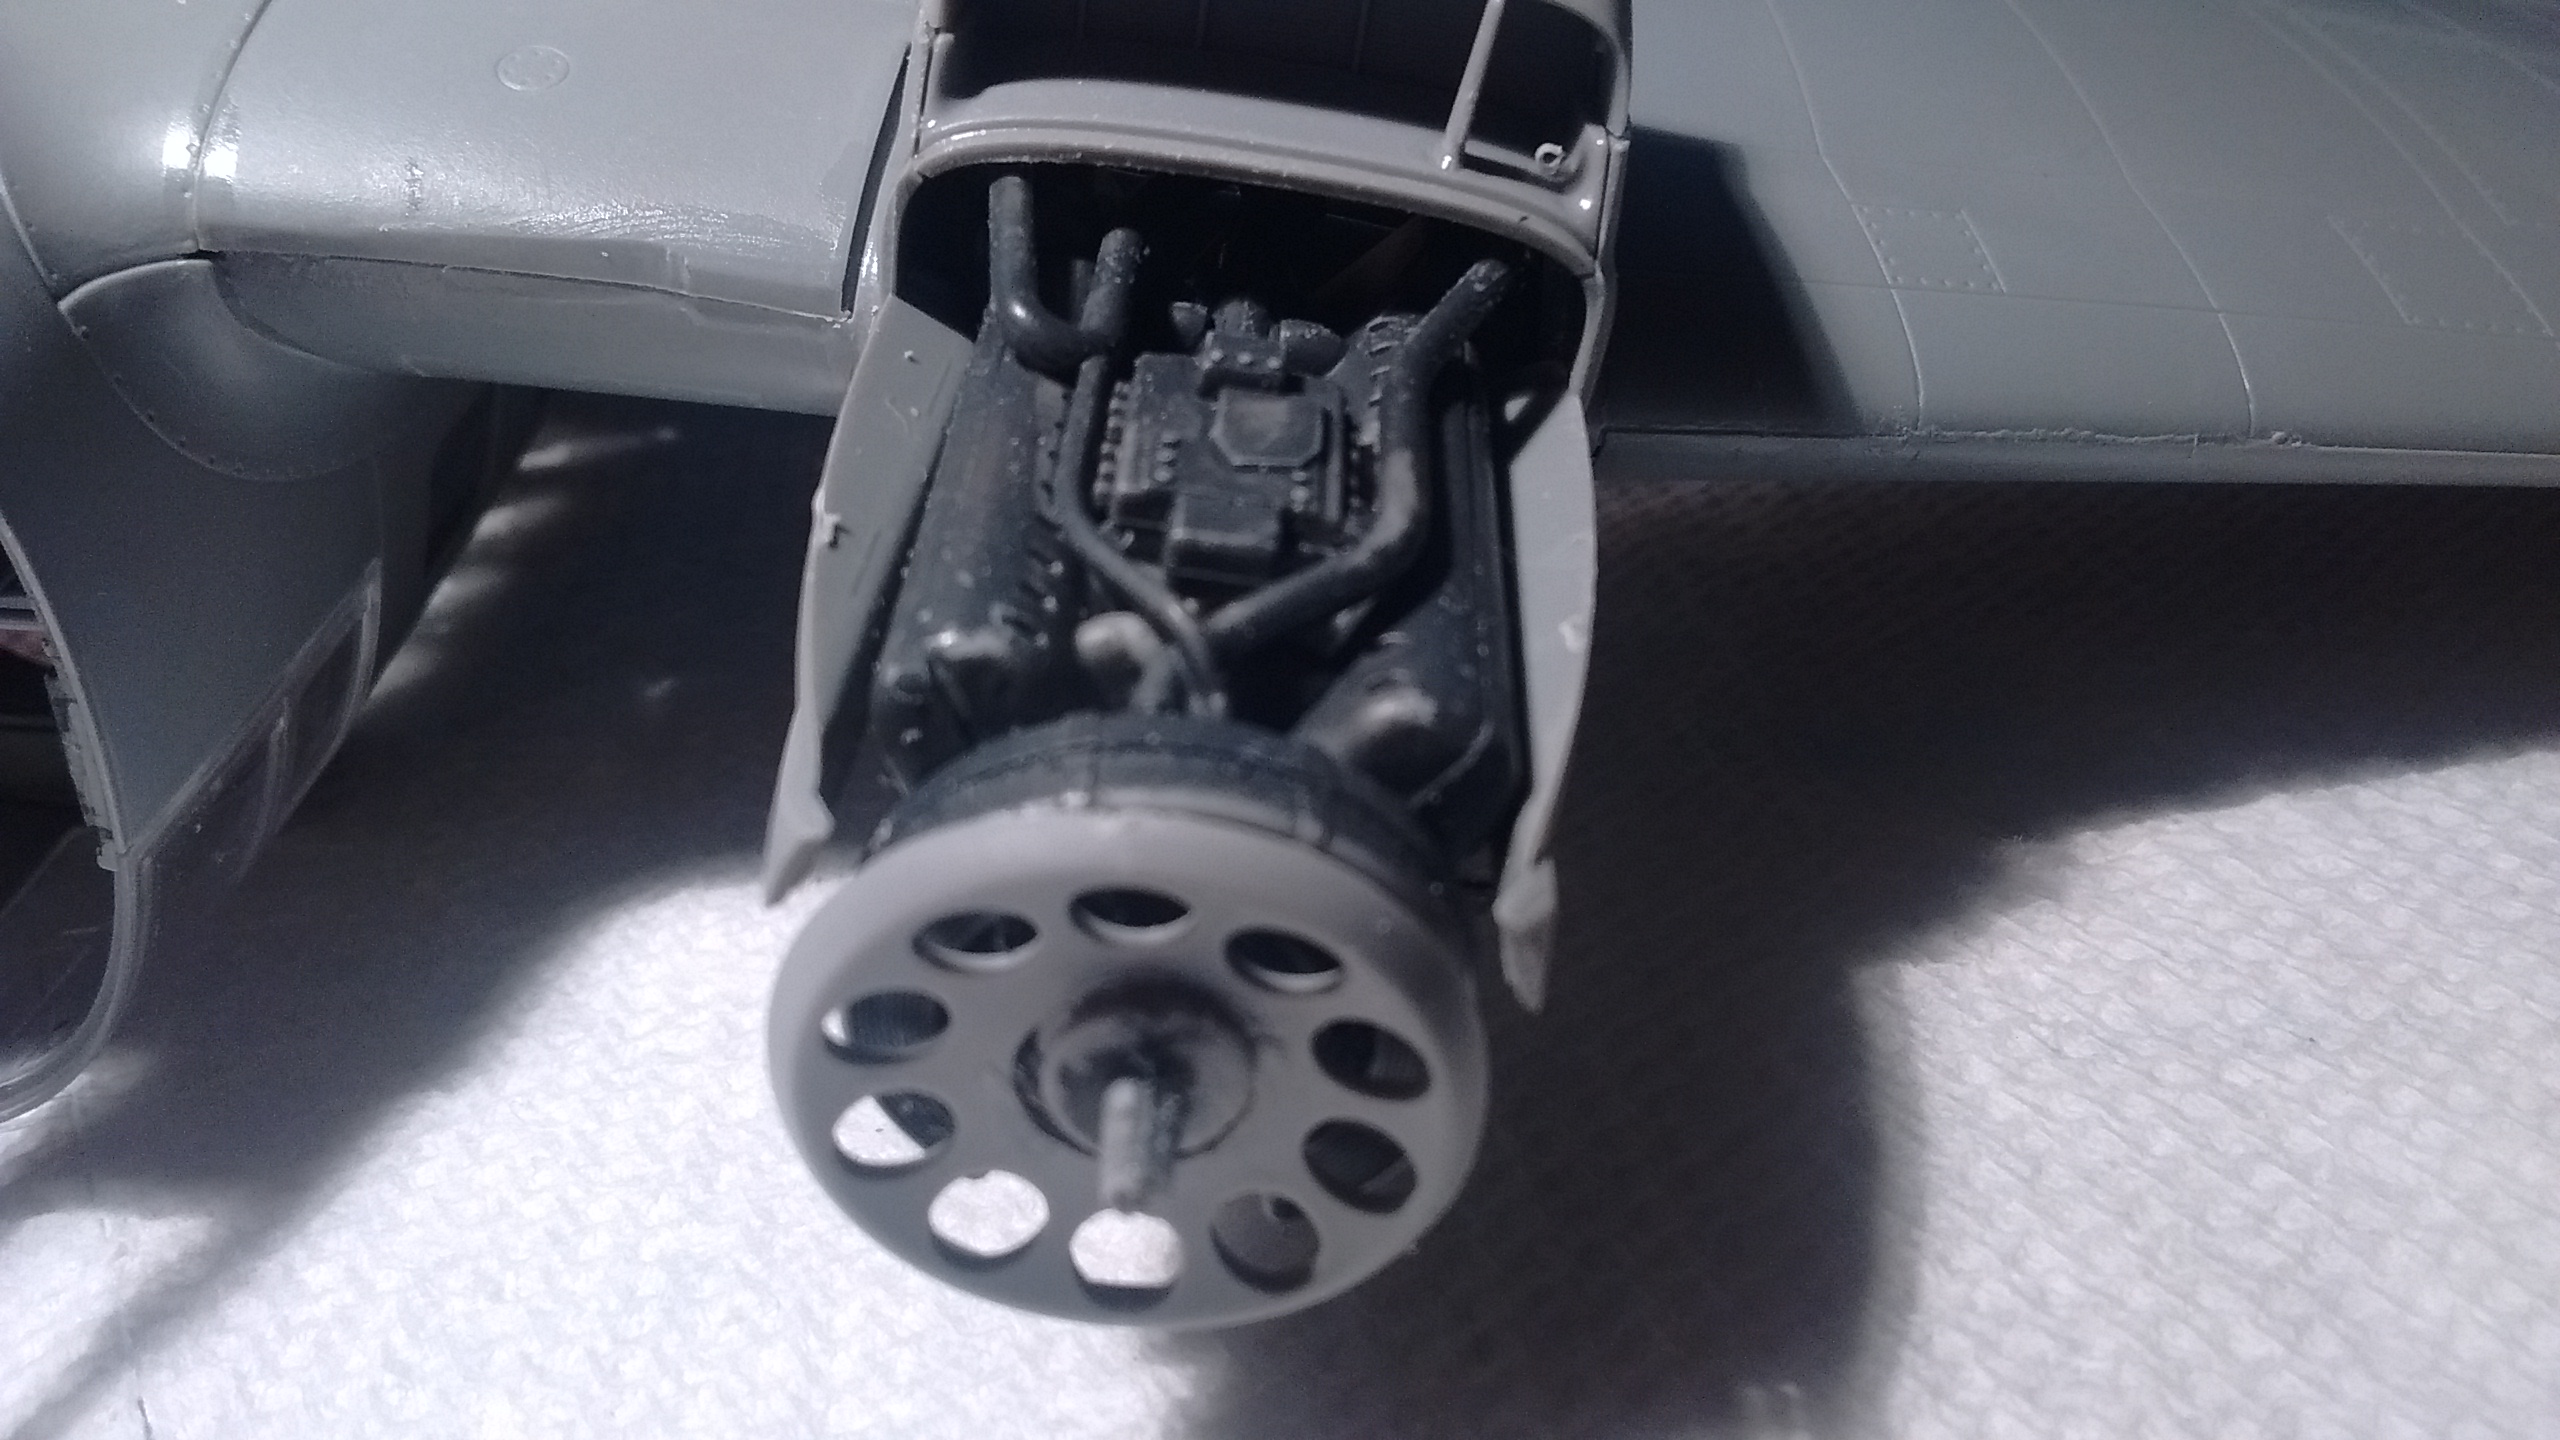
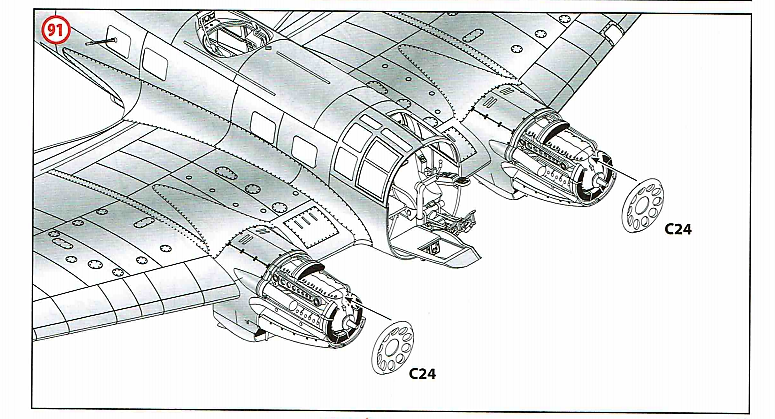
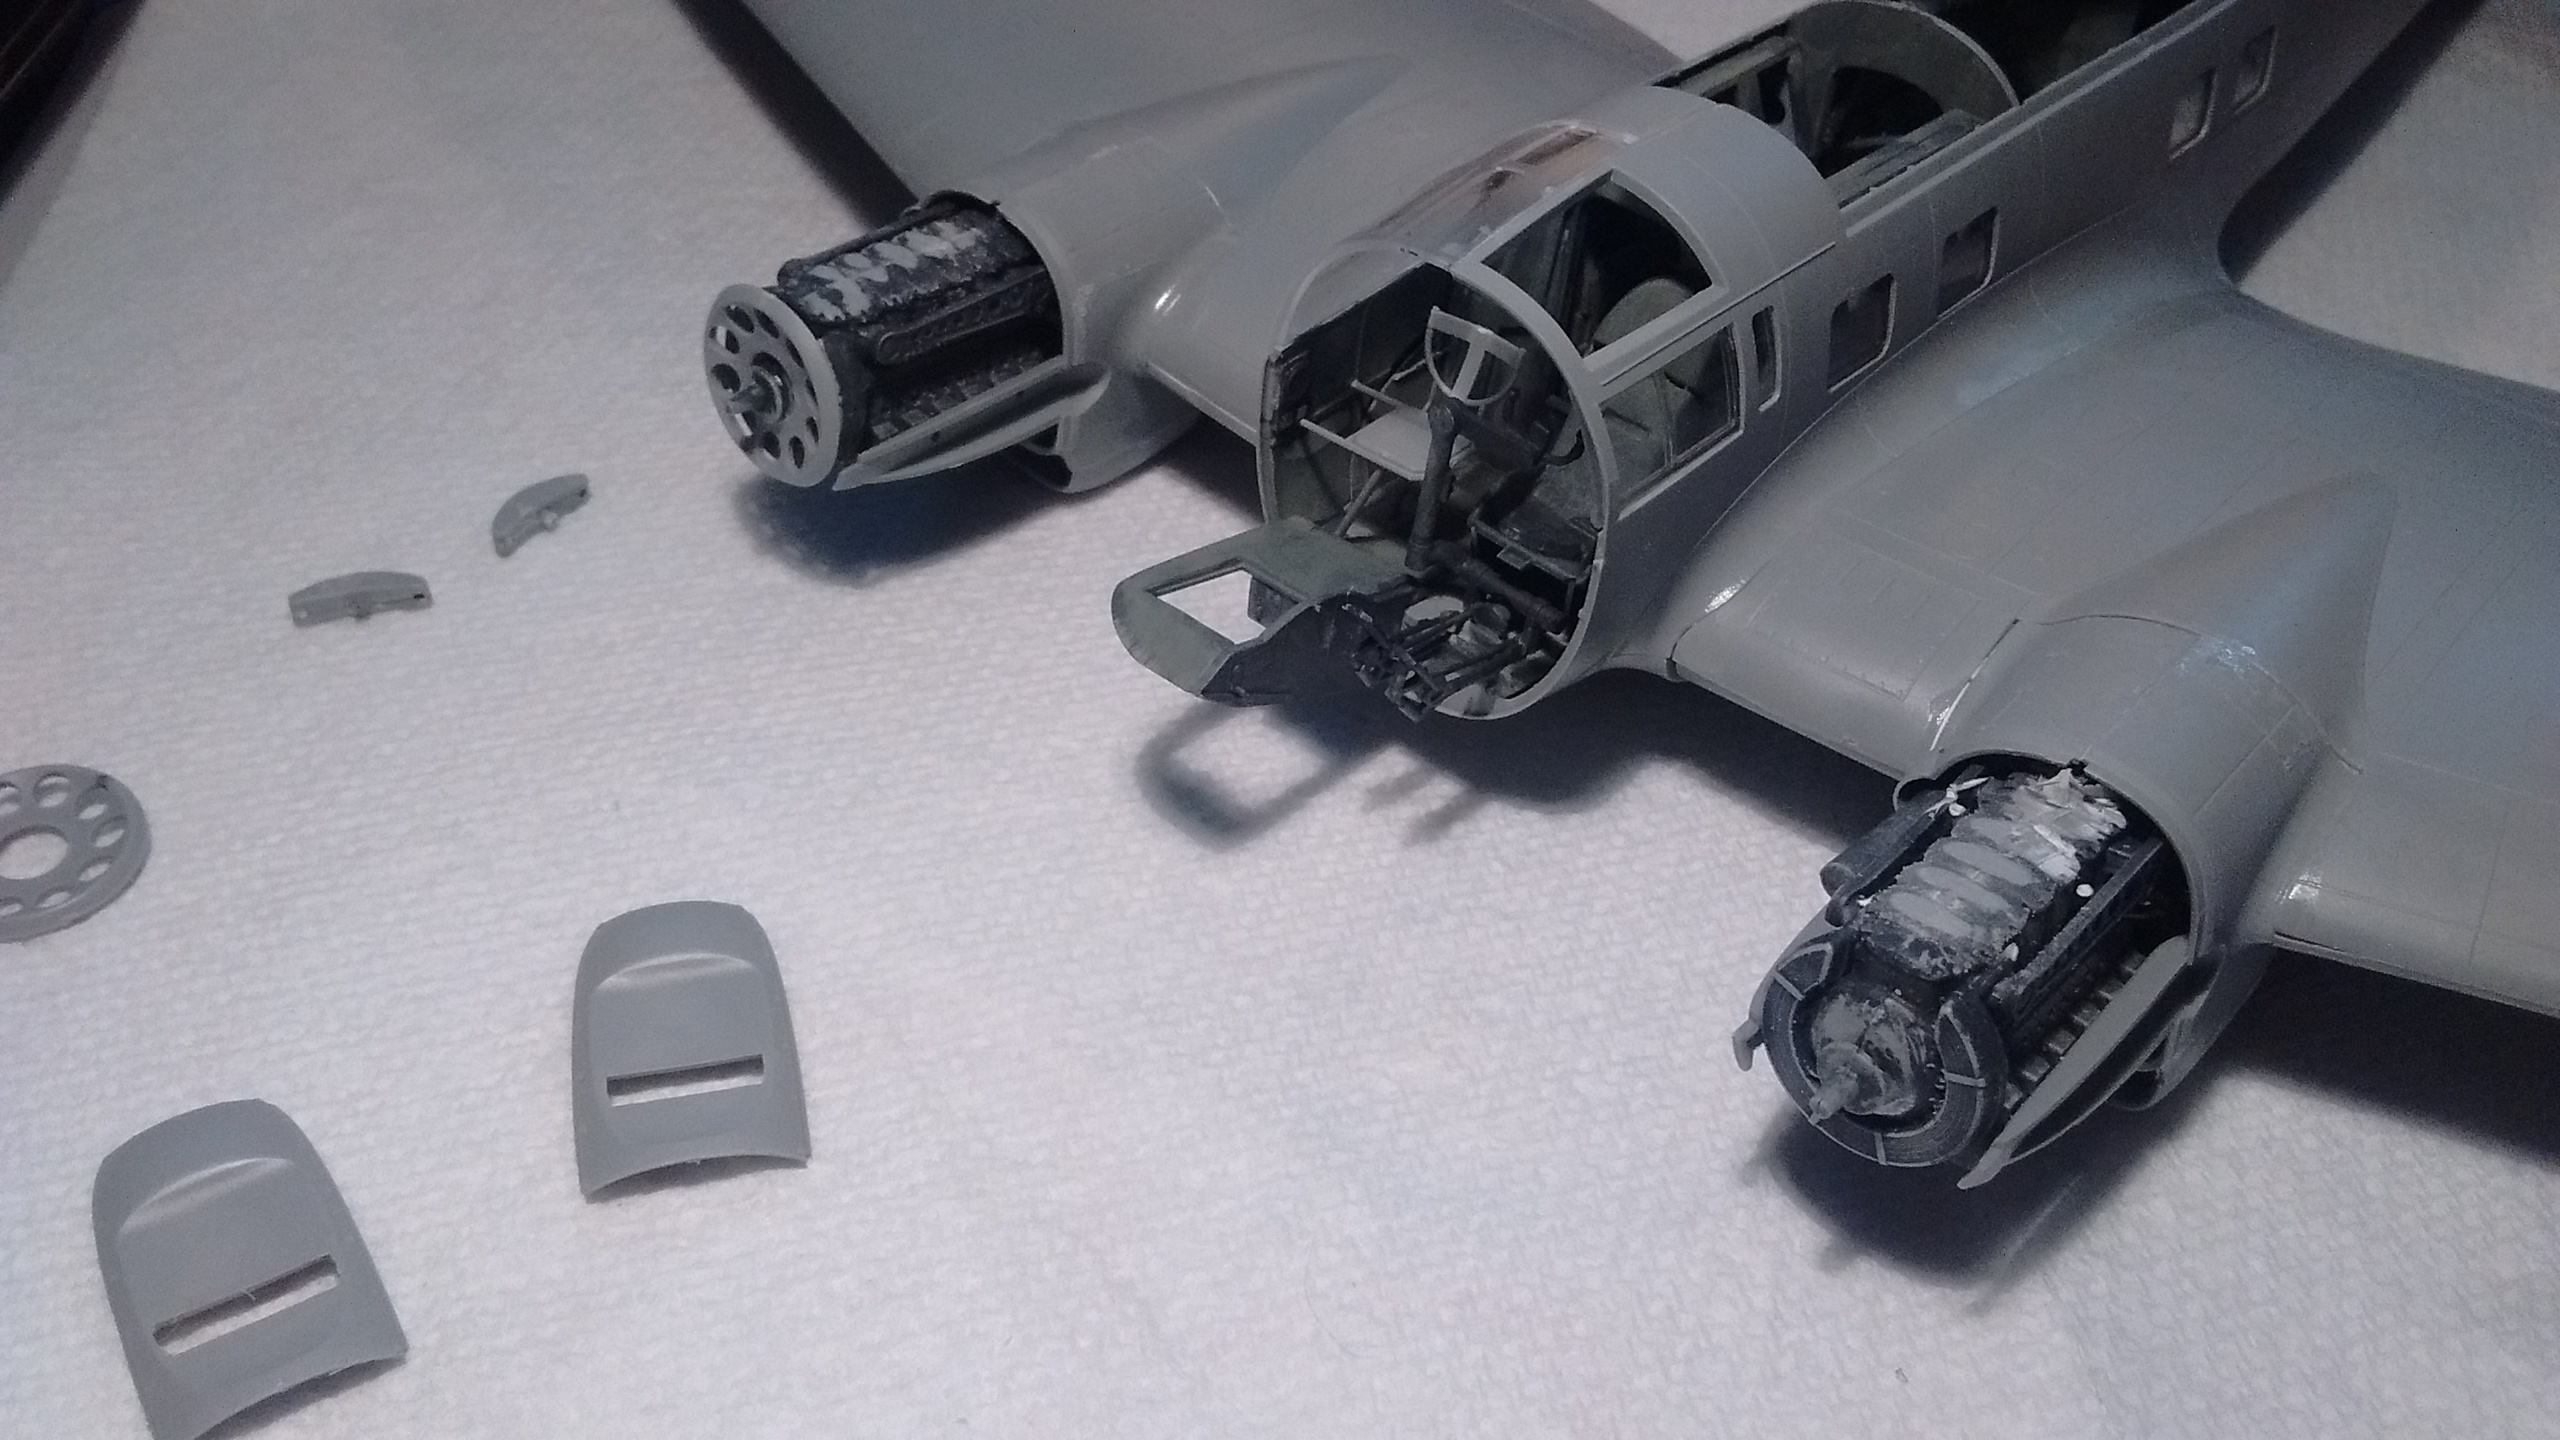
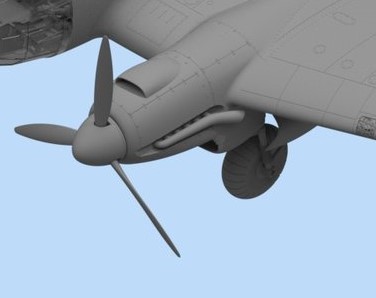
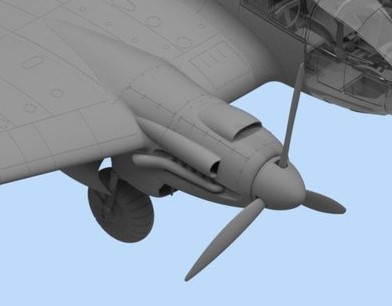
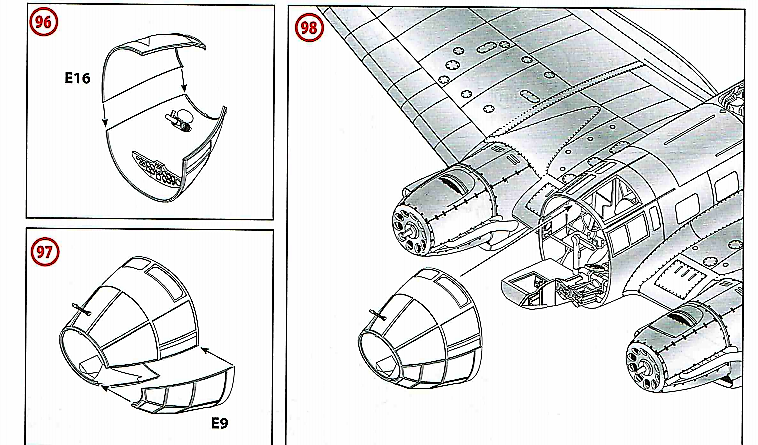
Thanks to Plane Dave’s advice I finally glued the engines in place yesterday afternoon.
I am glad I have been waiting that long because I would have broken something.
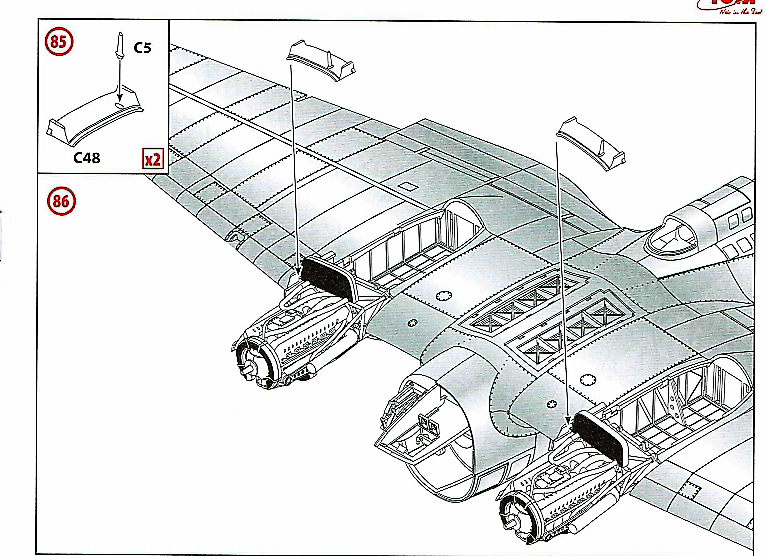
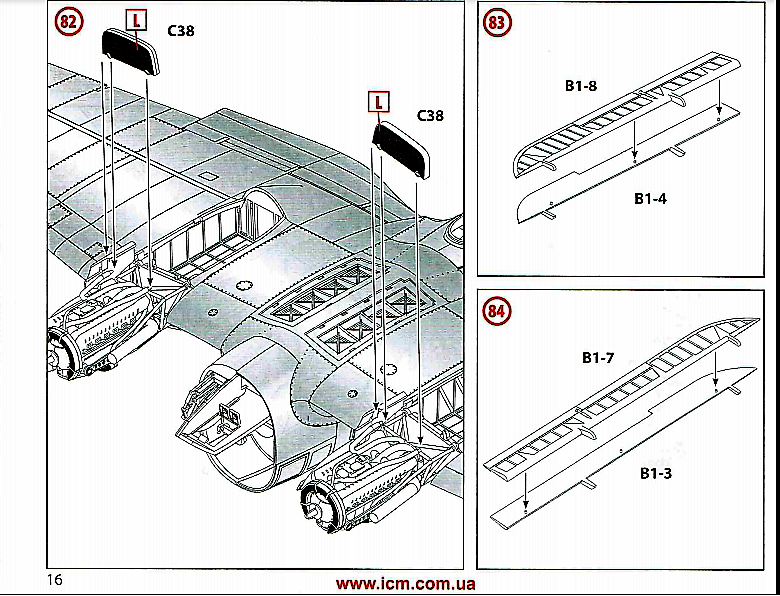
Step 82 will be next later today since my three year-old grandson is babysitting his grandfather. Steps 83 and 84 had already been done and parts glued to the wings.
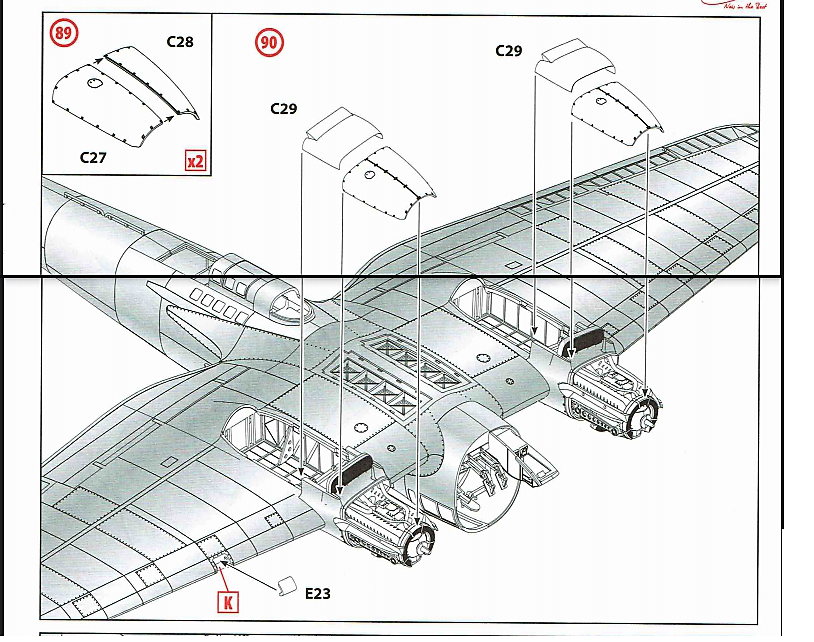
Steps 85 to 92 will follow later this afternoon.
All clear parts will be set aside for painting in the spring.
Tomorrow I will show you pictures of where the project stands right now.
I have not been idle yesterday while I was waiting for the glue to dry.
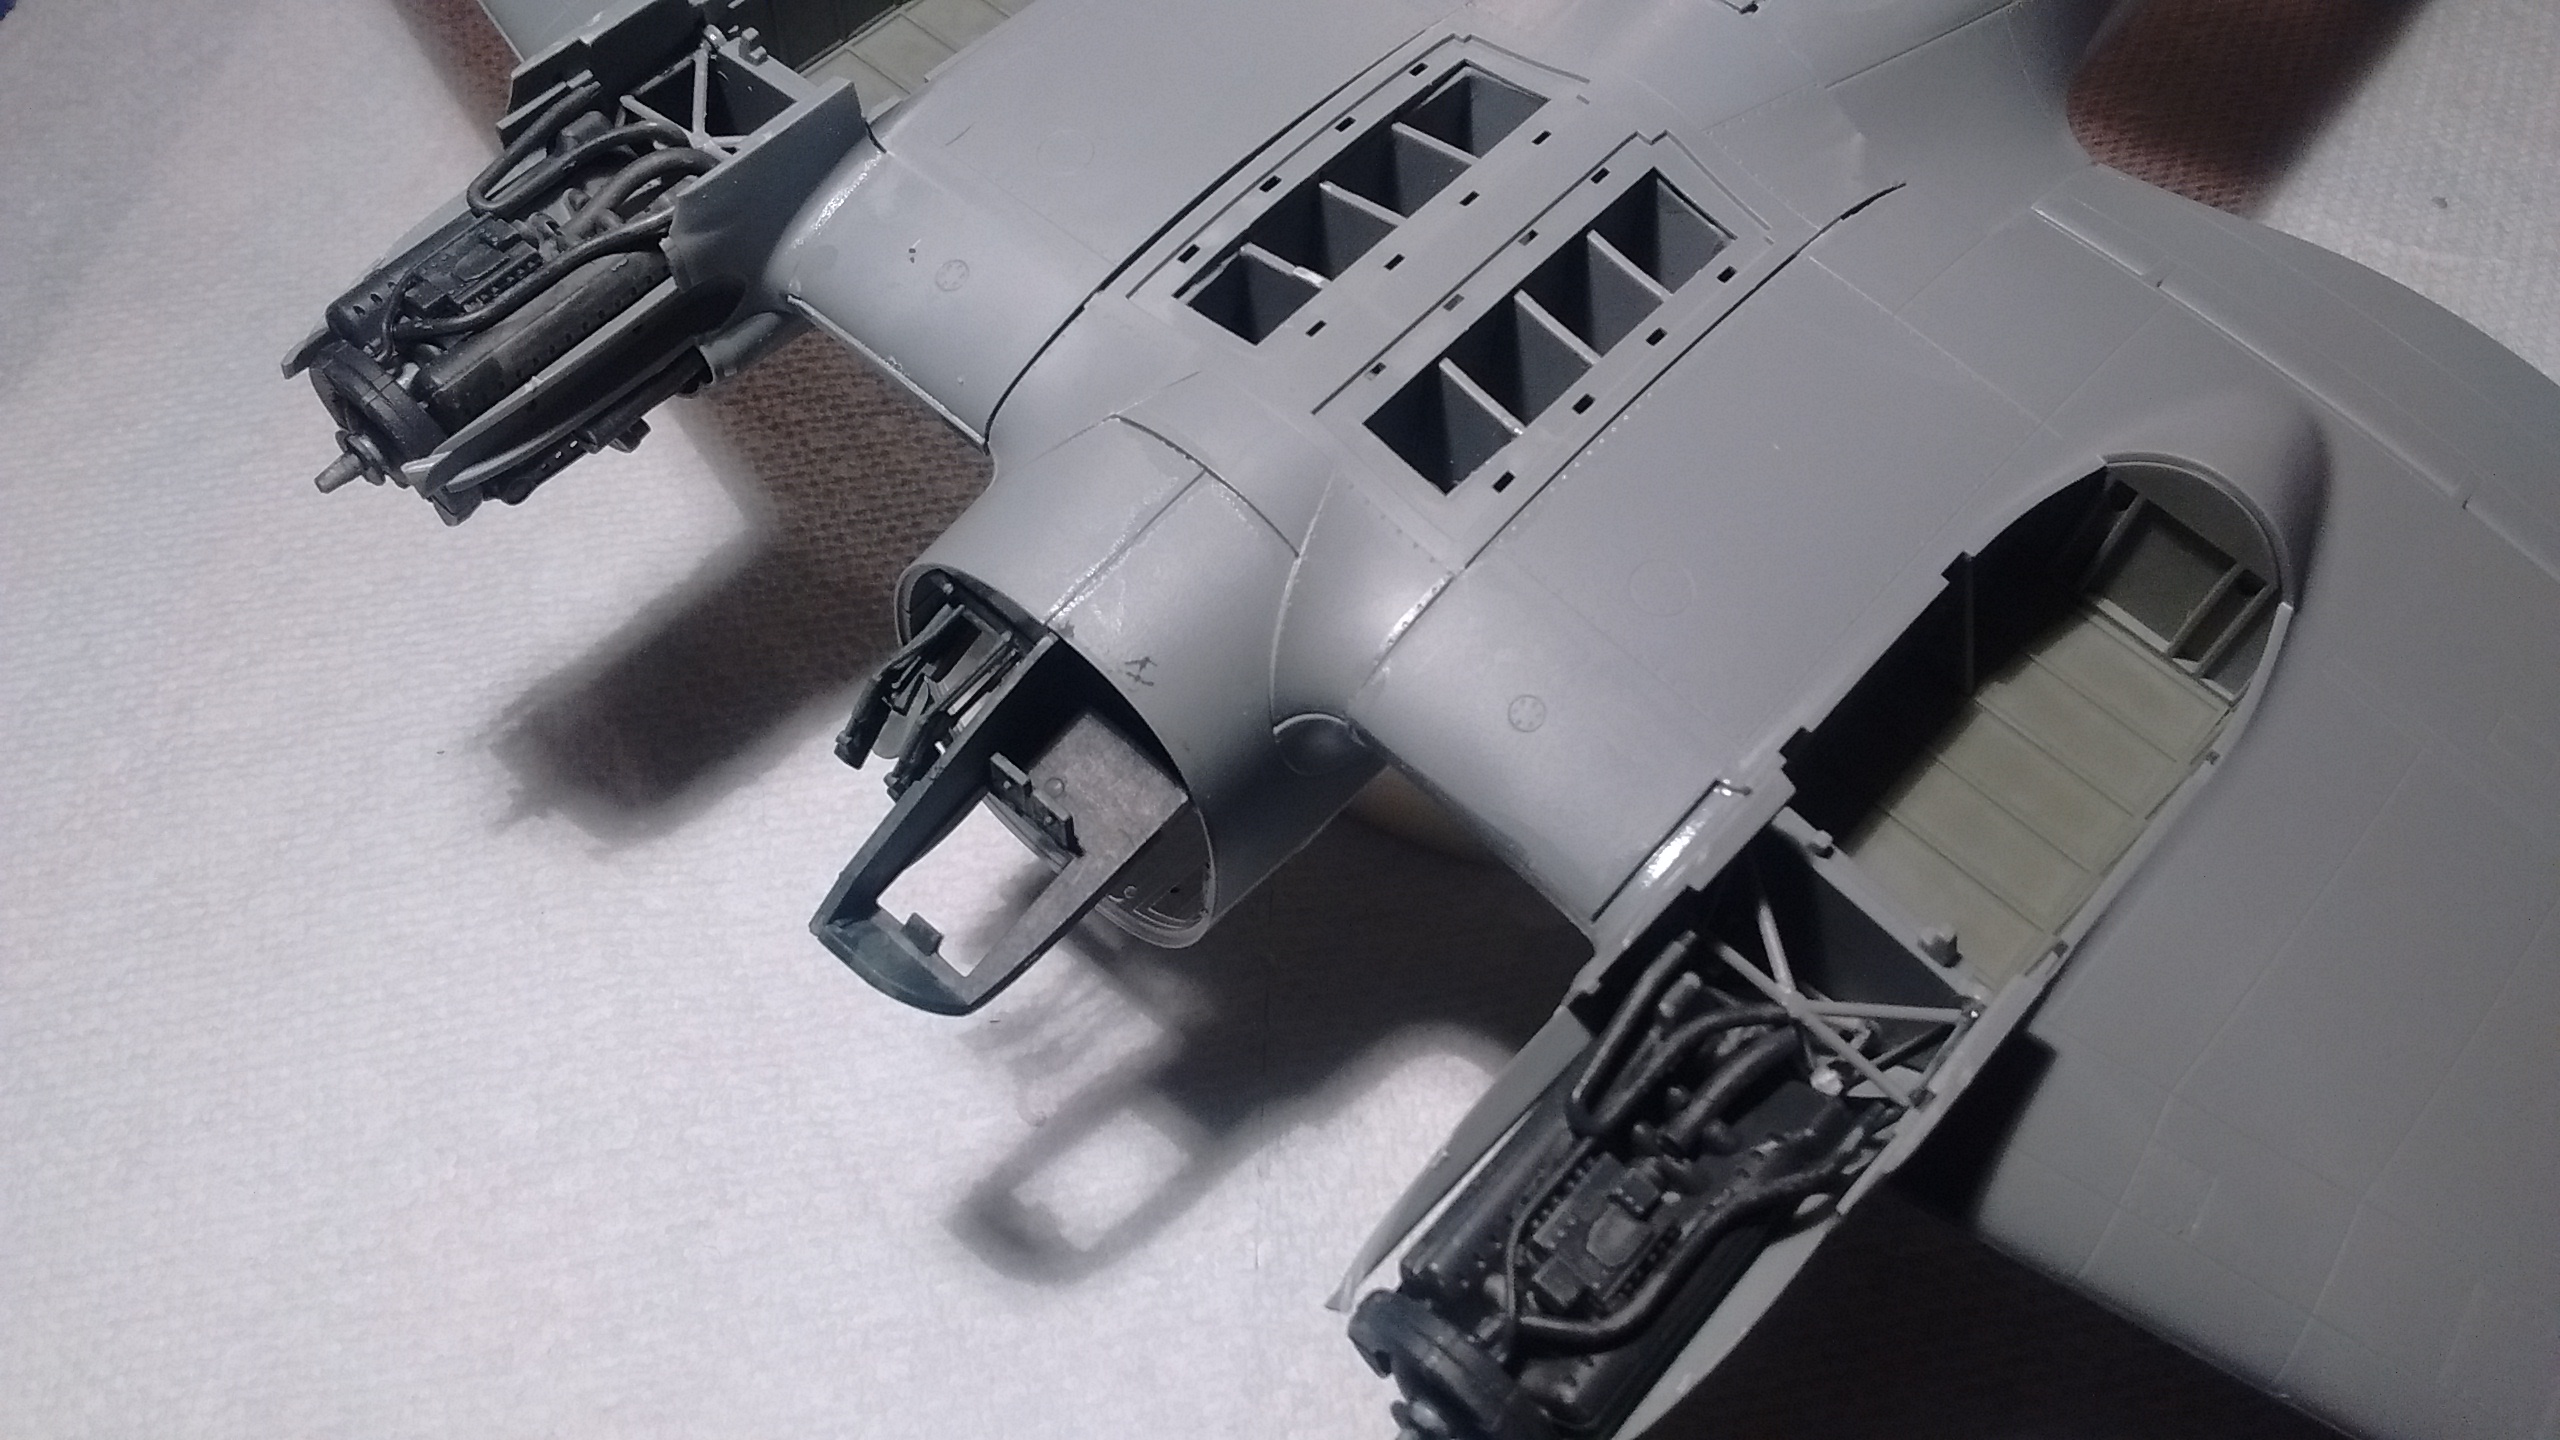
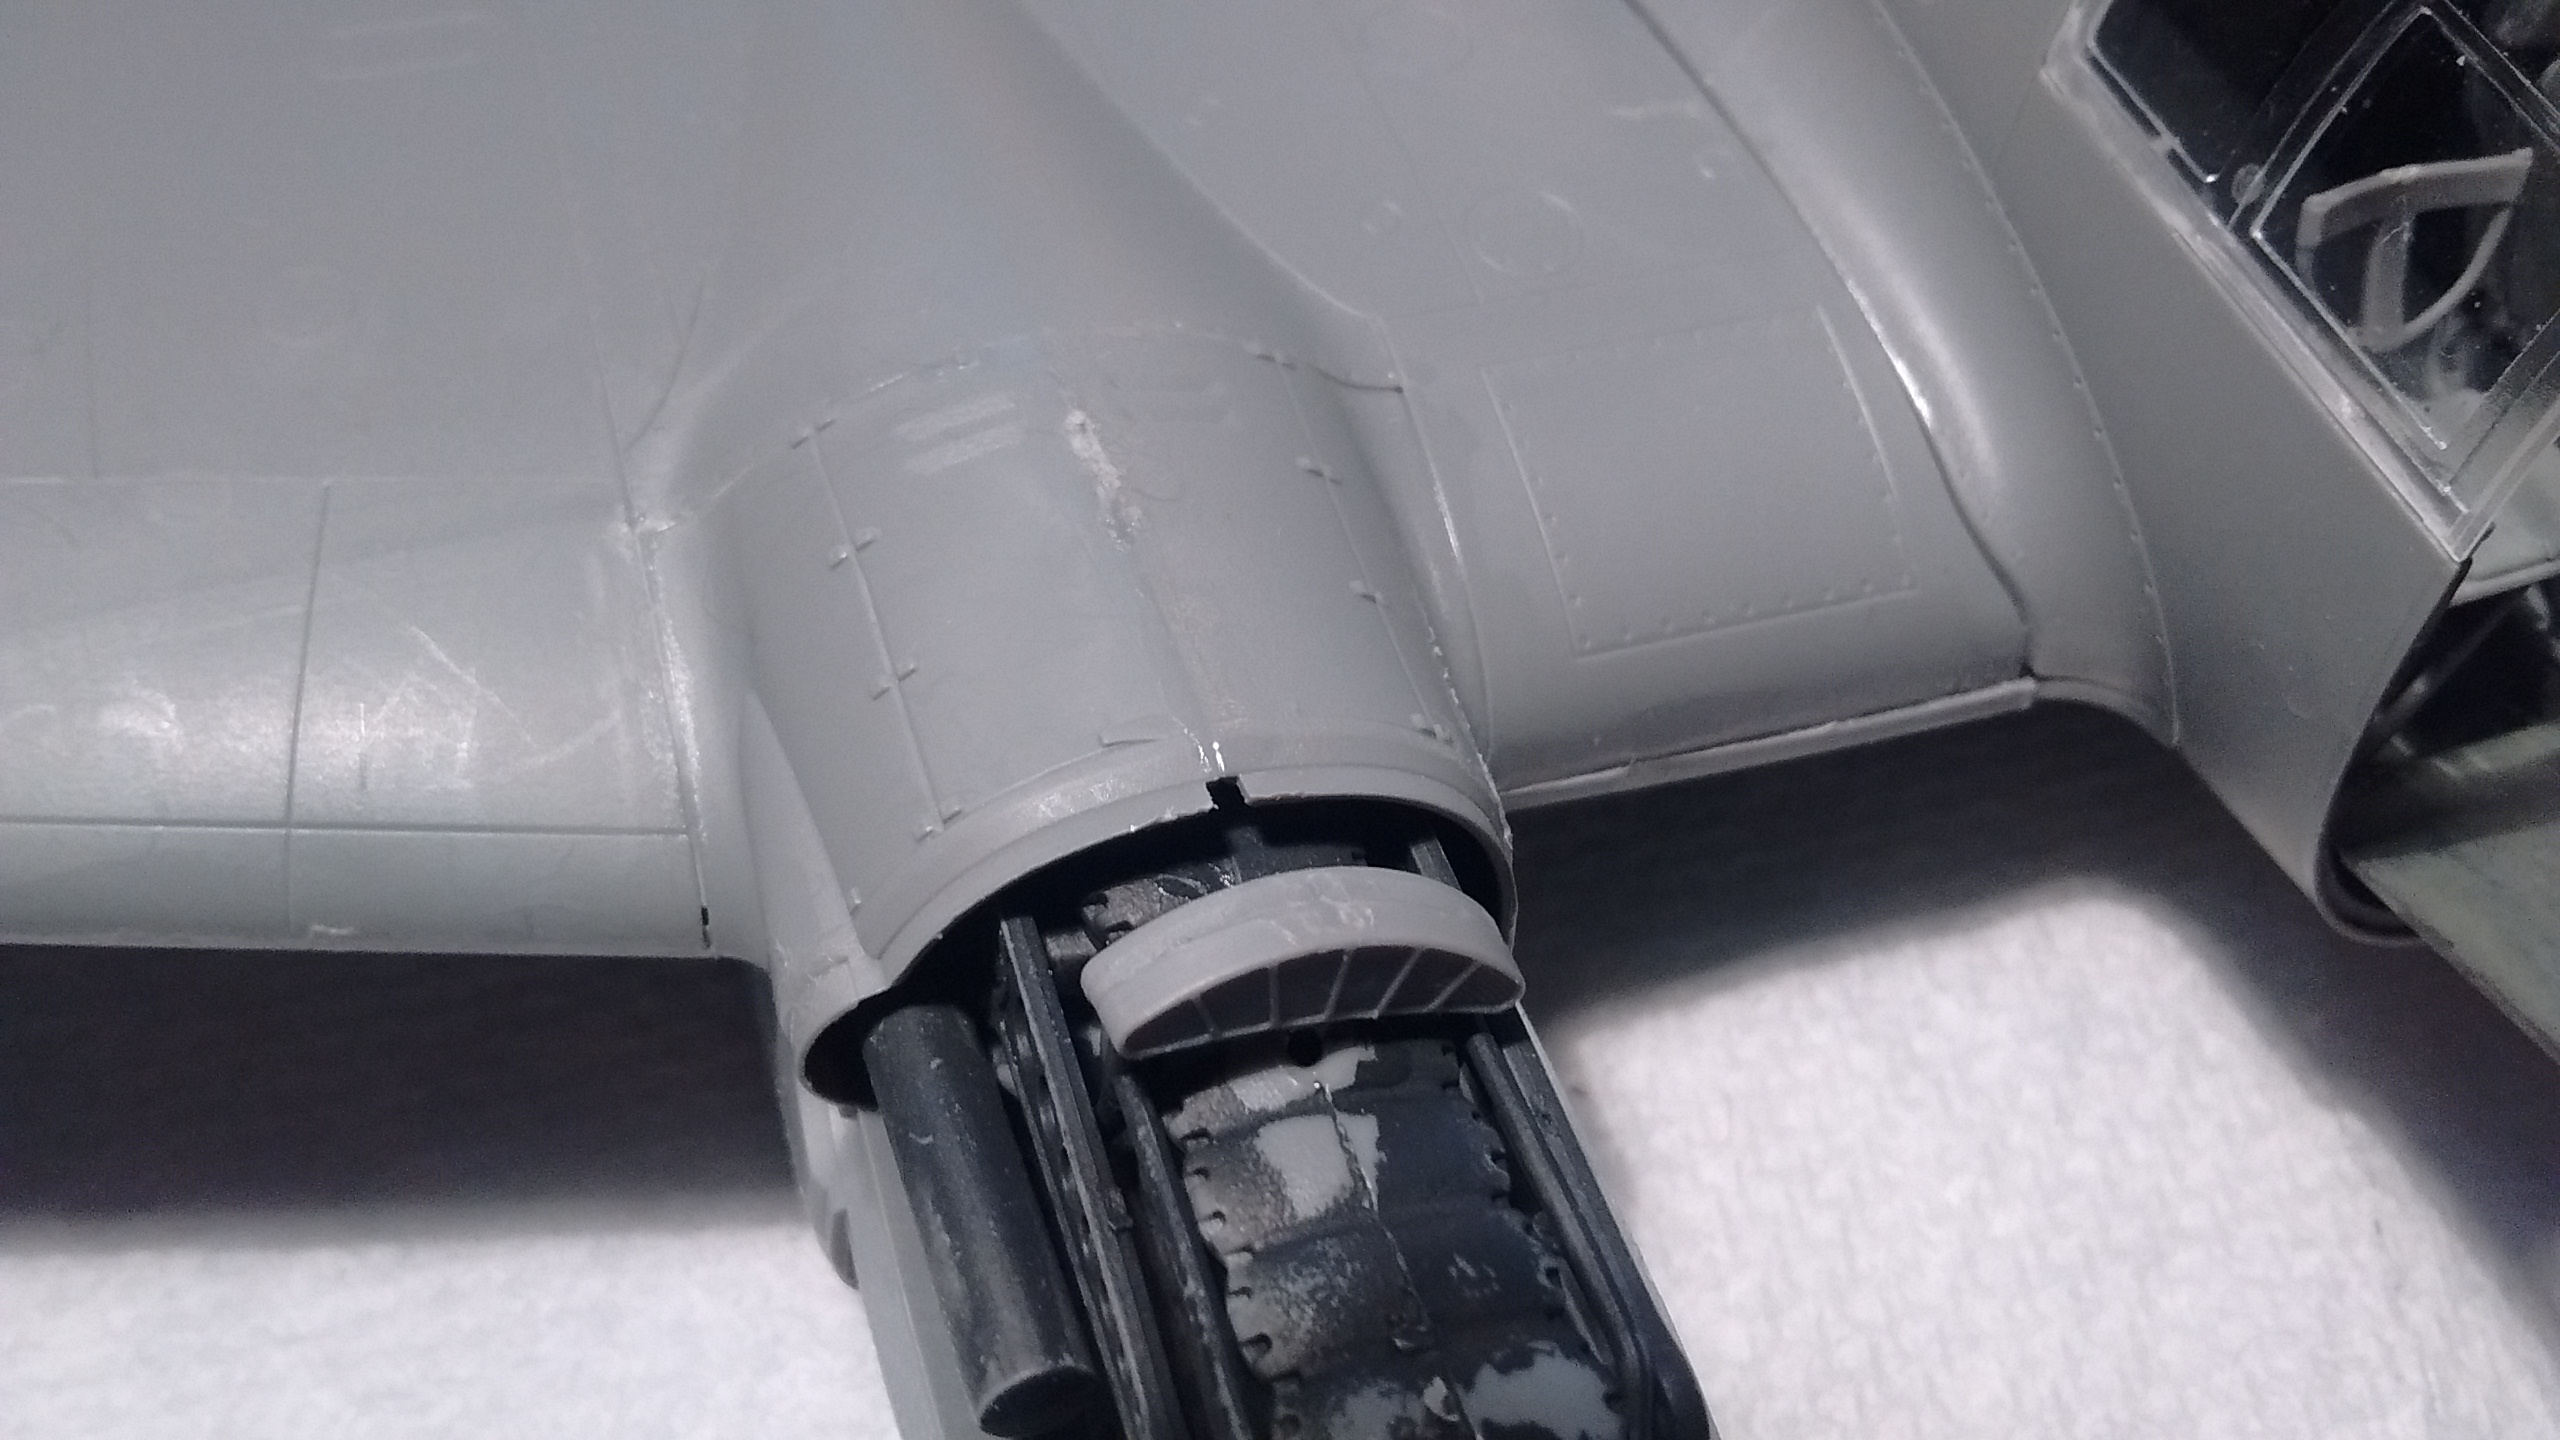
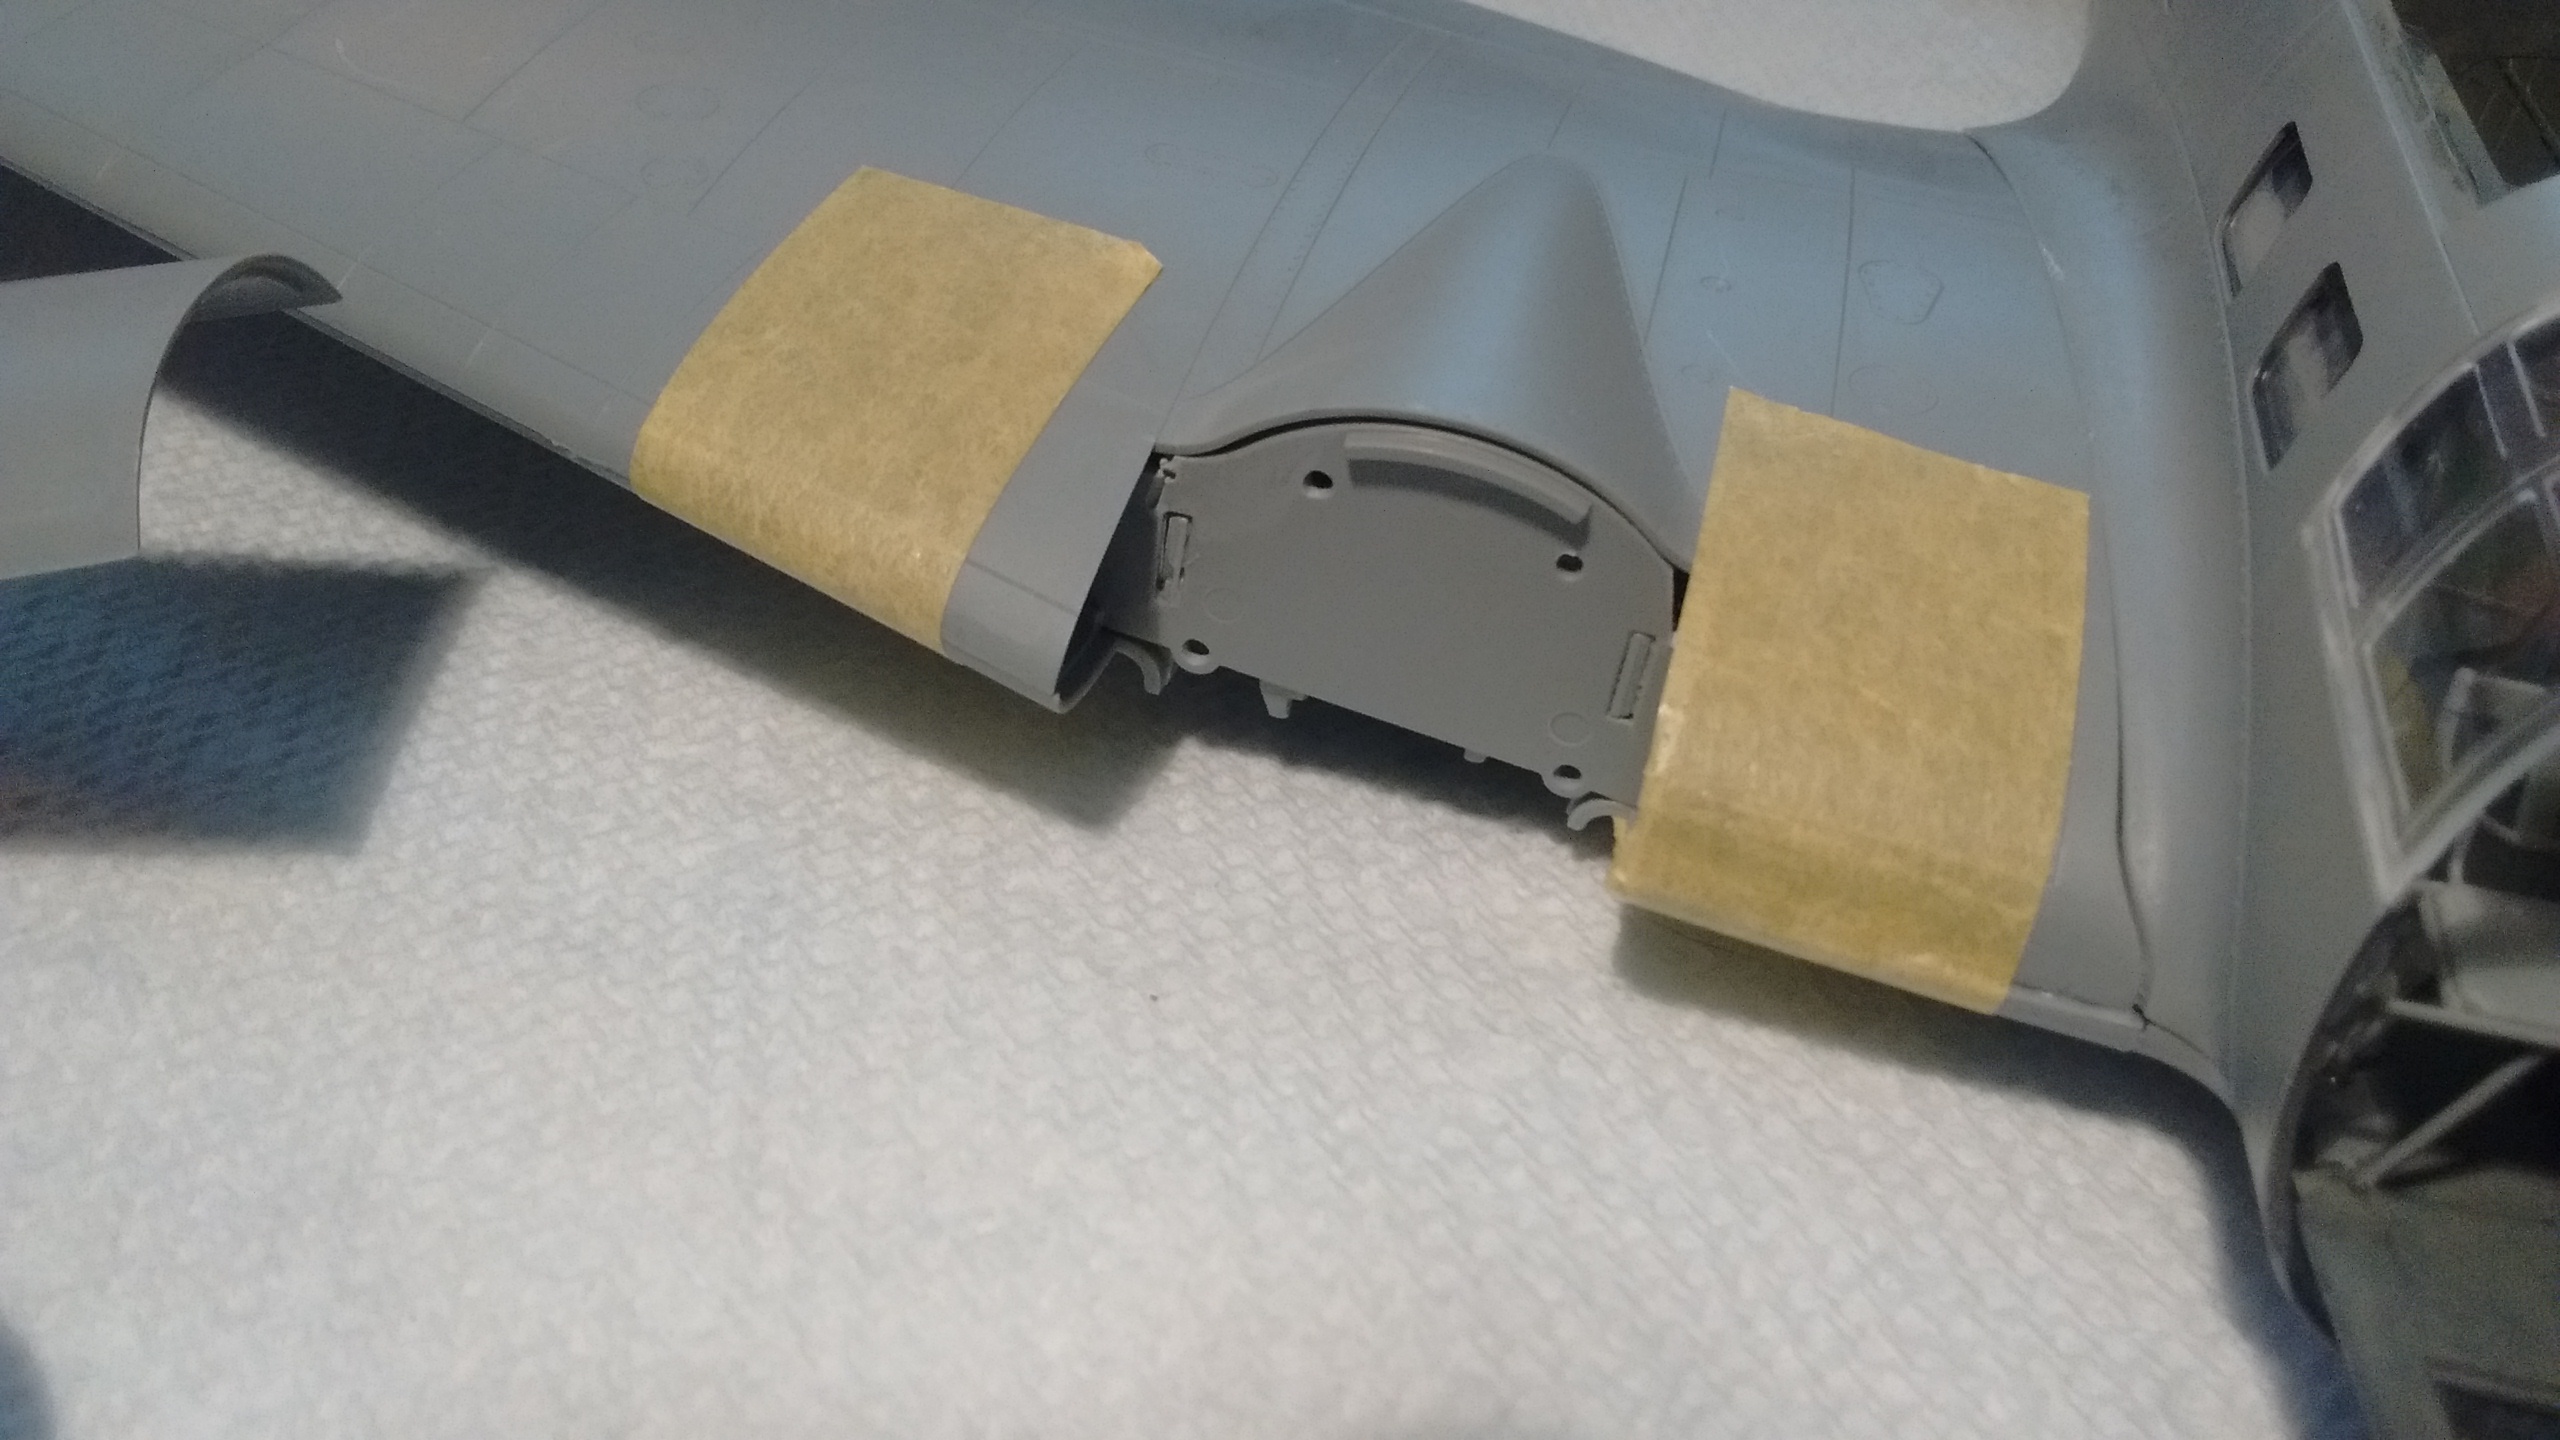
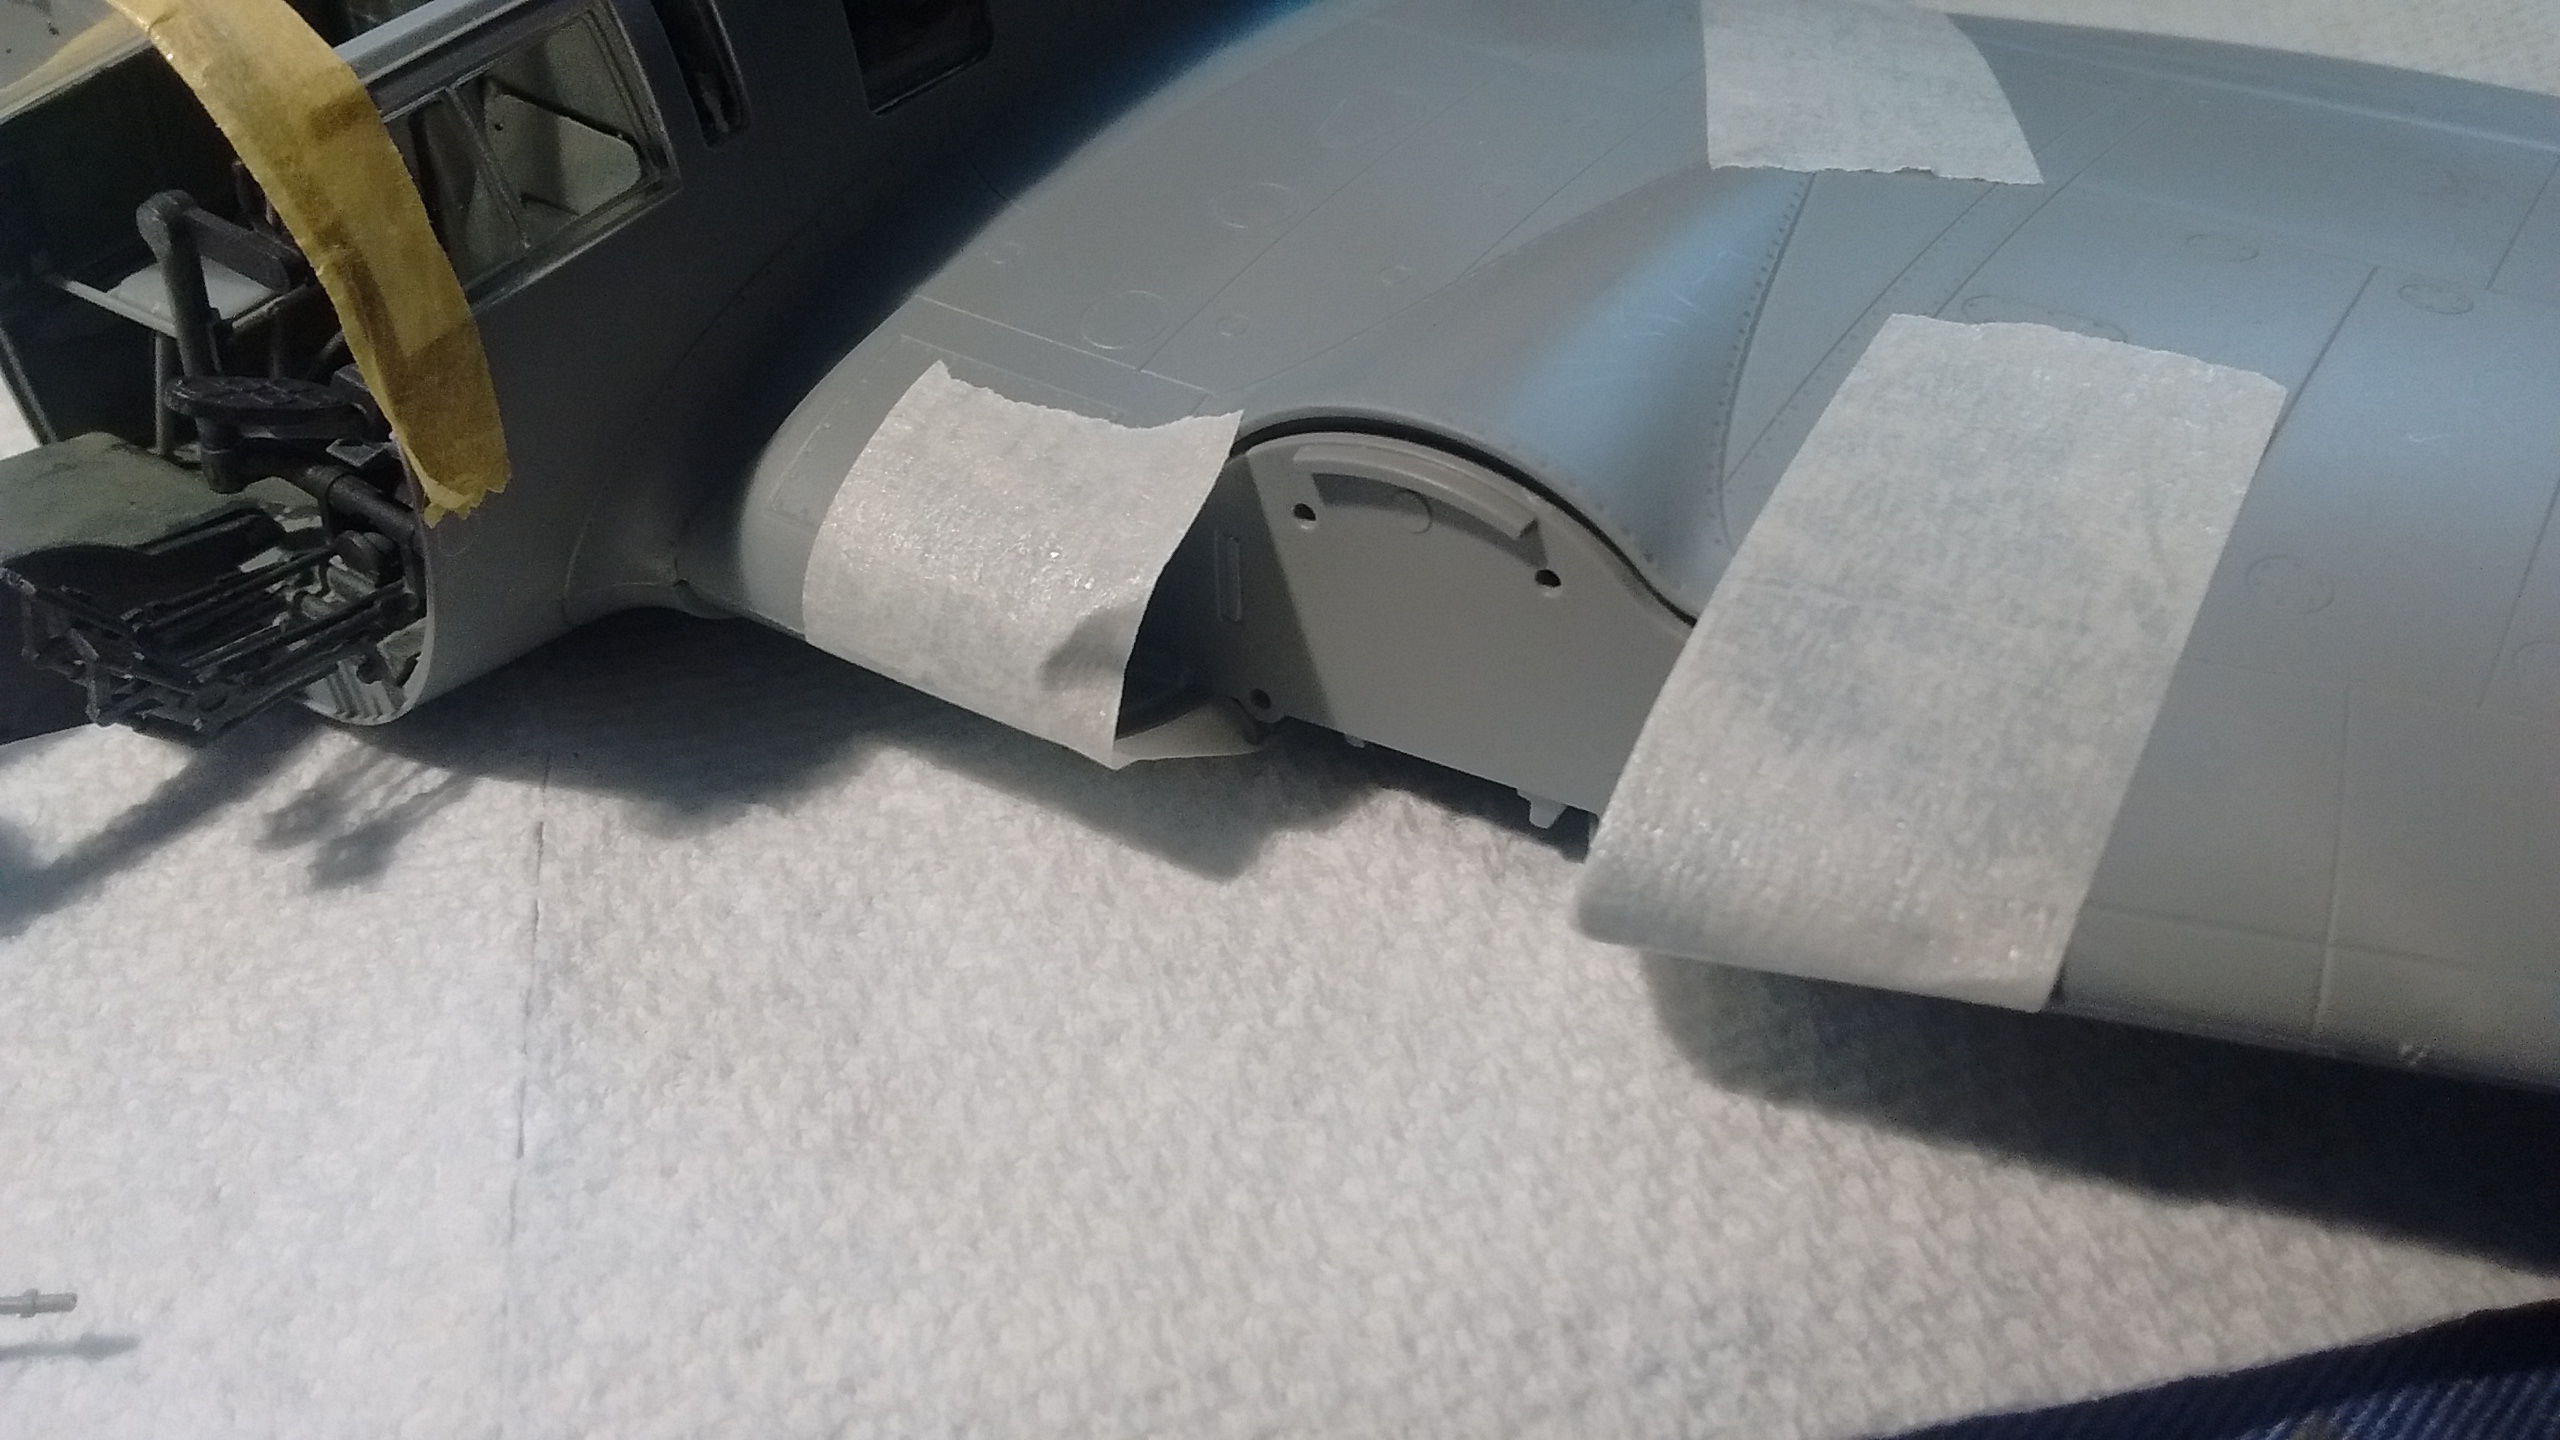
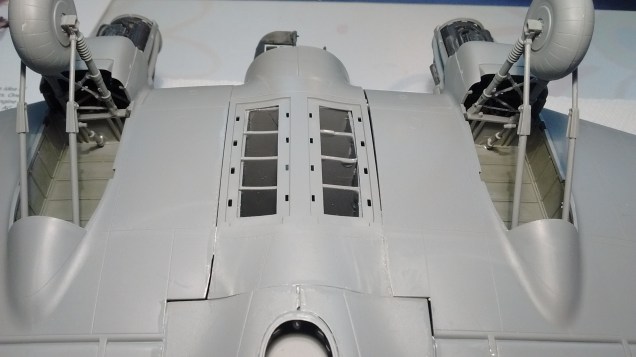
I glued more of the wings this morning.
Work still has to be done on the the wings before the engines are added. Also I have to decide if I will expose them in plain view.
All the clear parts will be added probably in December maybe even later in the spring when I can use my airbrush outside.
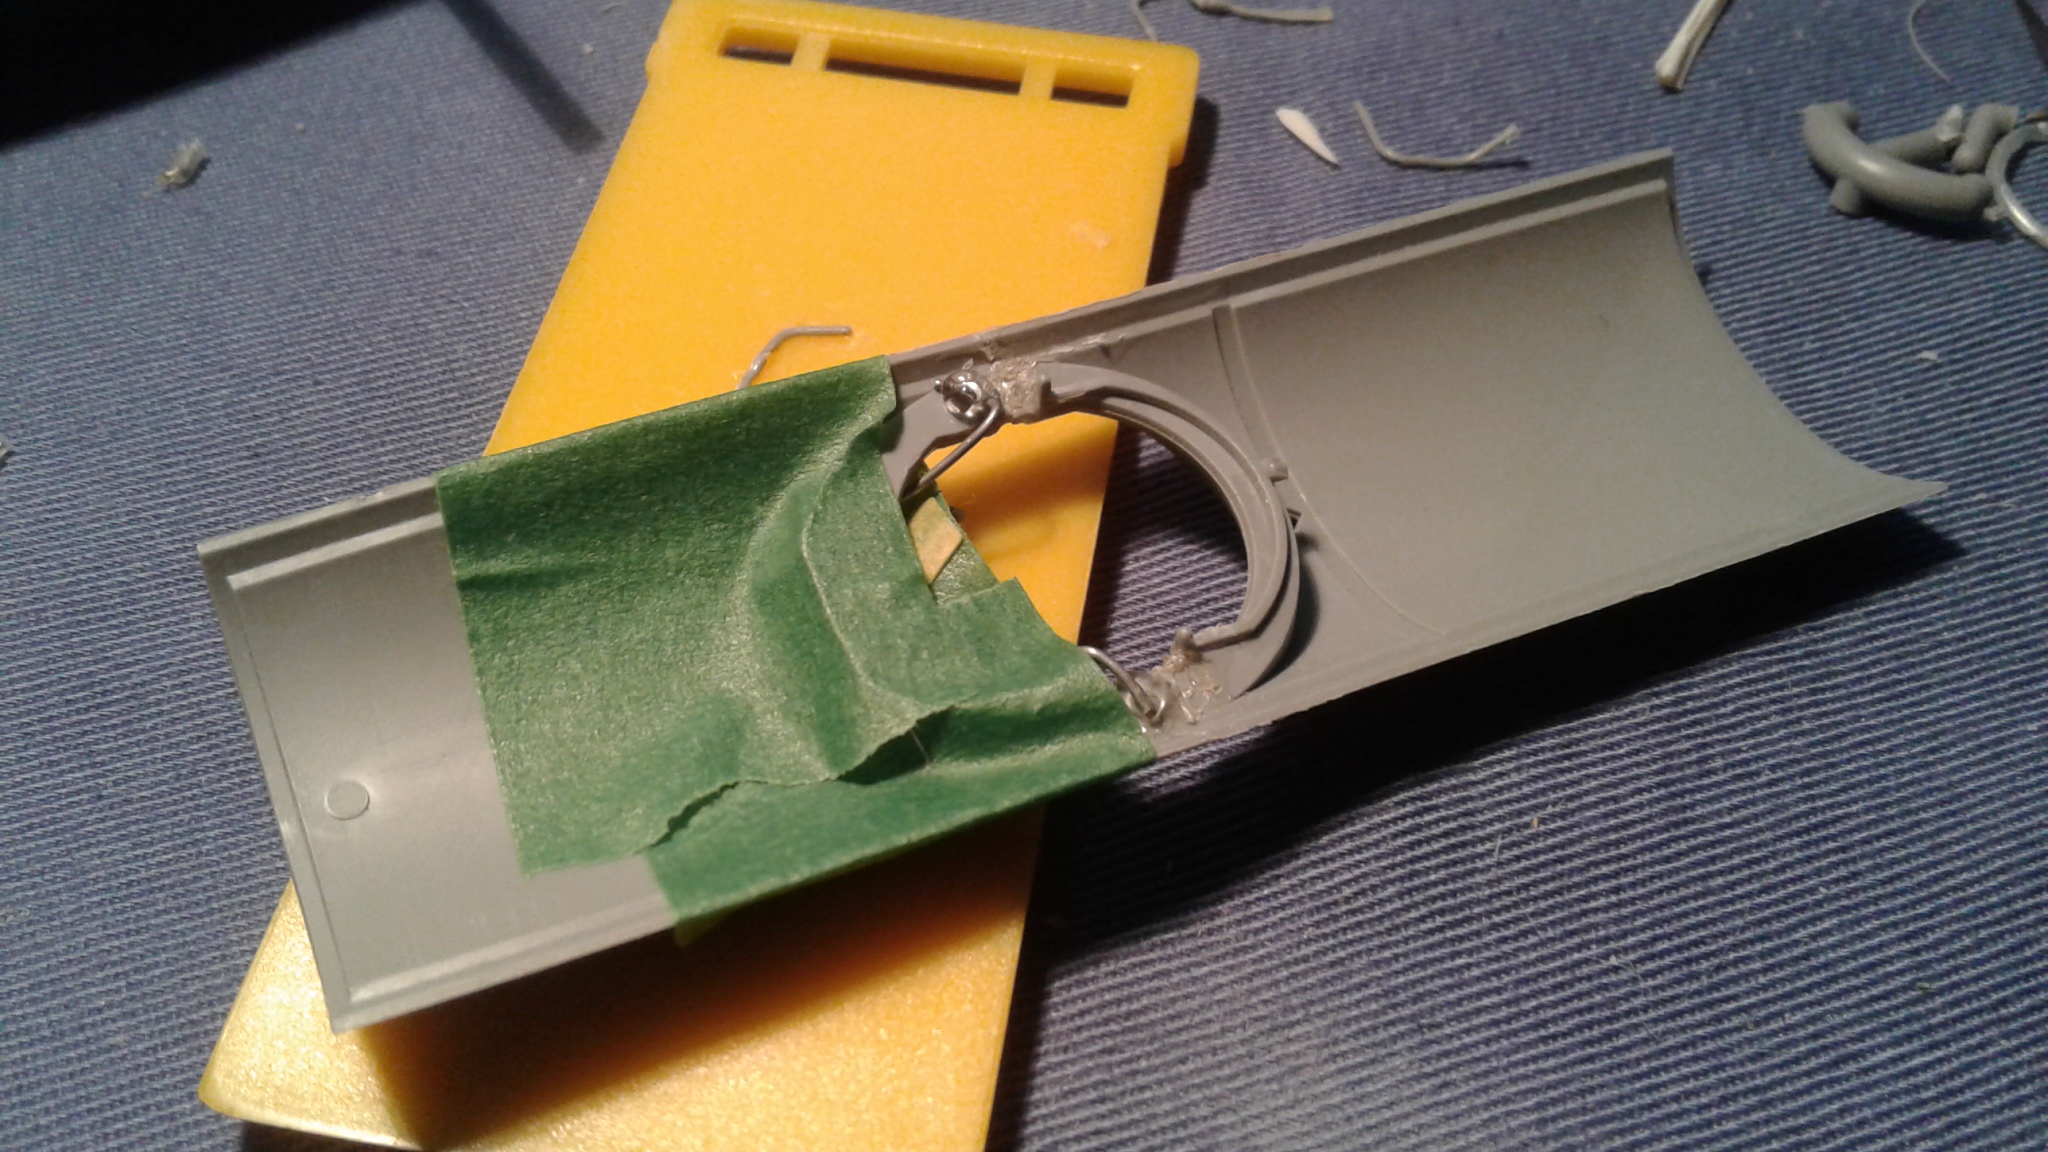
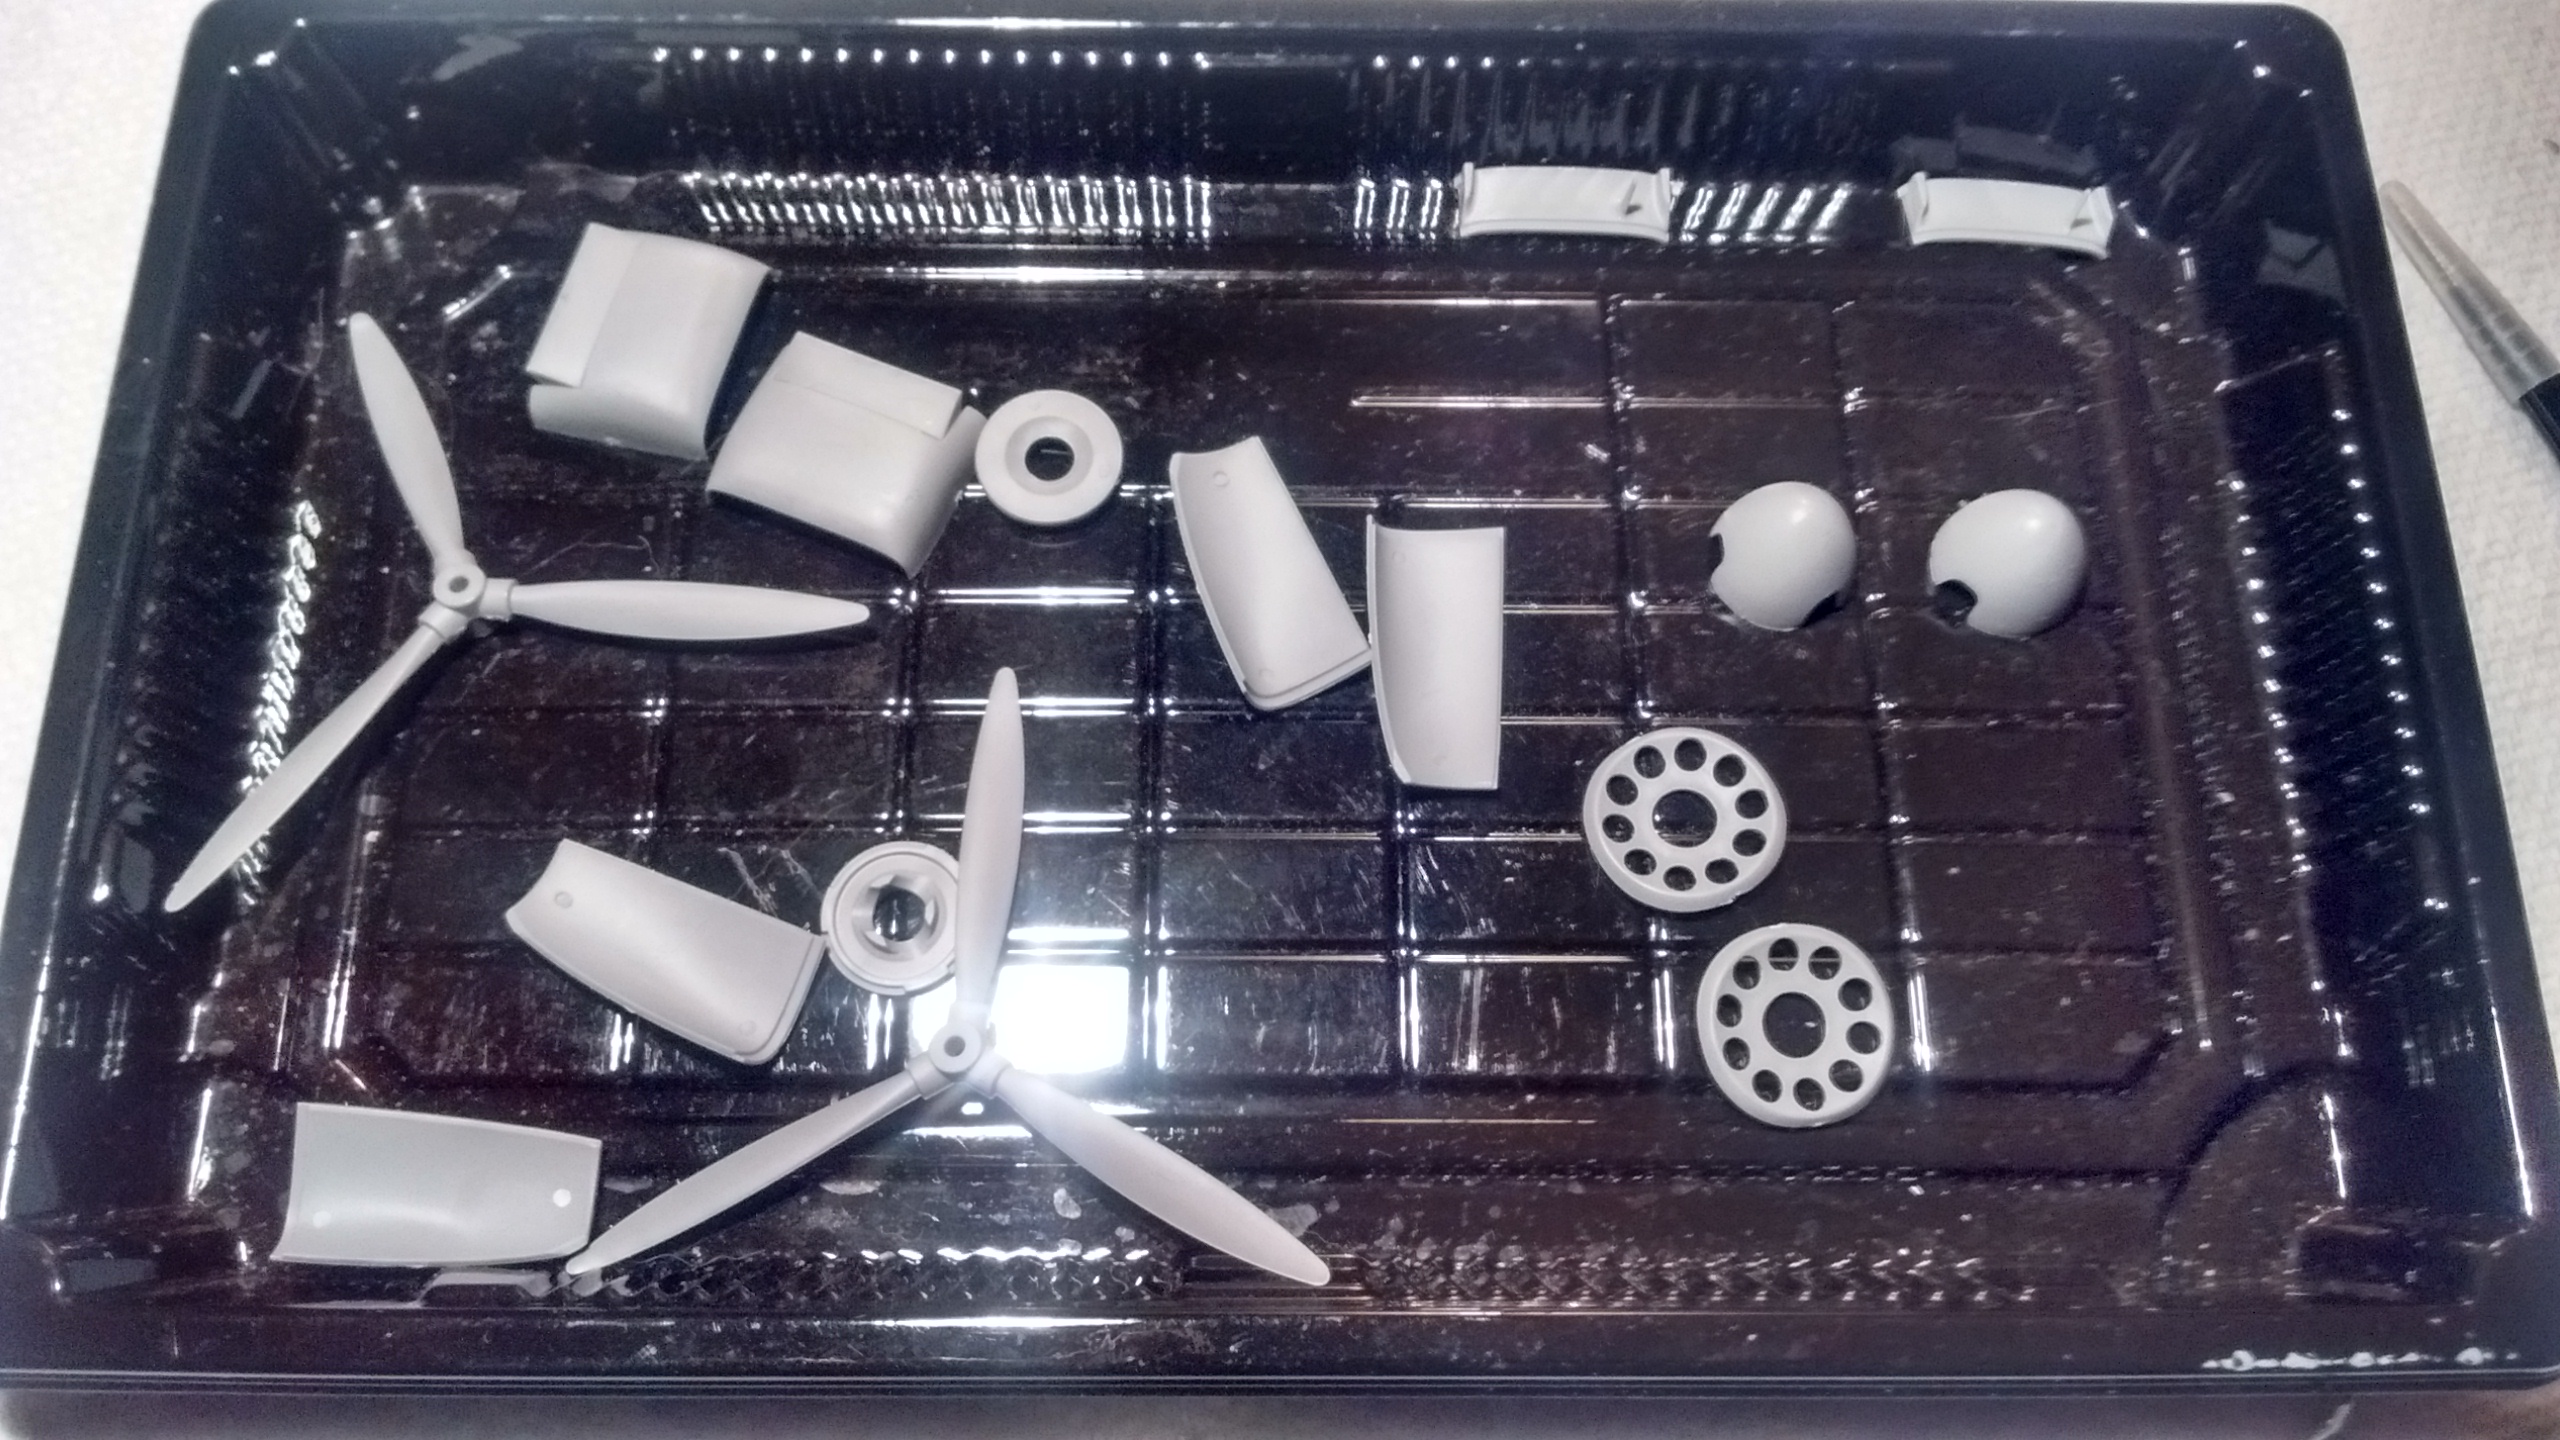
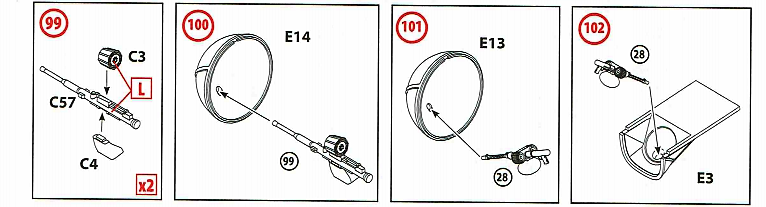
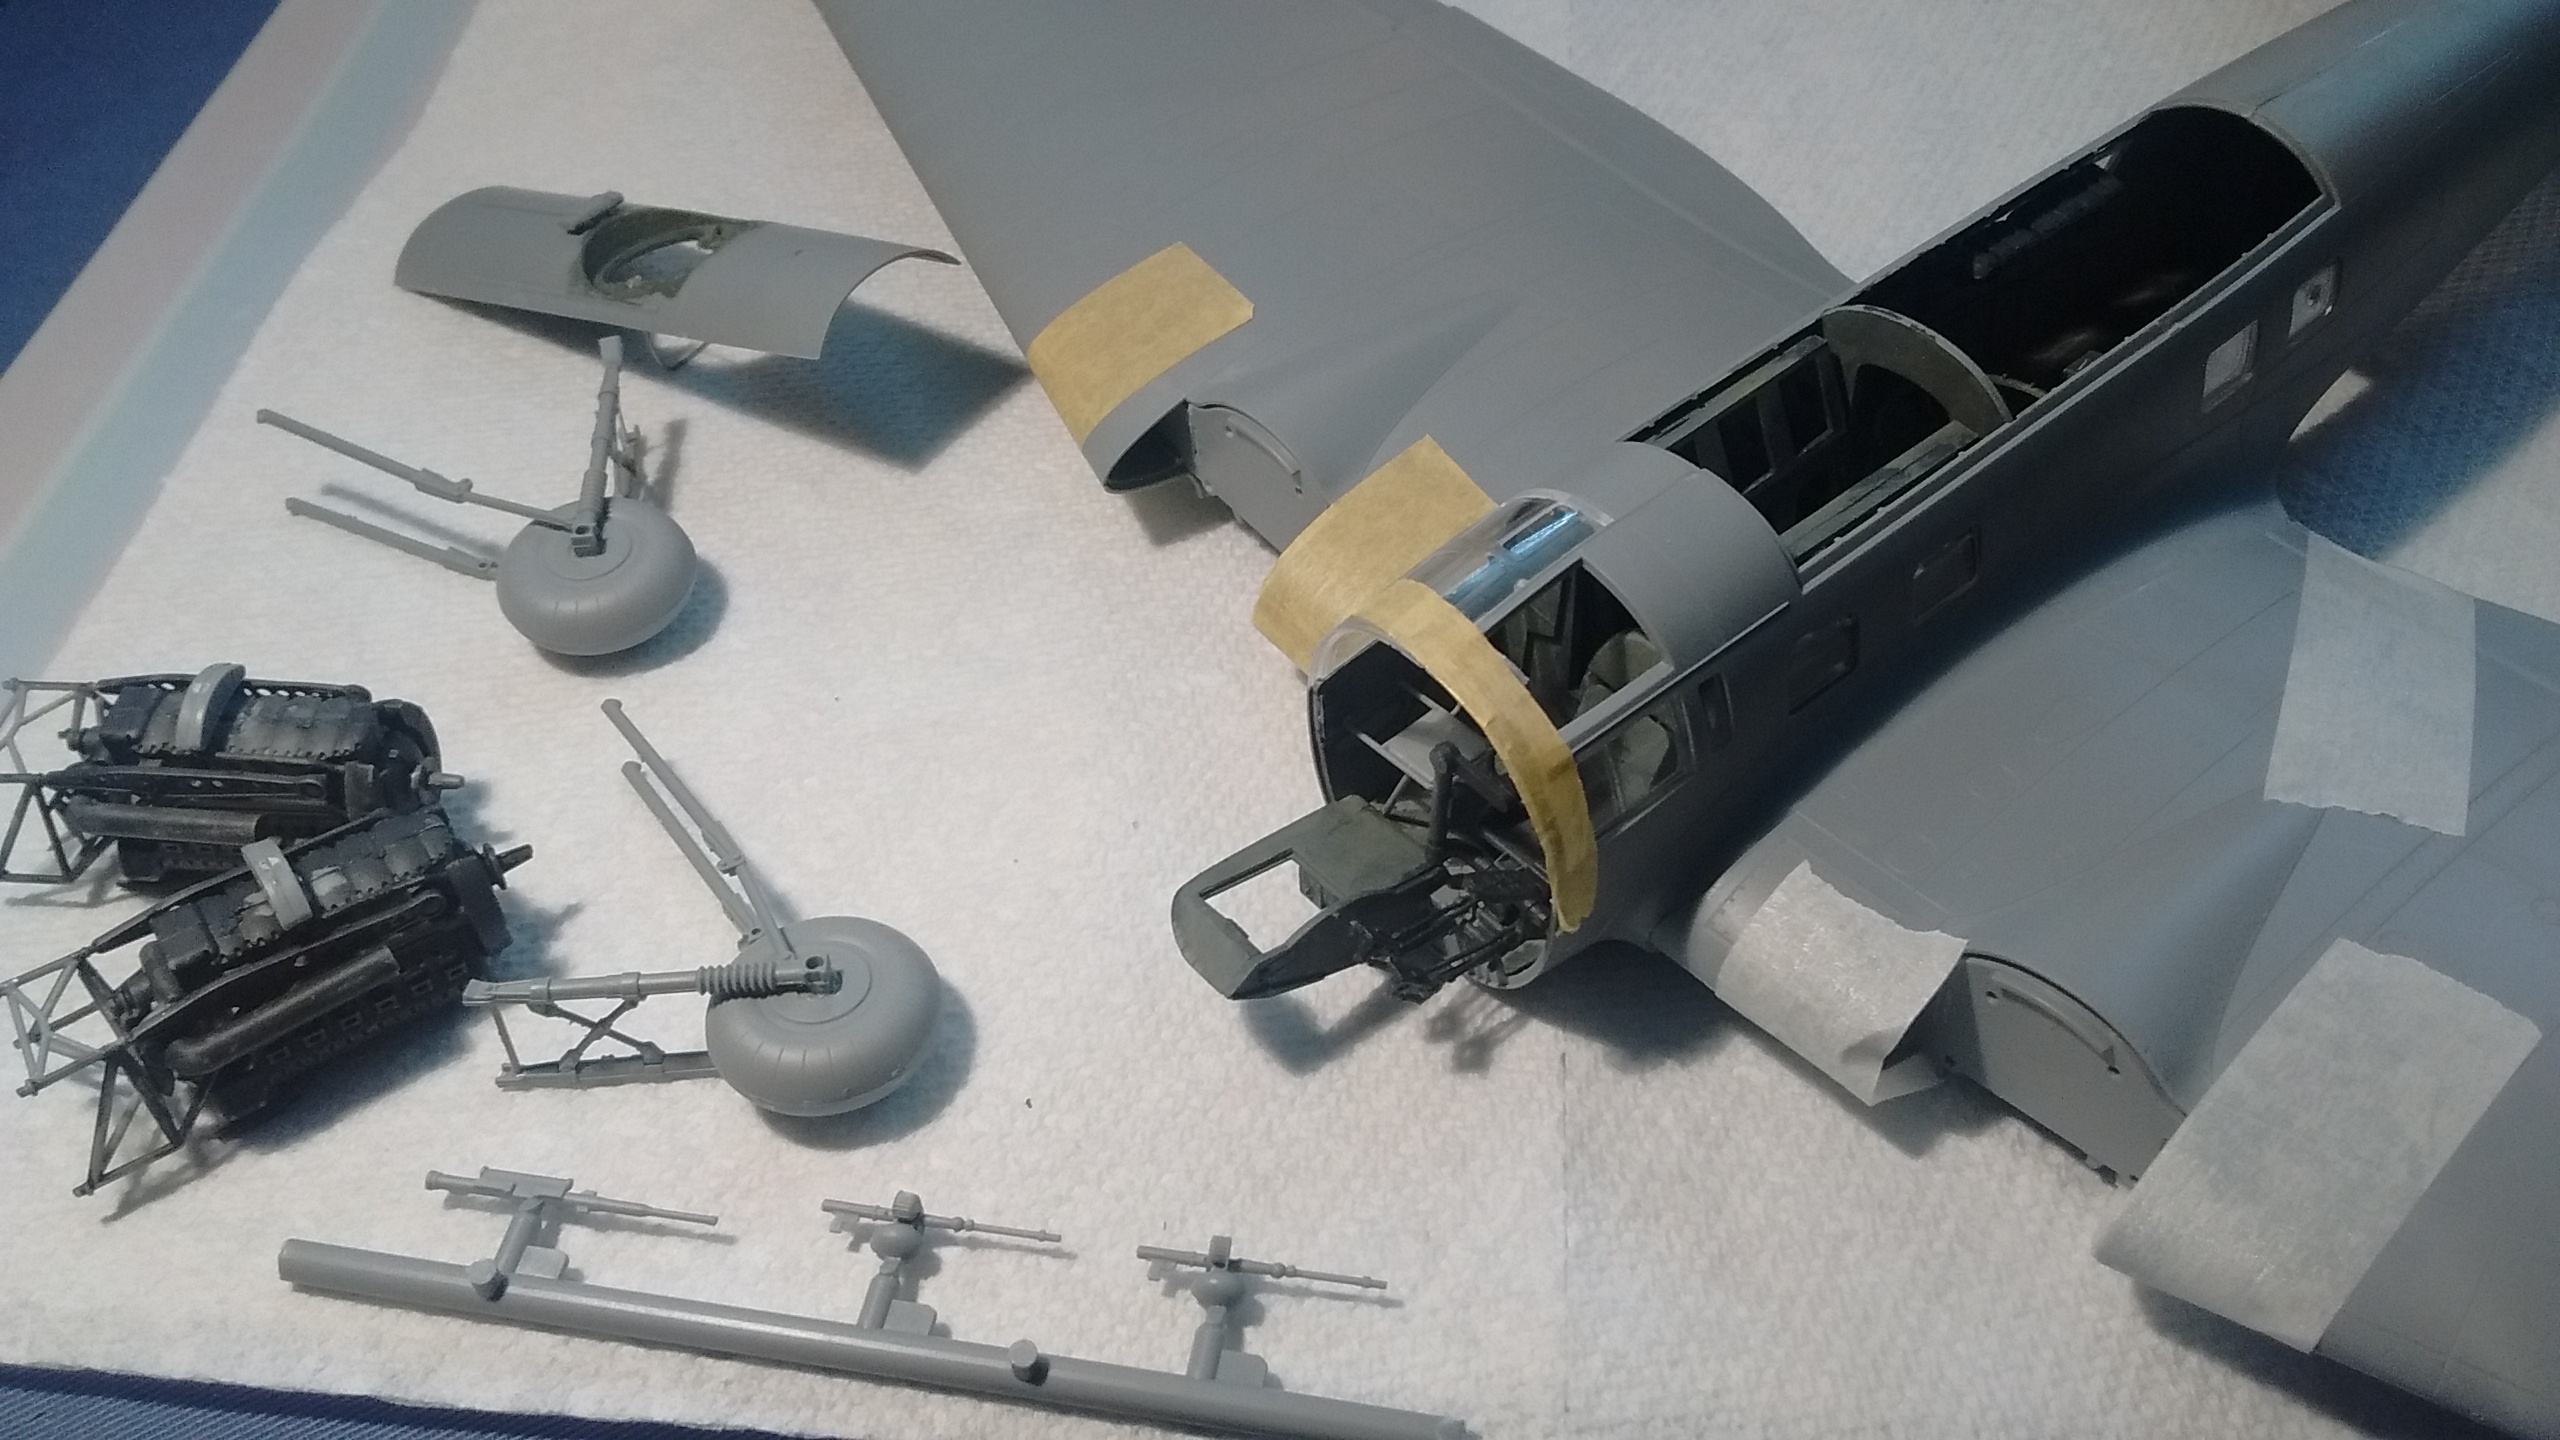
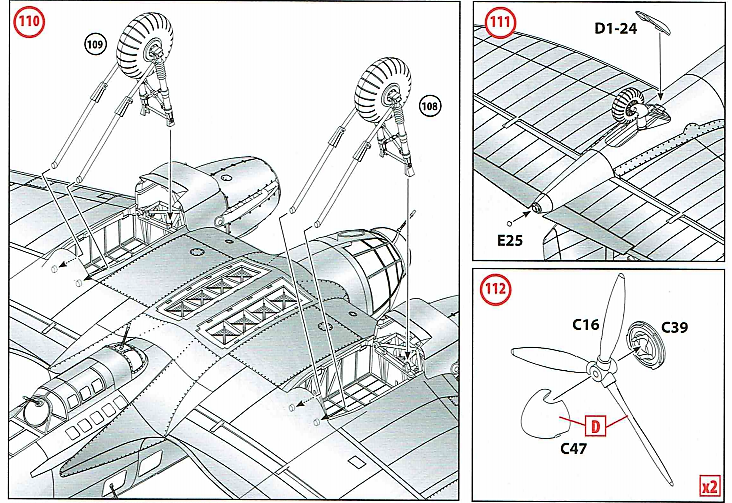
I have assembled the landing struts and the wheels.
If you look closely you will see I have fashioned a wire to replace one of the parts. Step 110 will be done much later because I don’t want the landing gear in the way.
Step 111 has been done.
Tomorrow I will glue the engines and we’ll see what happens.


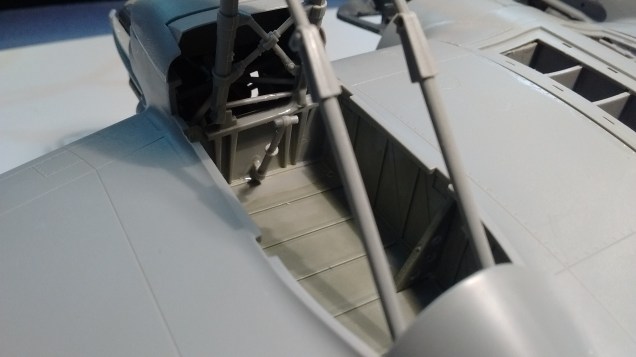


 The next steps seemed challenging enough to dry fit the parts first.
 That’s where I saw problems aligning each part and gluing everything. After careful consideration I glued just one part making sure it was aligned perfectly to the front of the plane.
It was time to call it a day…
That’s where I saw problems aligning each part and gluing everything. After careful consideration I glued just one part making sure it was aligned perfectly to the front of the plane.
It was time to call it a day…