I just read this comment (Wednesday 18 August, 2021, 12h38).
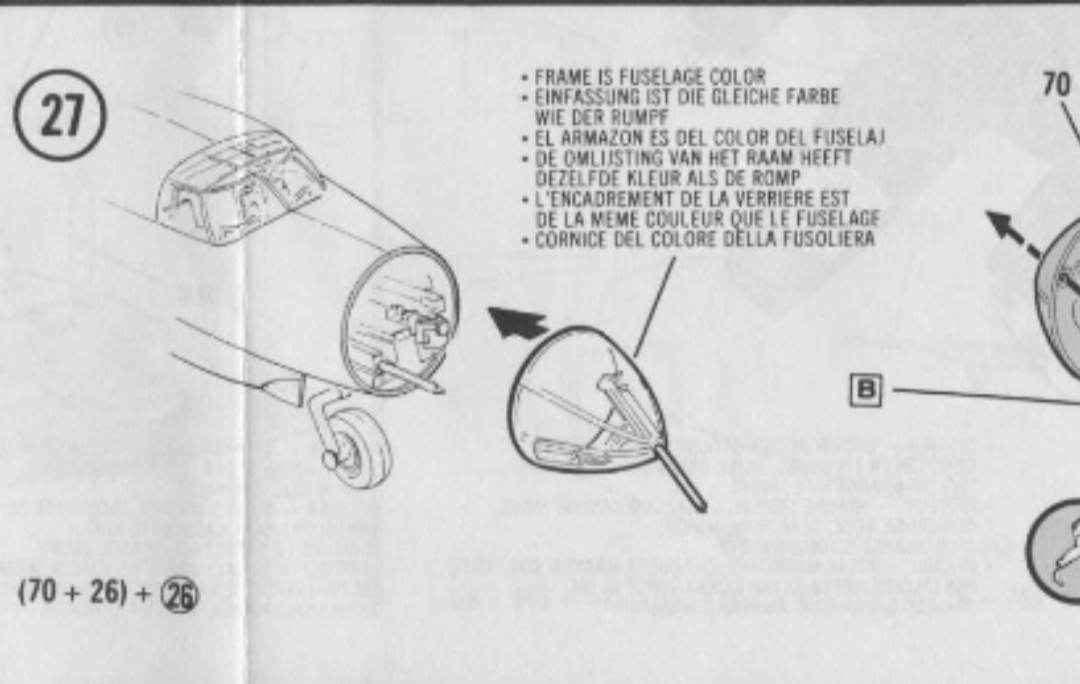
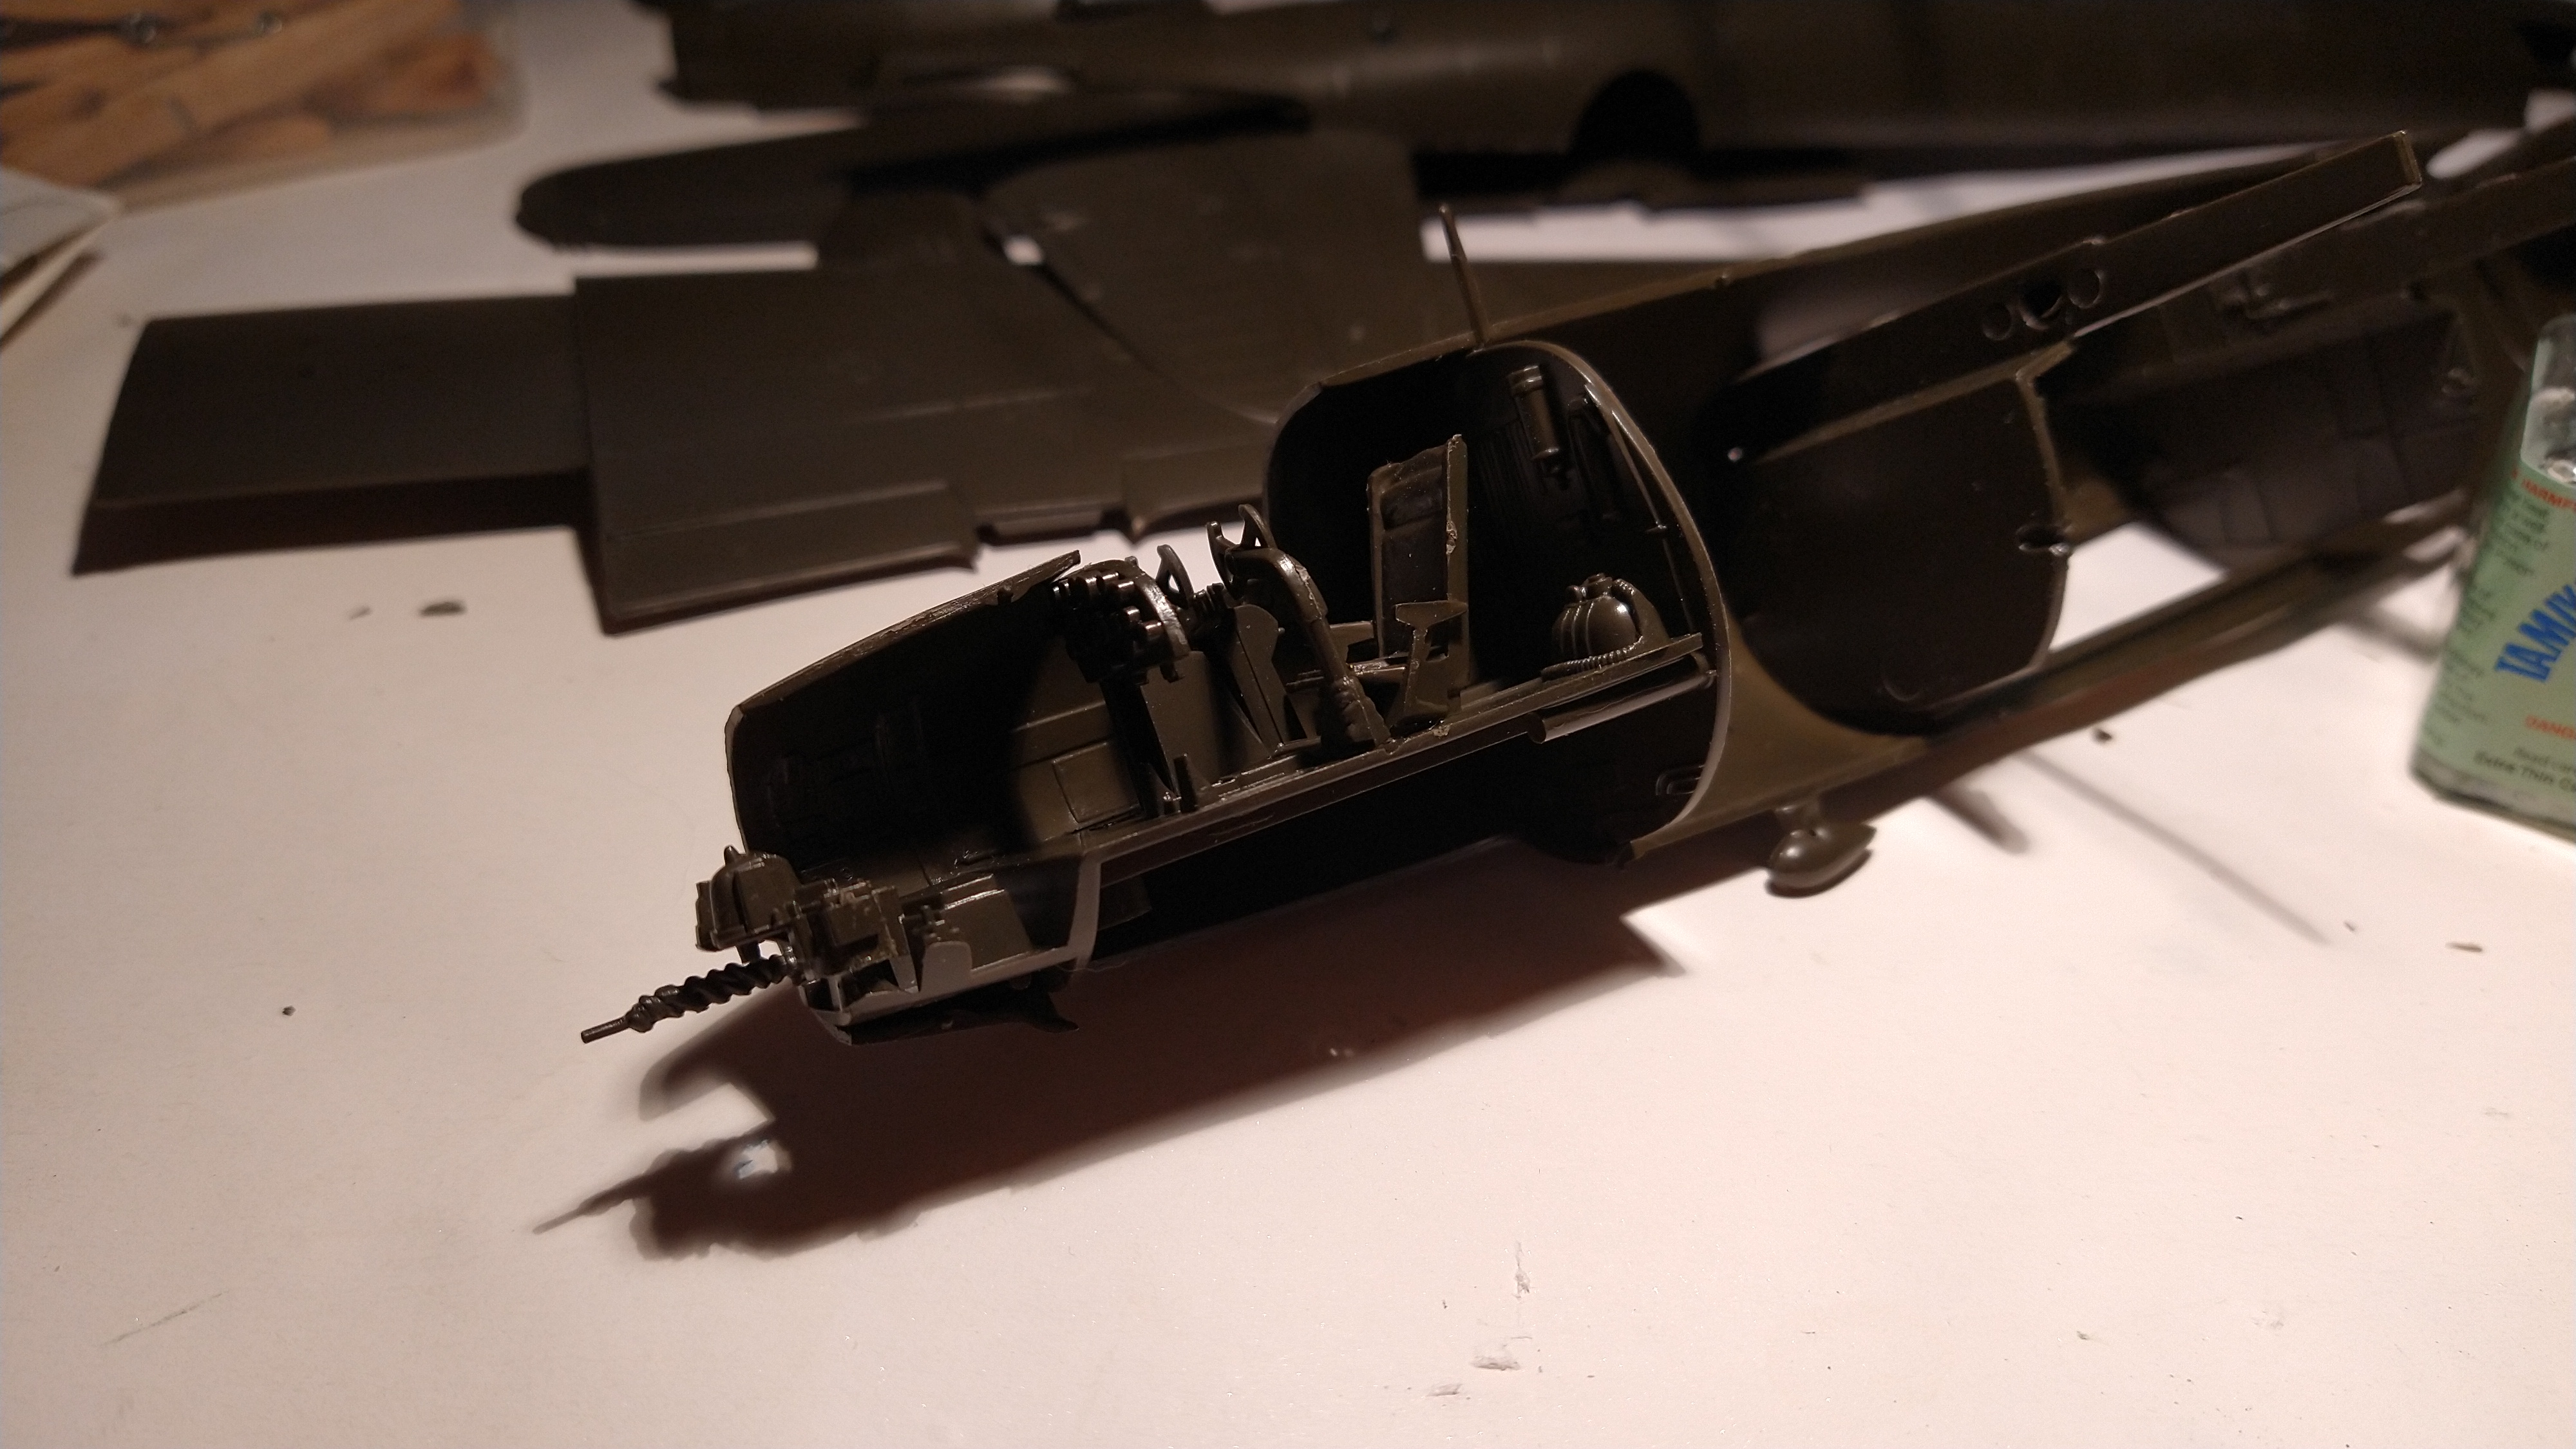
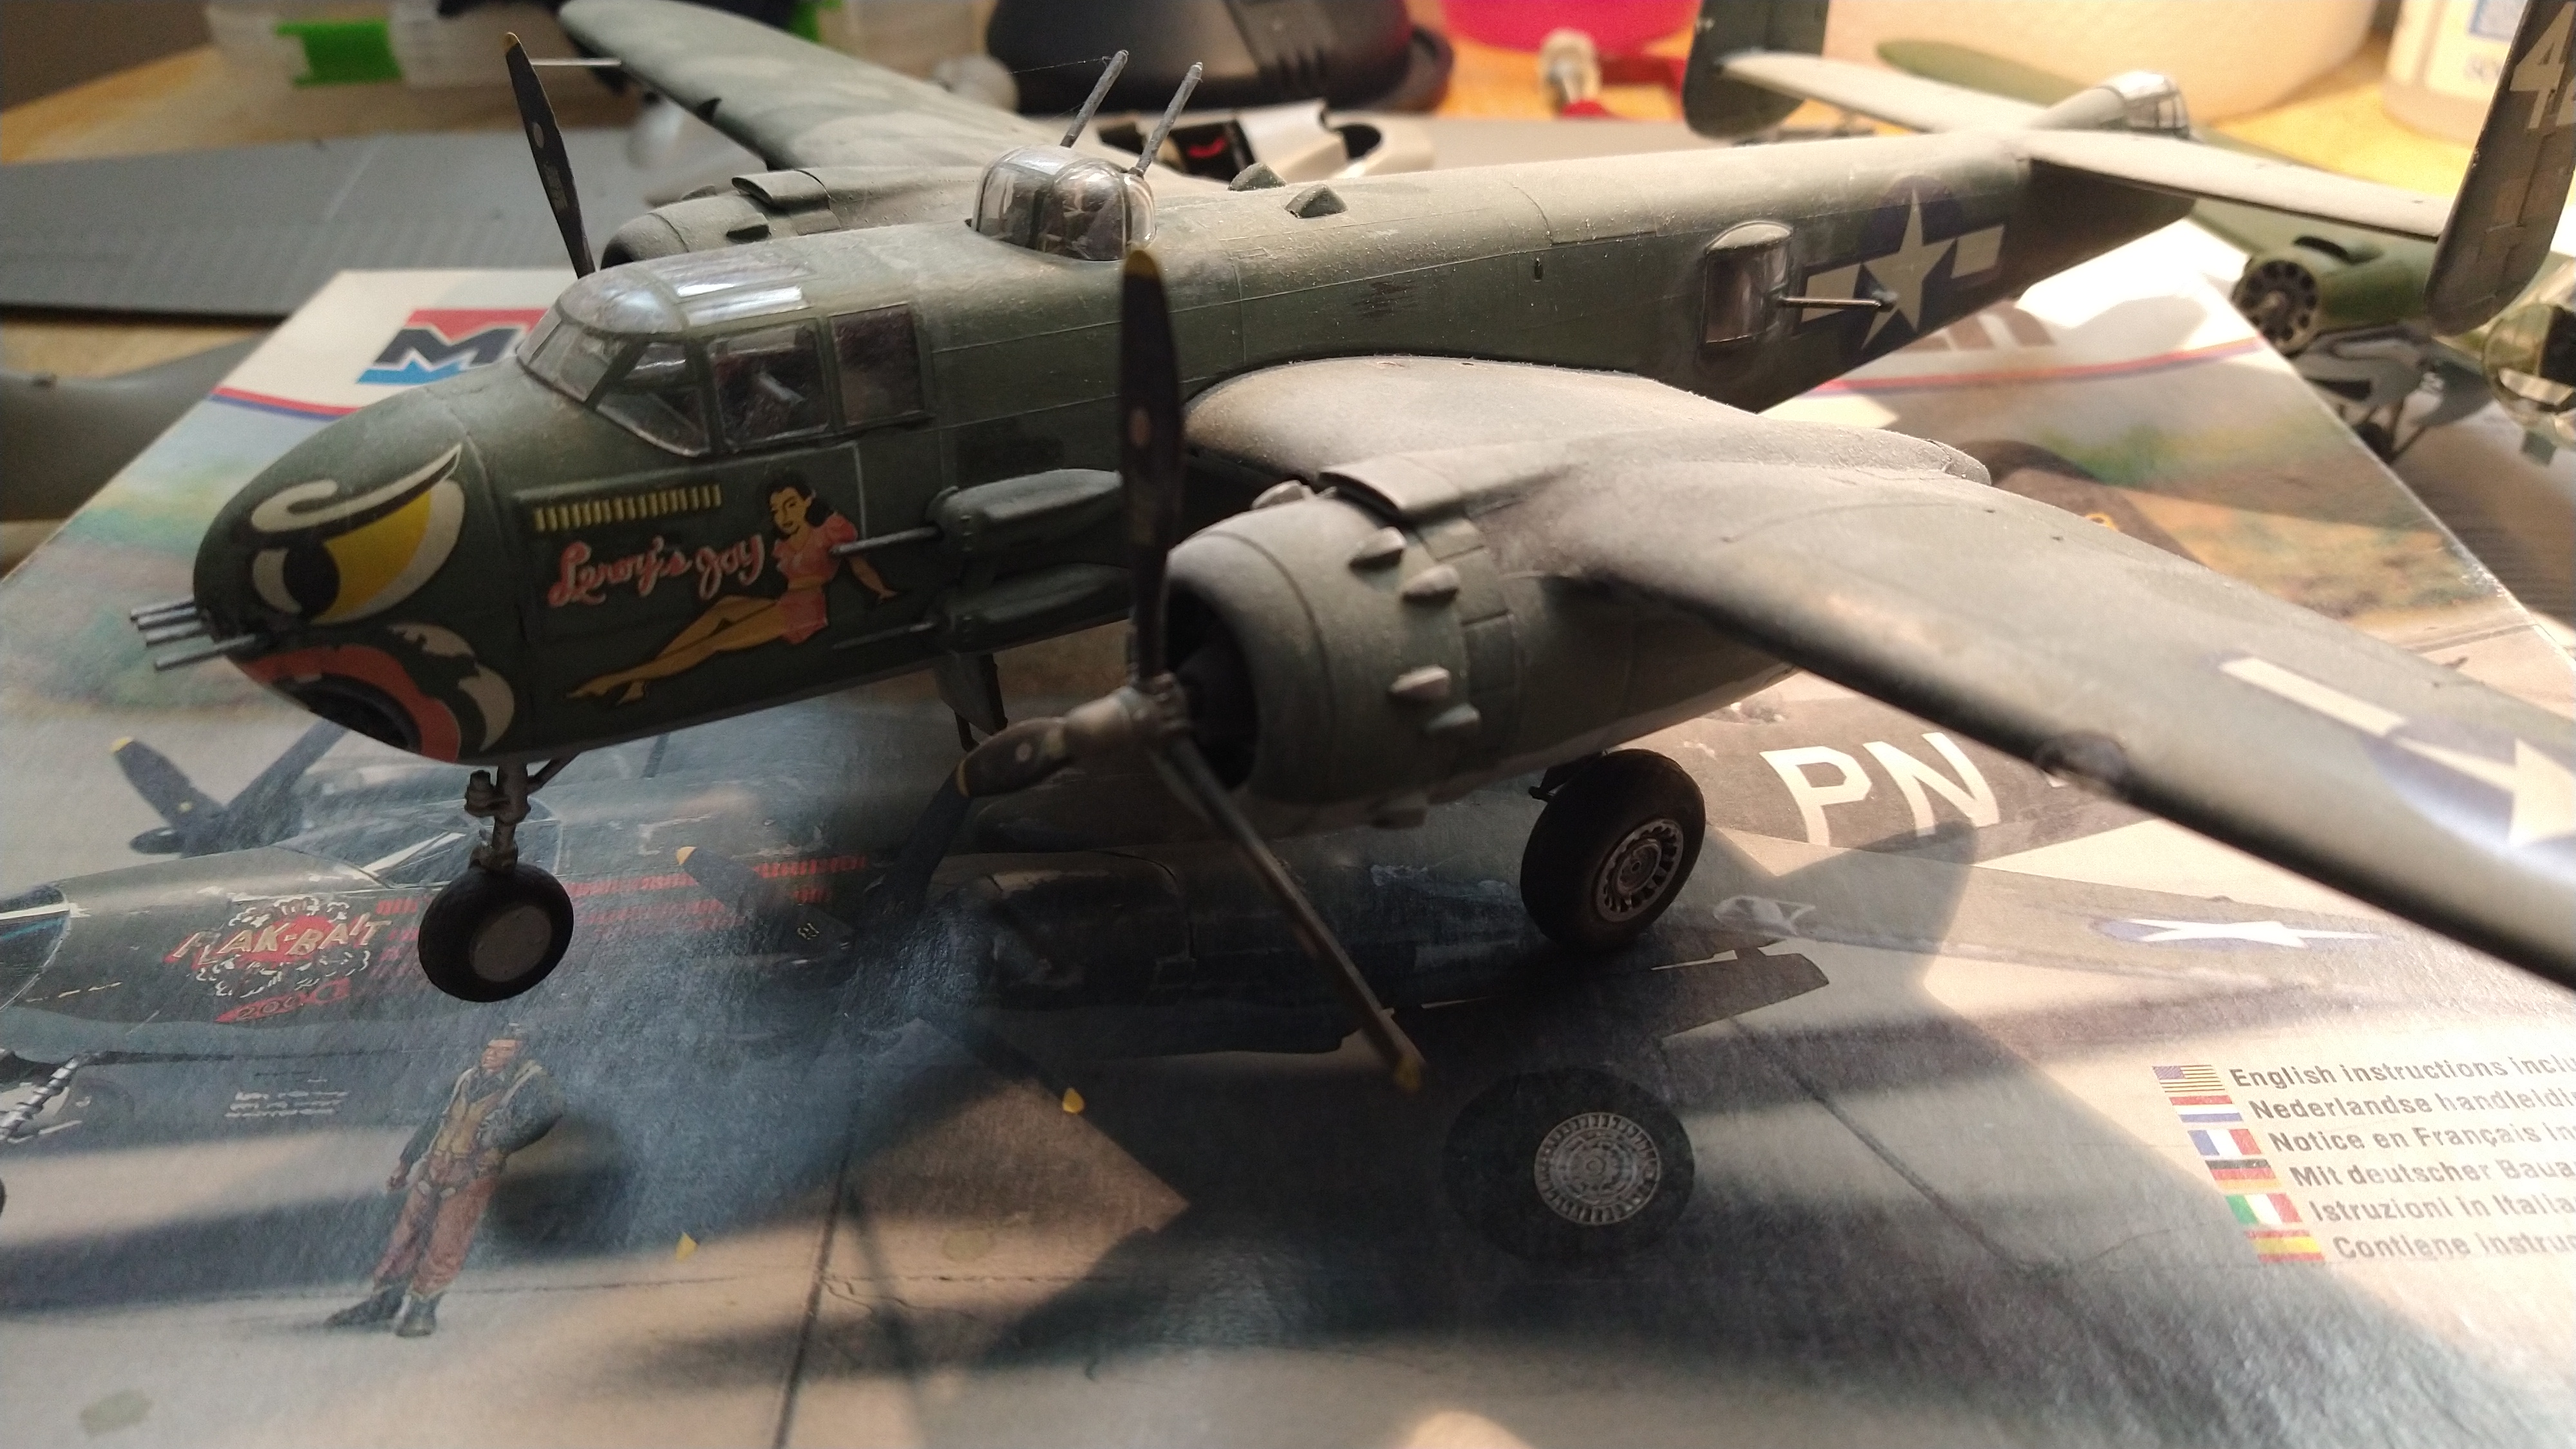
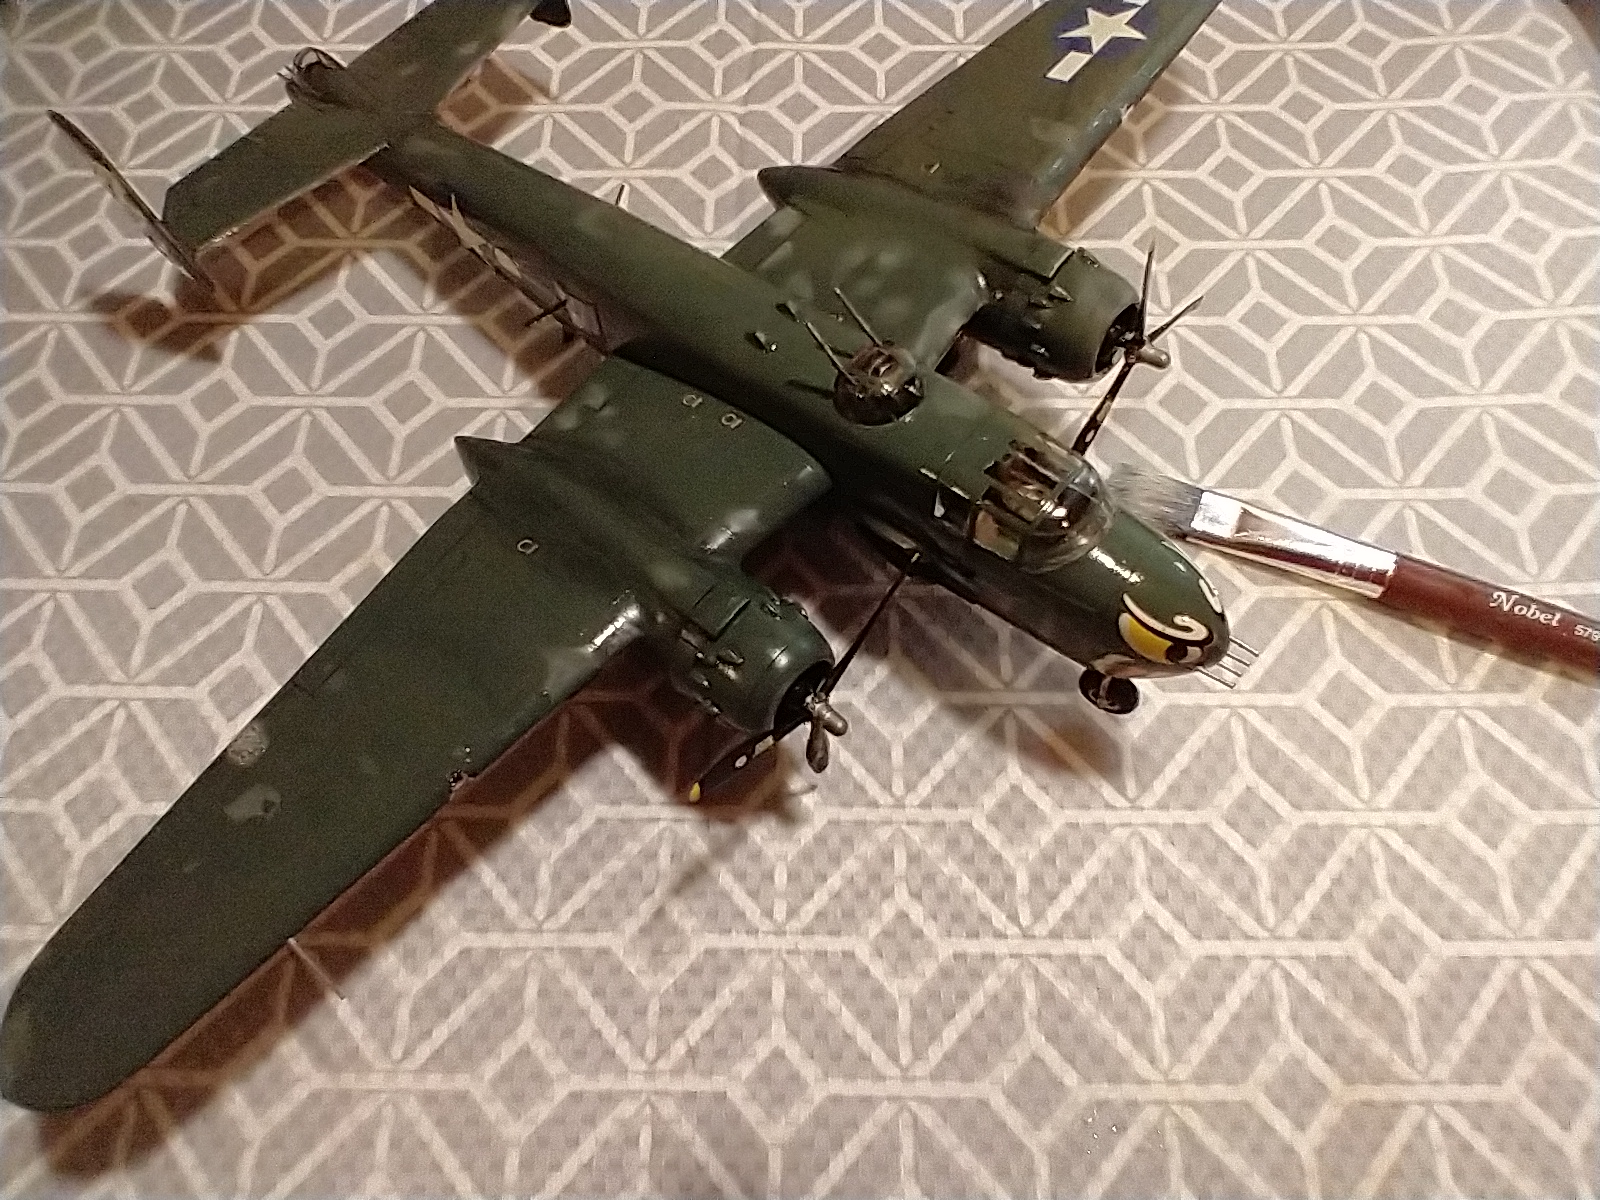
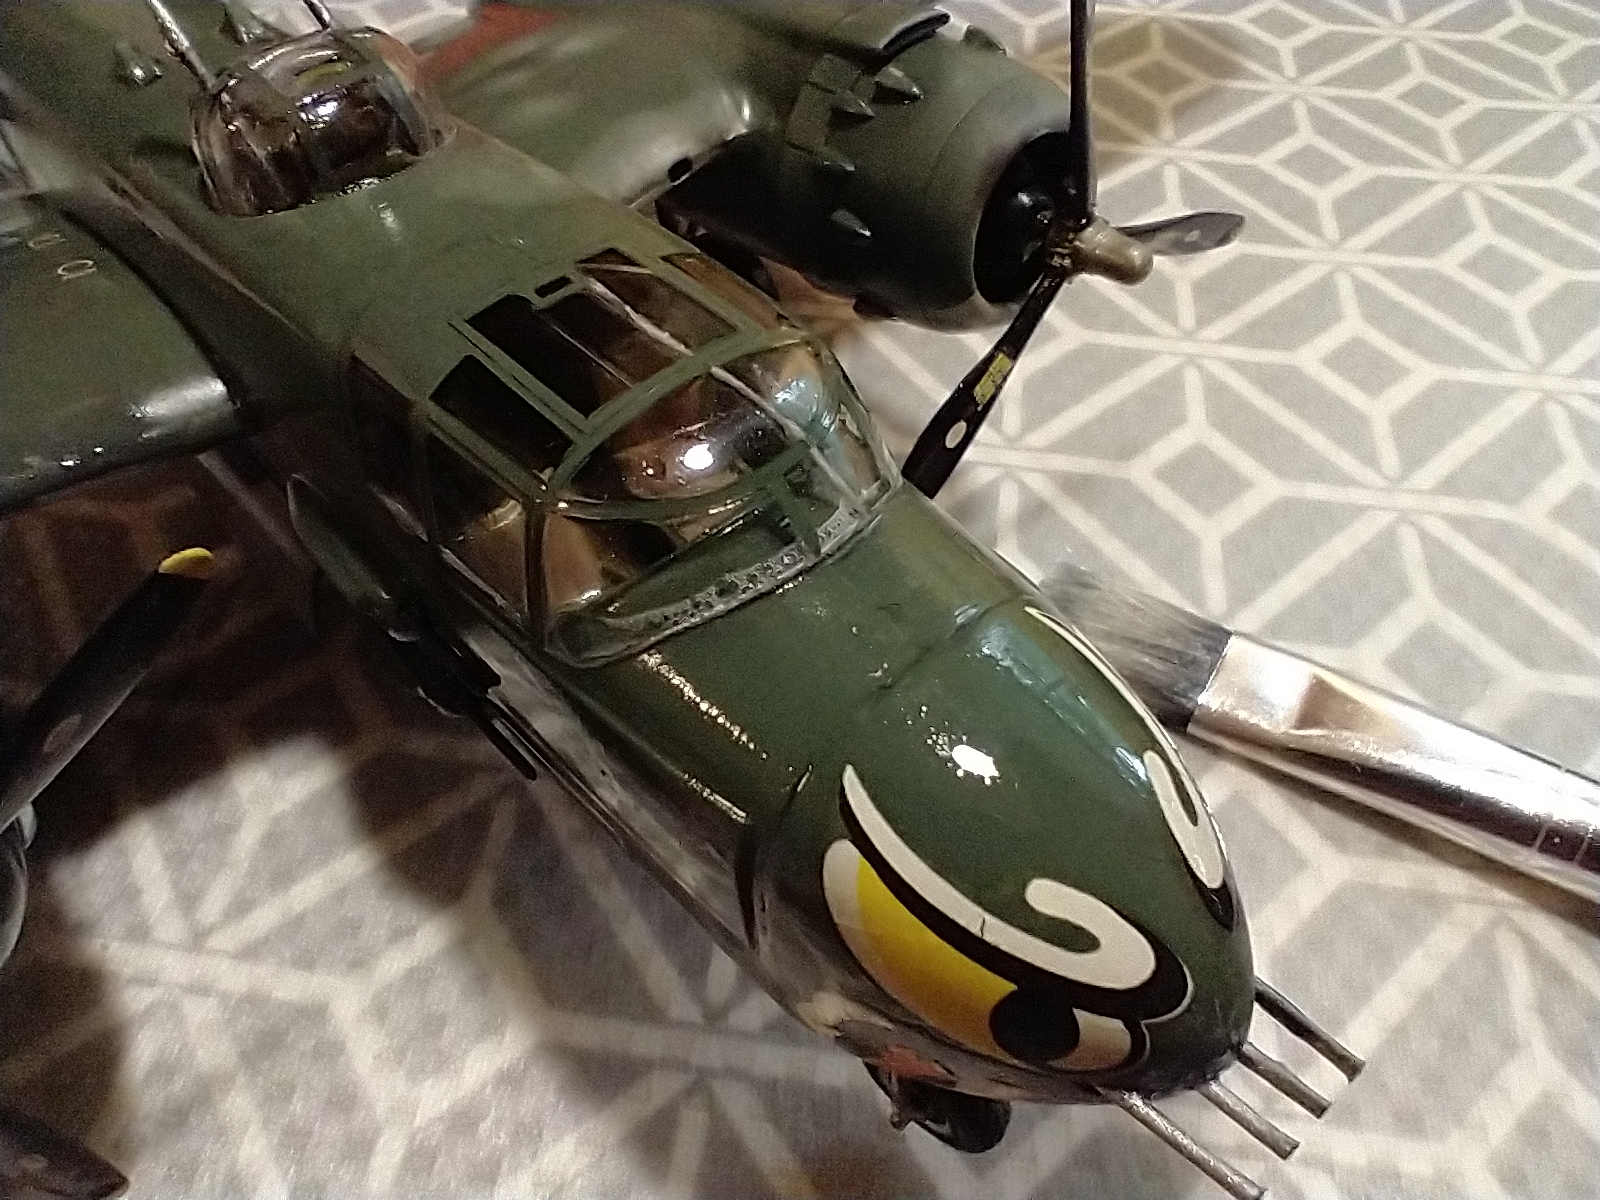
The Marauder isn’t painted “interior green”. It is painted (in the cockpit and nose, and rear gunner’s turret) in Dark Green (Tamiya XF-67 NATO Green will work). The bomb bay is Neutral Gray, and the rear fuselage is unpainted aluminum.
Darn!
I told you My Forgotten Hobby was like a sitcom full of surprises. I always have a draft written one or a few days before I hit the Publish button.
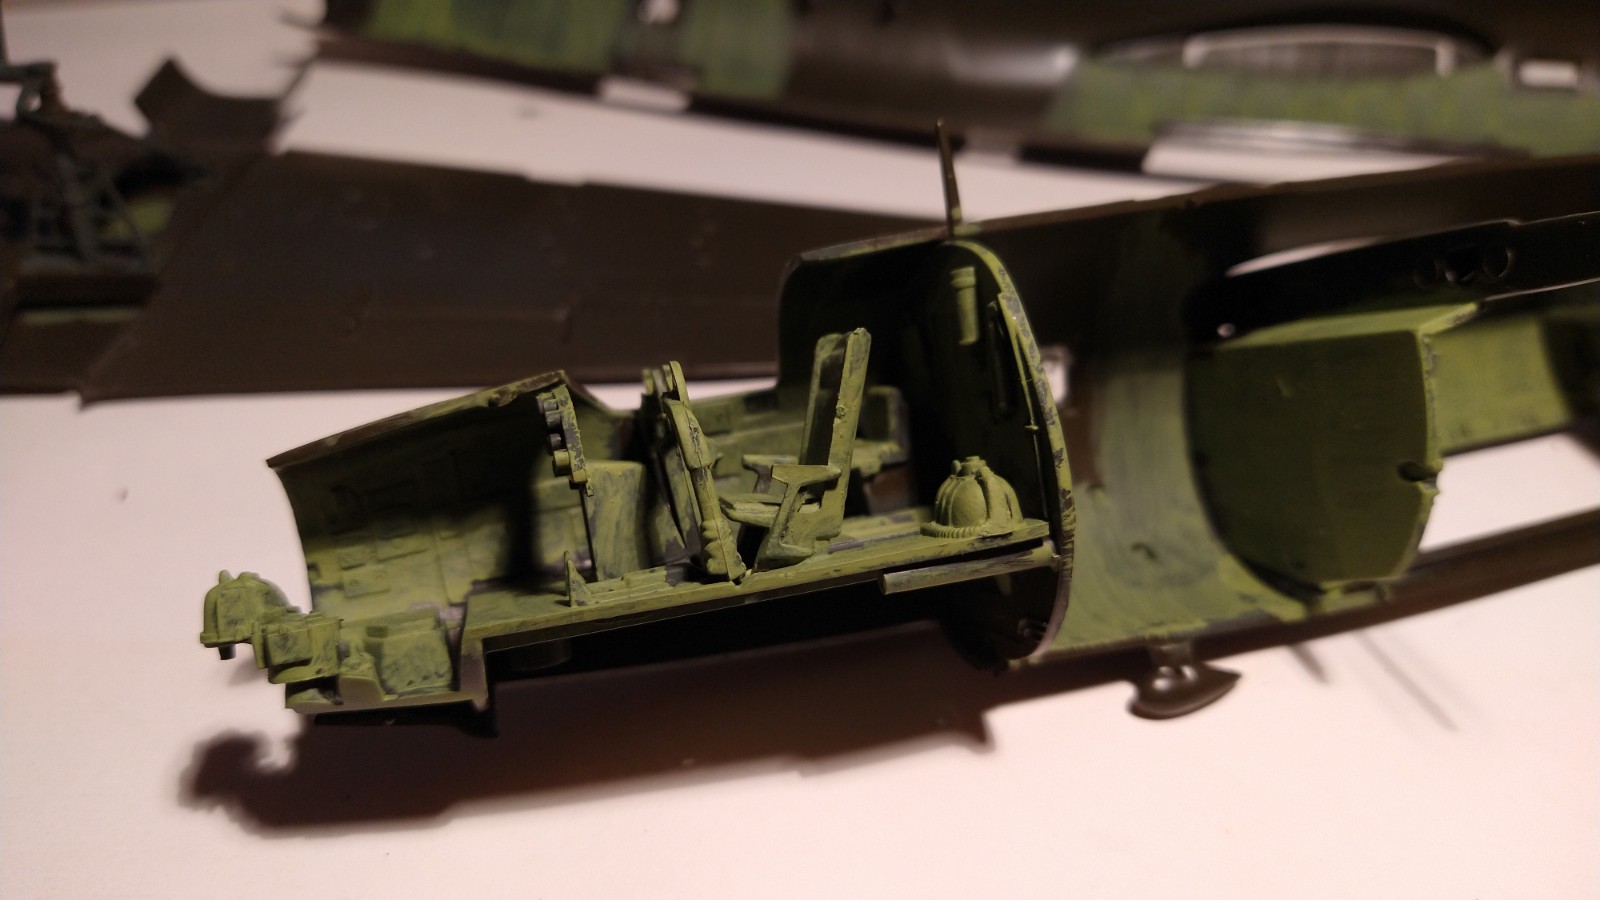
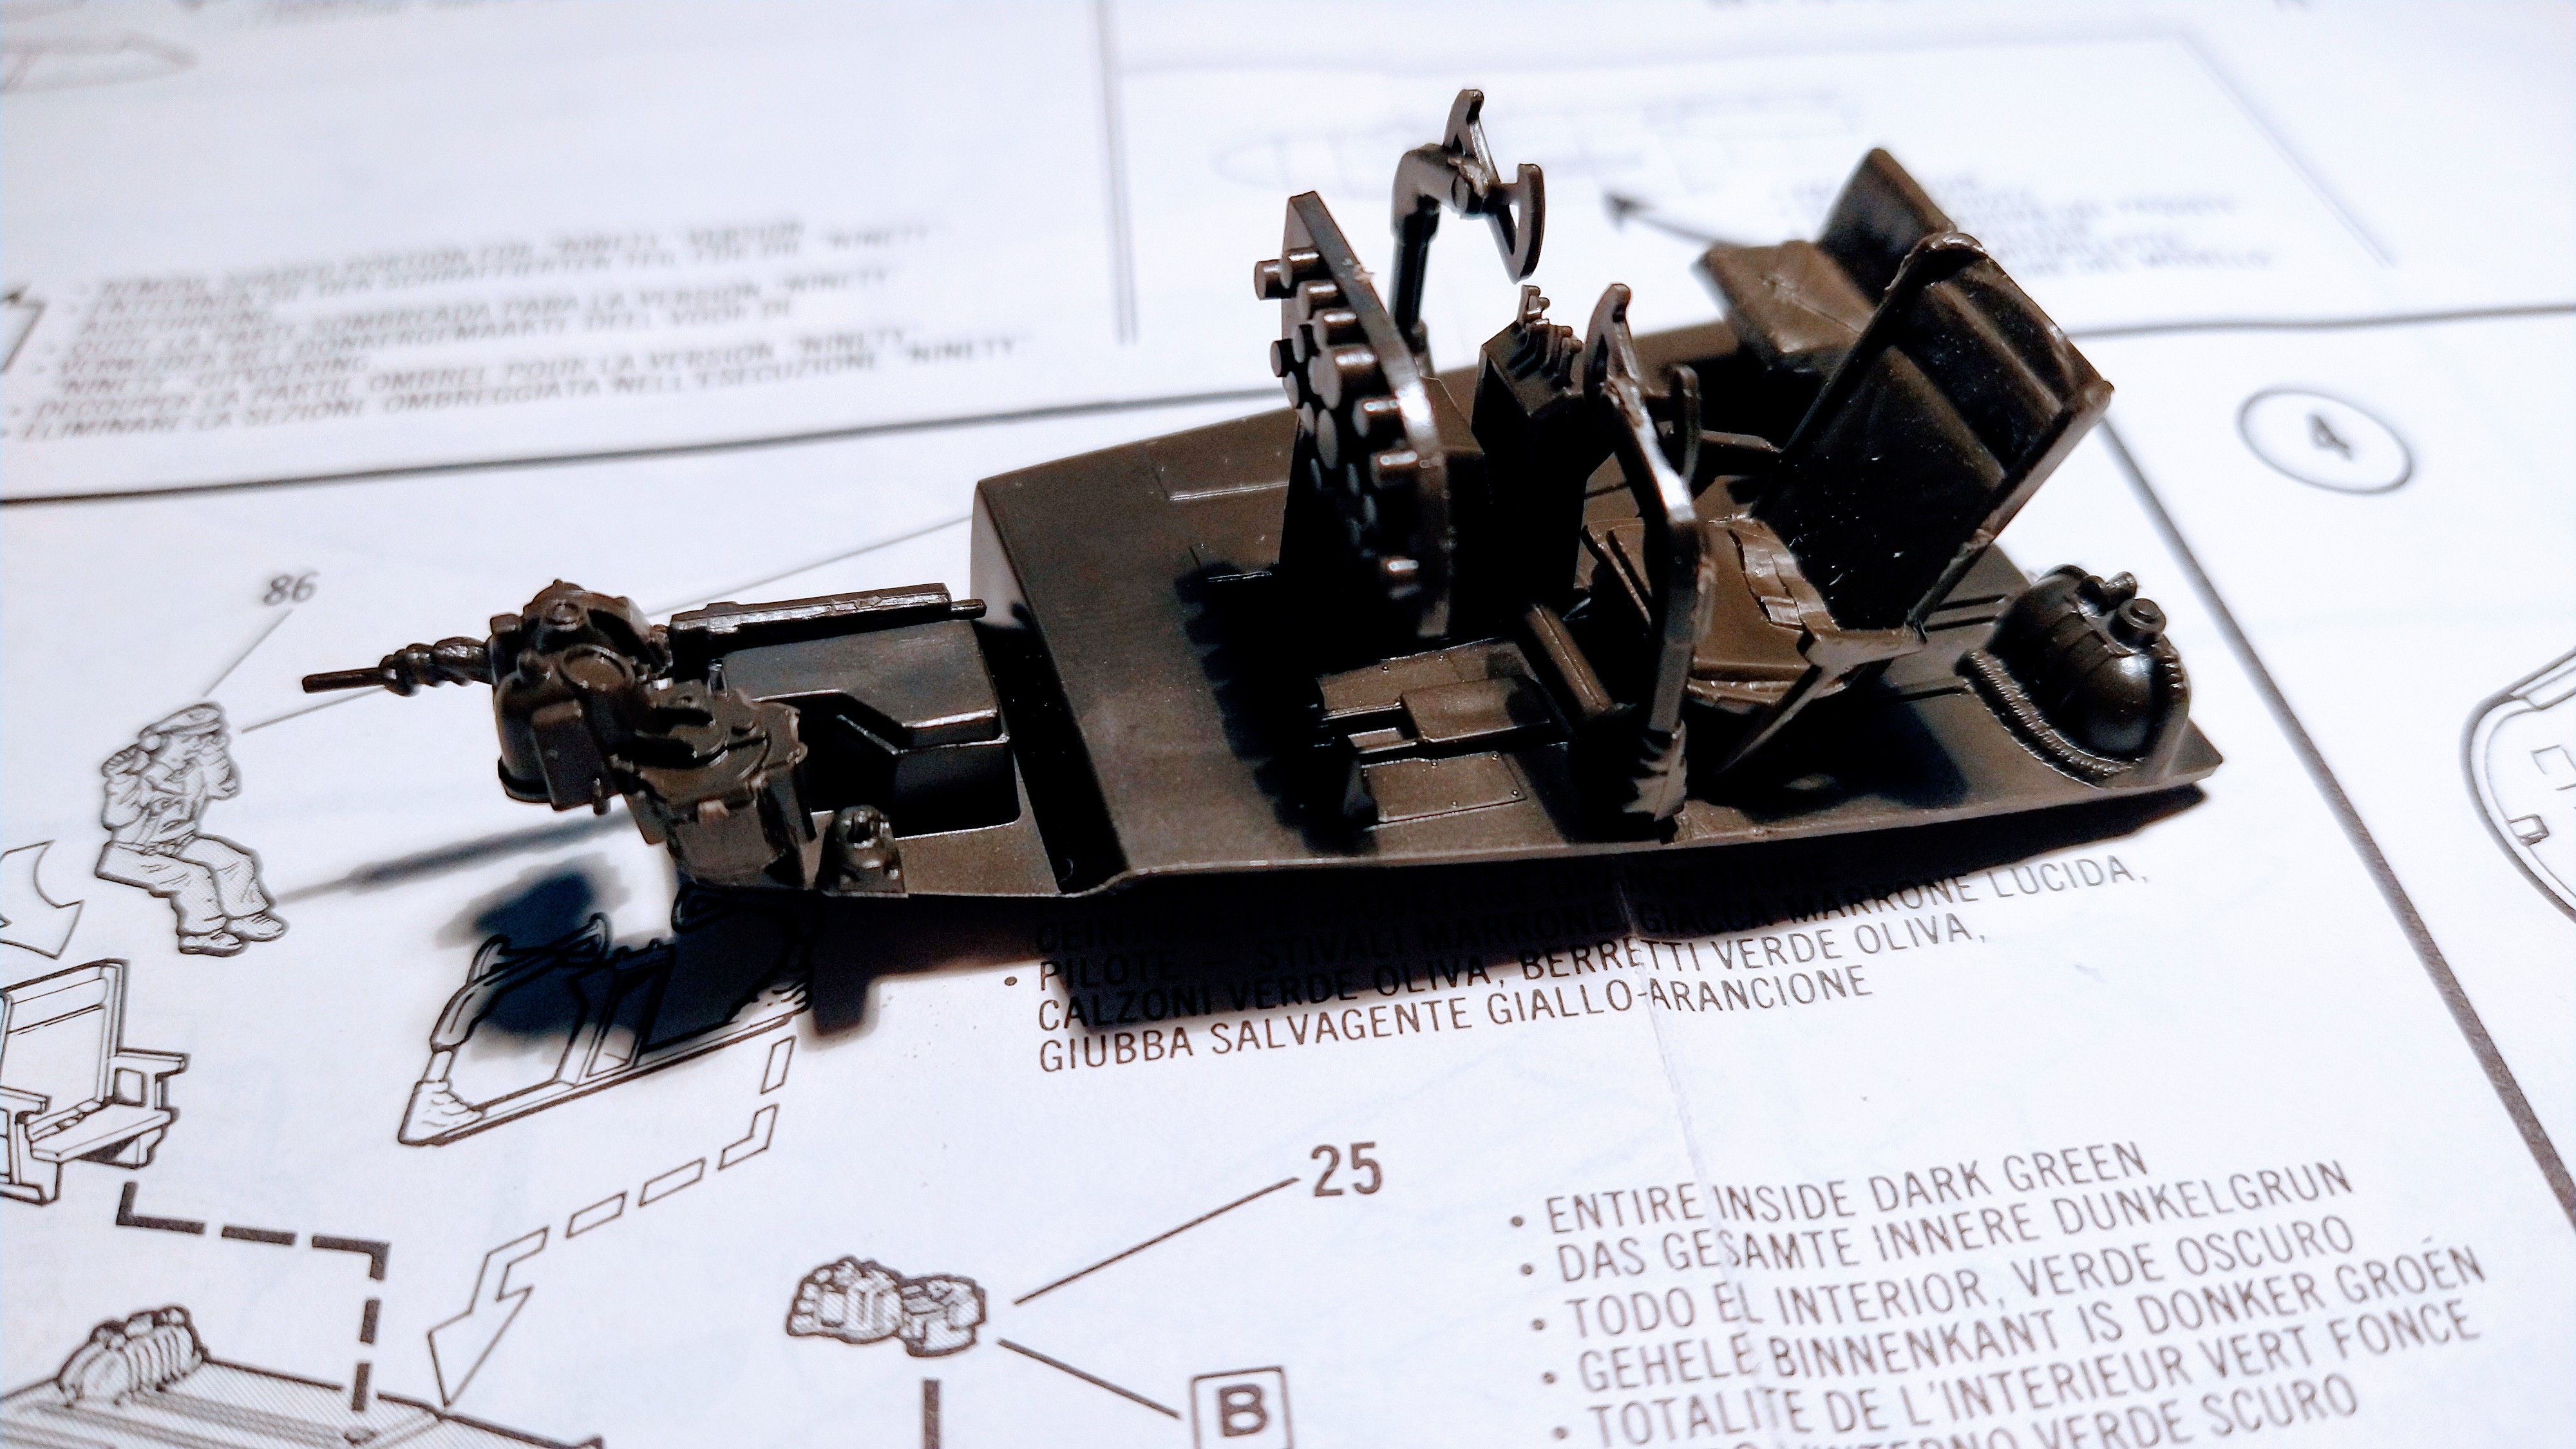
On Monday night I had painted the cockpit area dark green, then not liking what I did, on Tuesday morning I got thinking that I should use zinc chromate instead.
This is what I wrote on Wednesday morning…
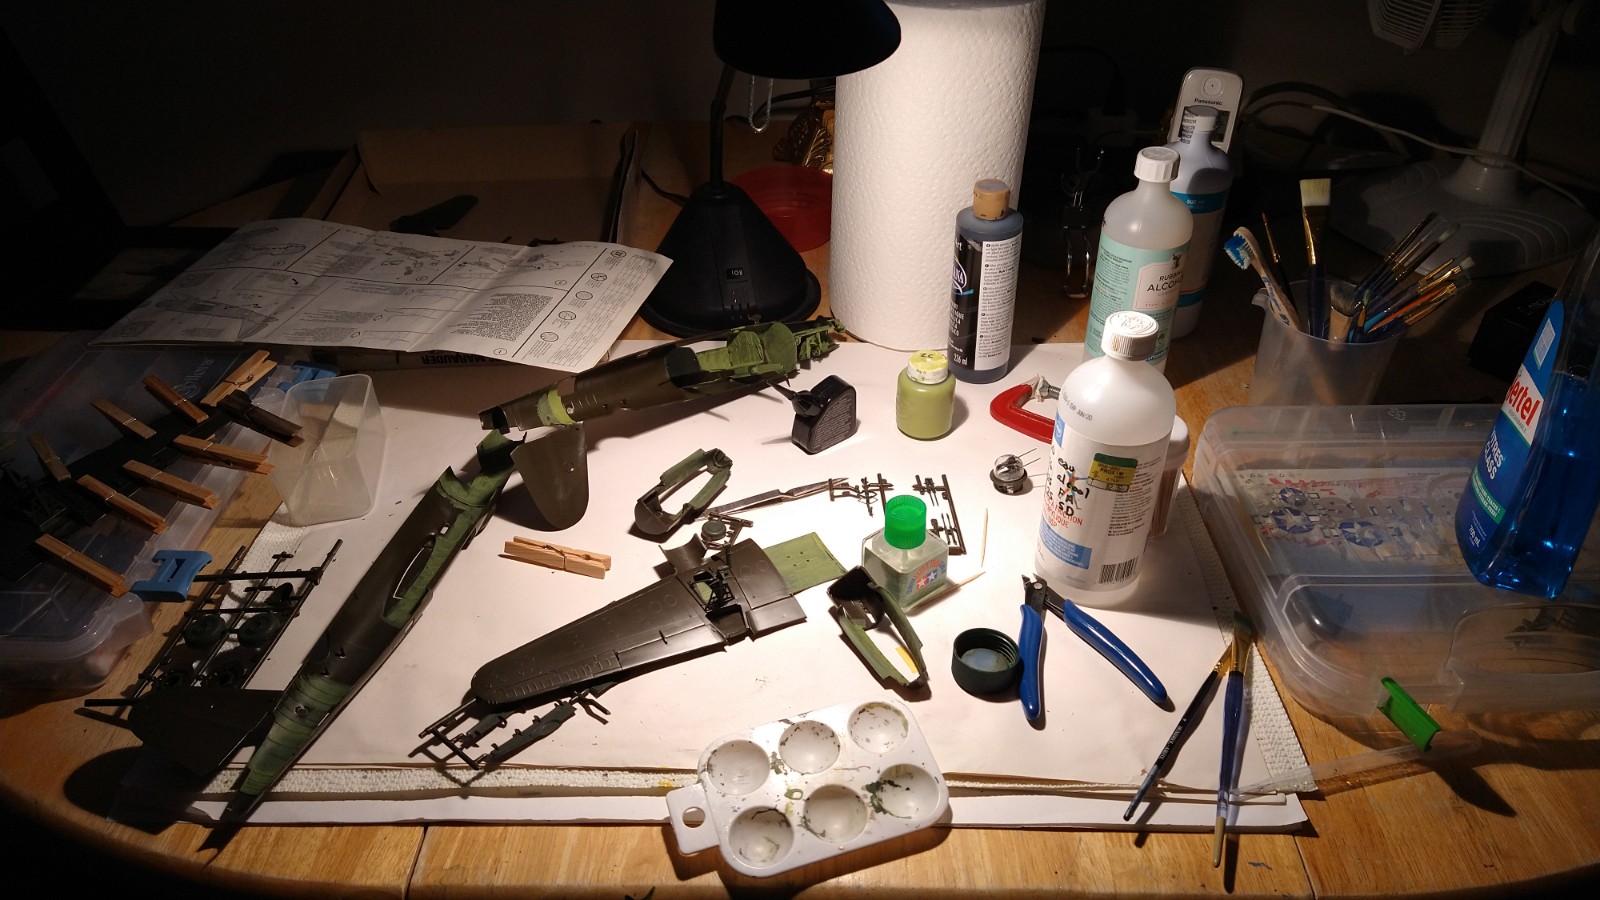
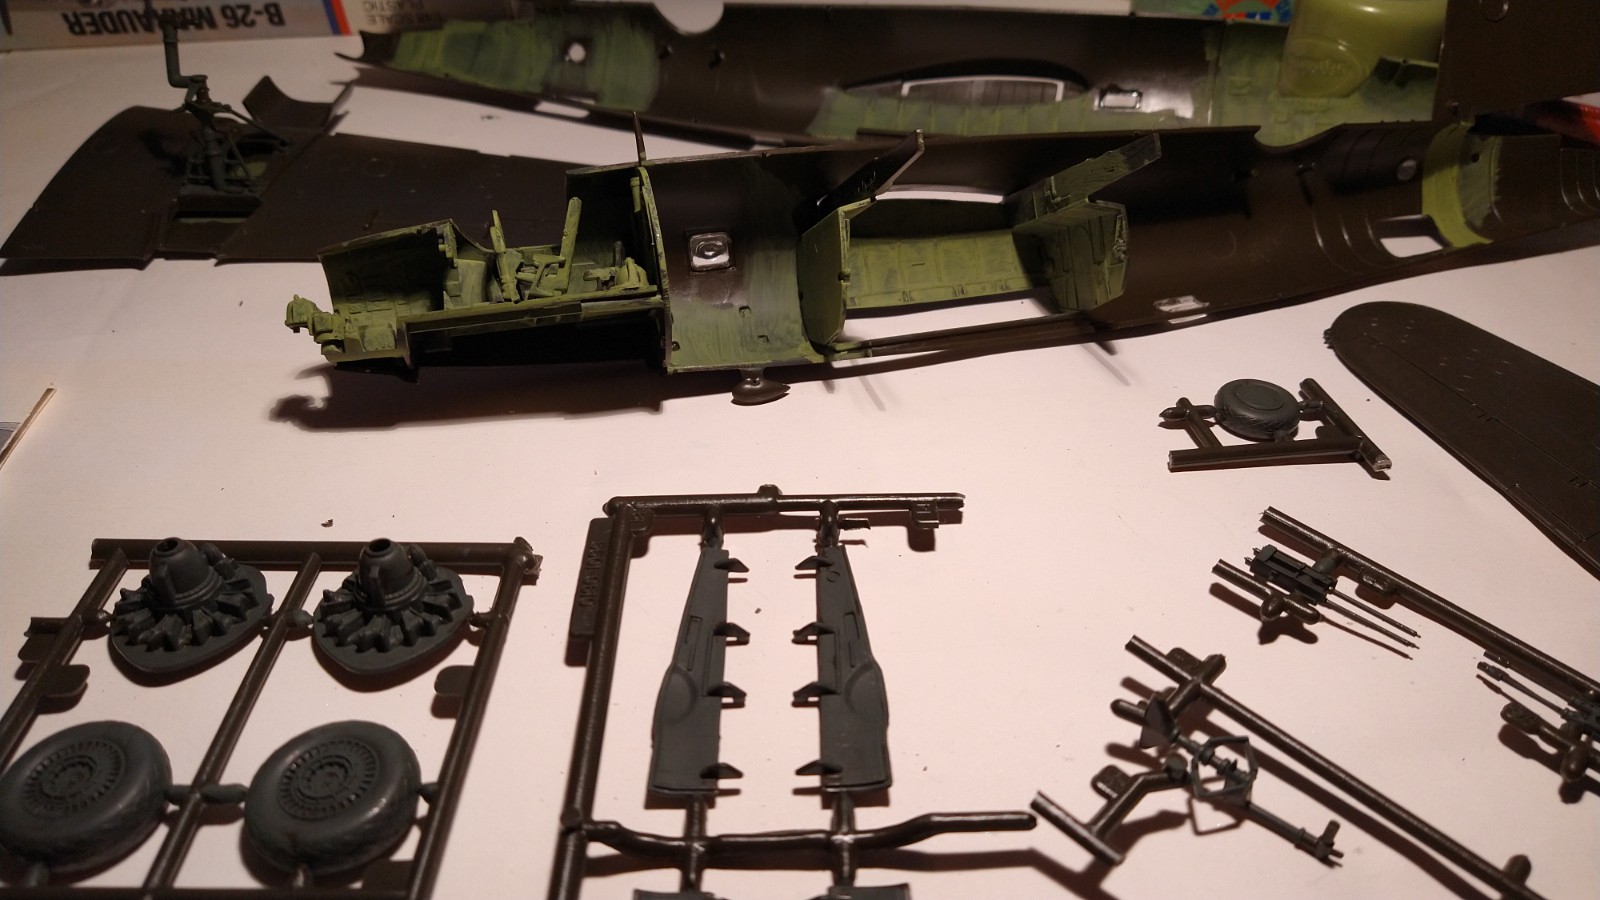
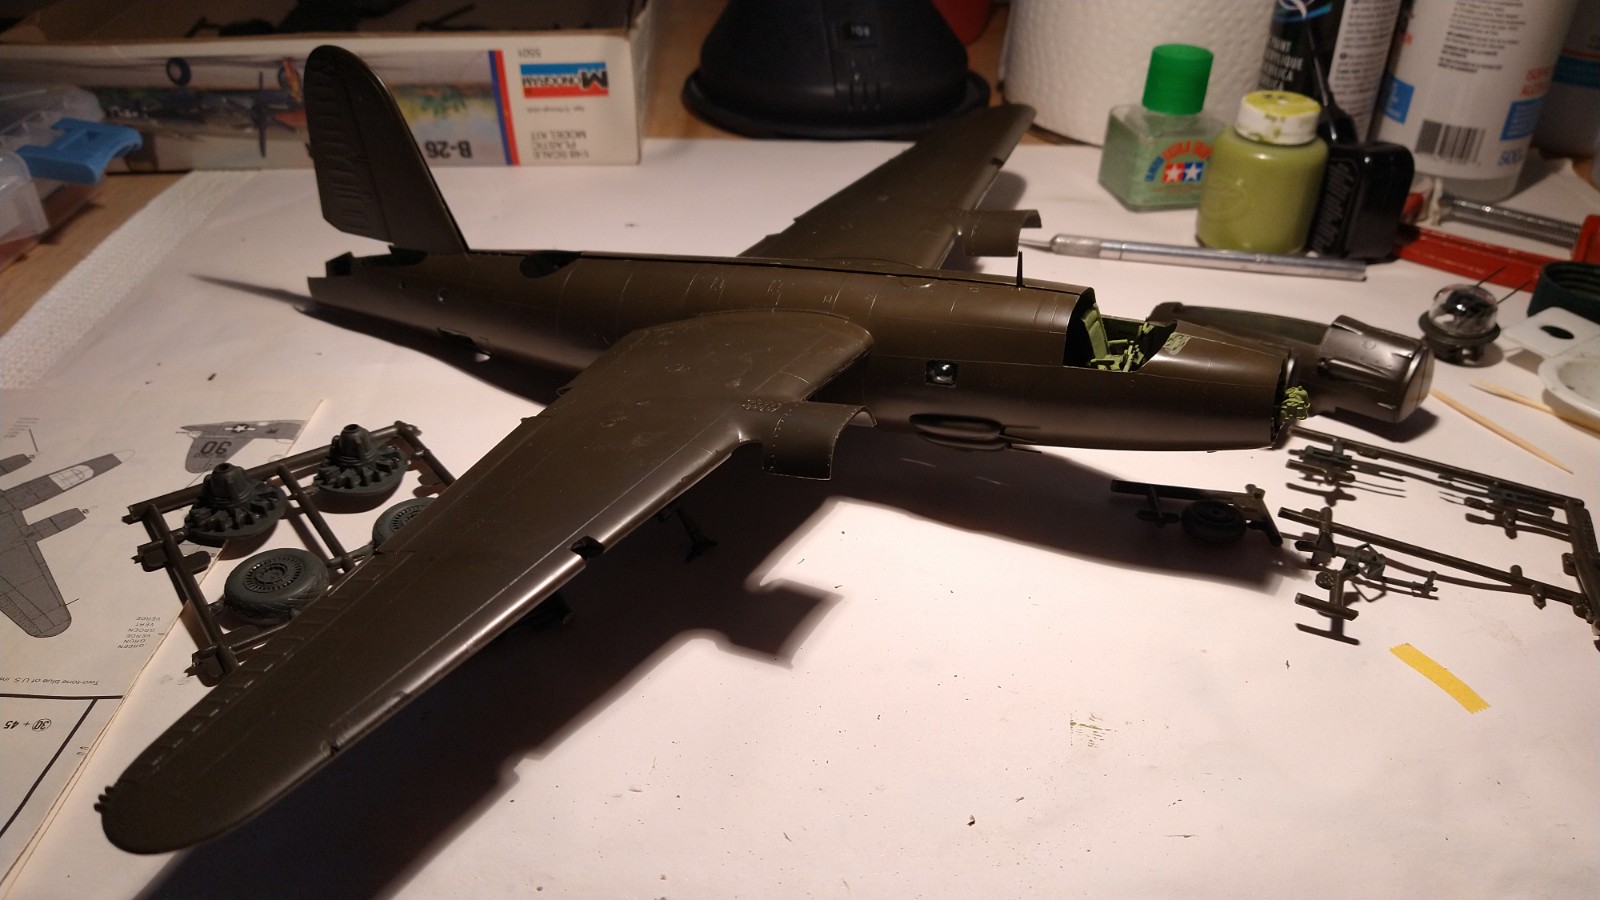
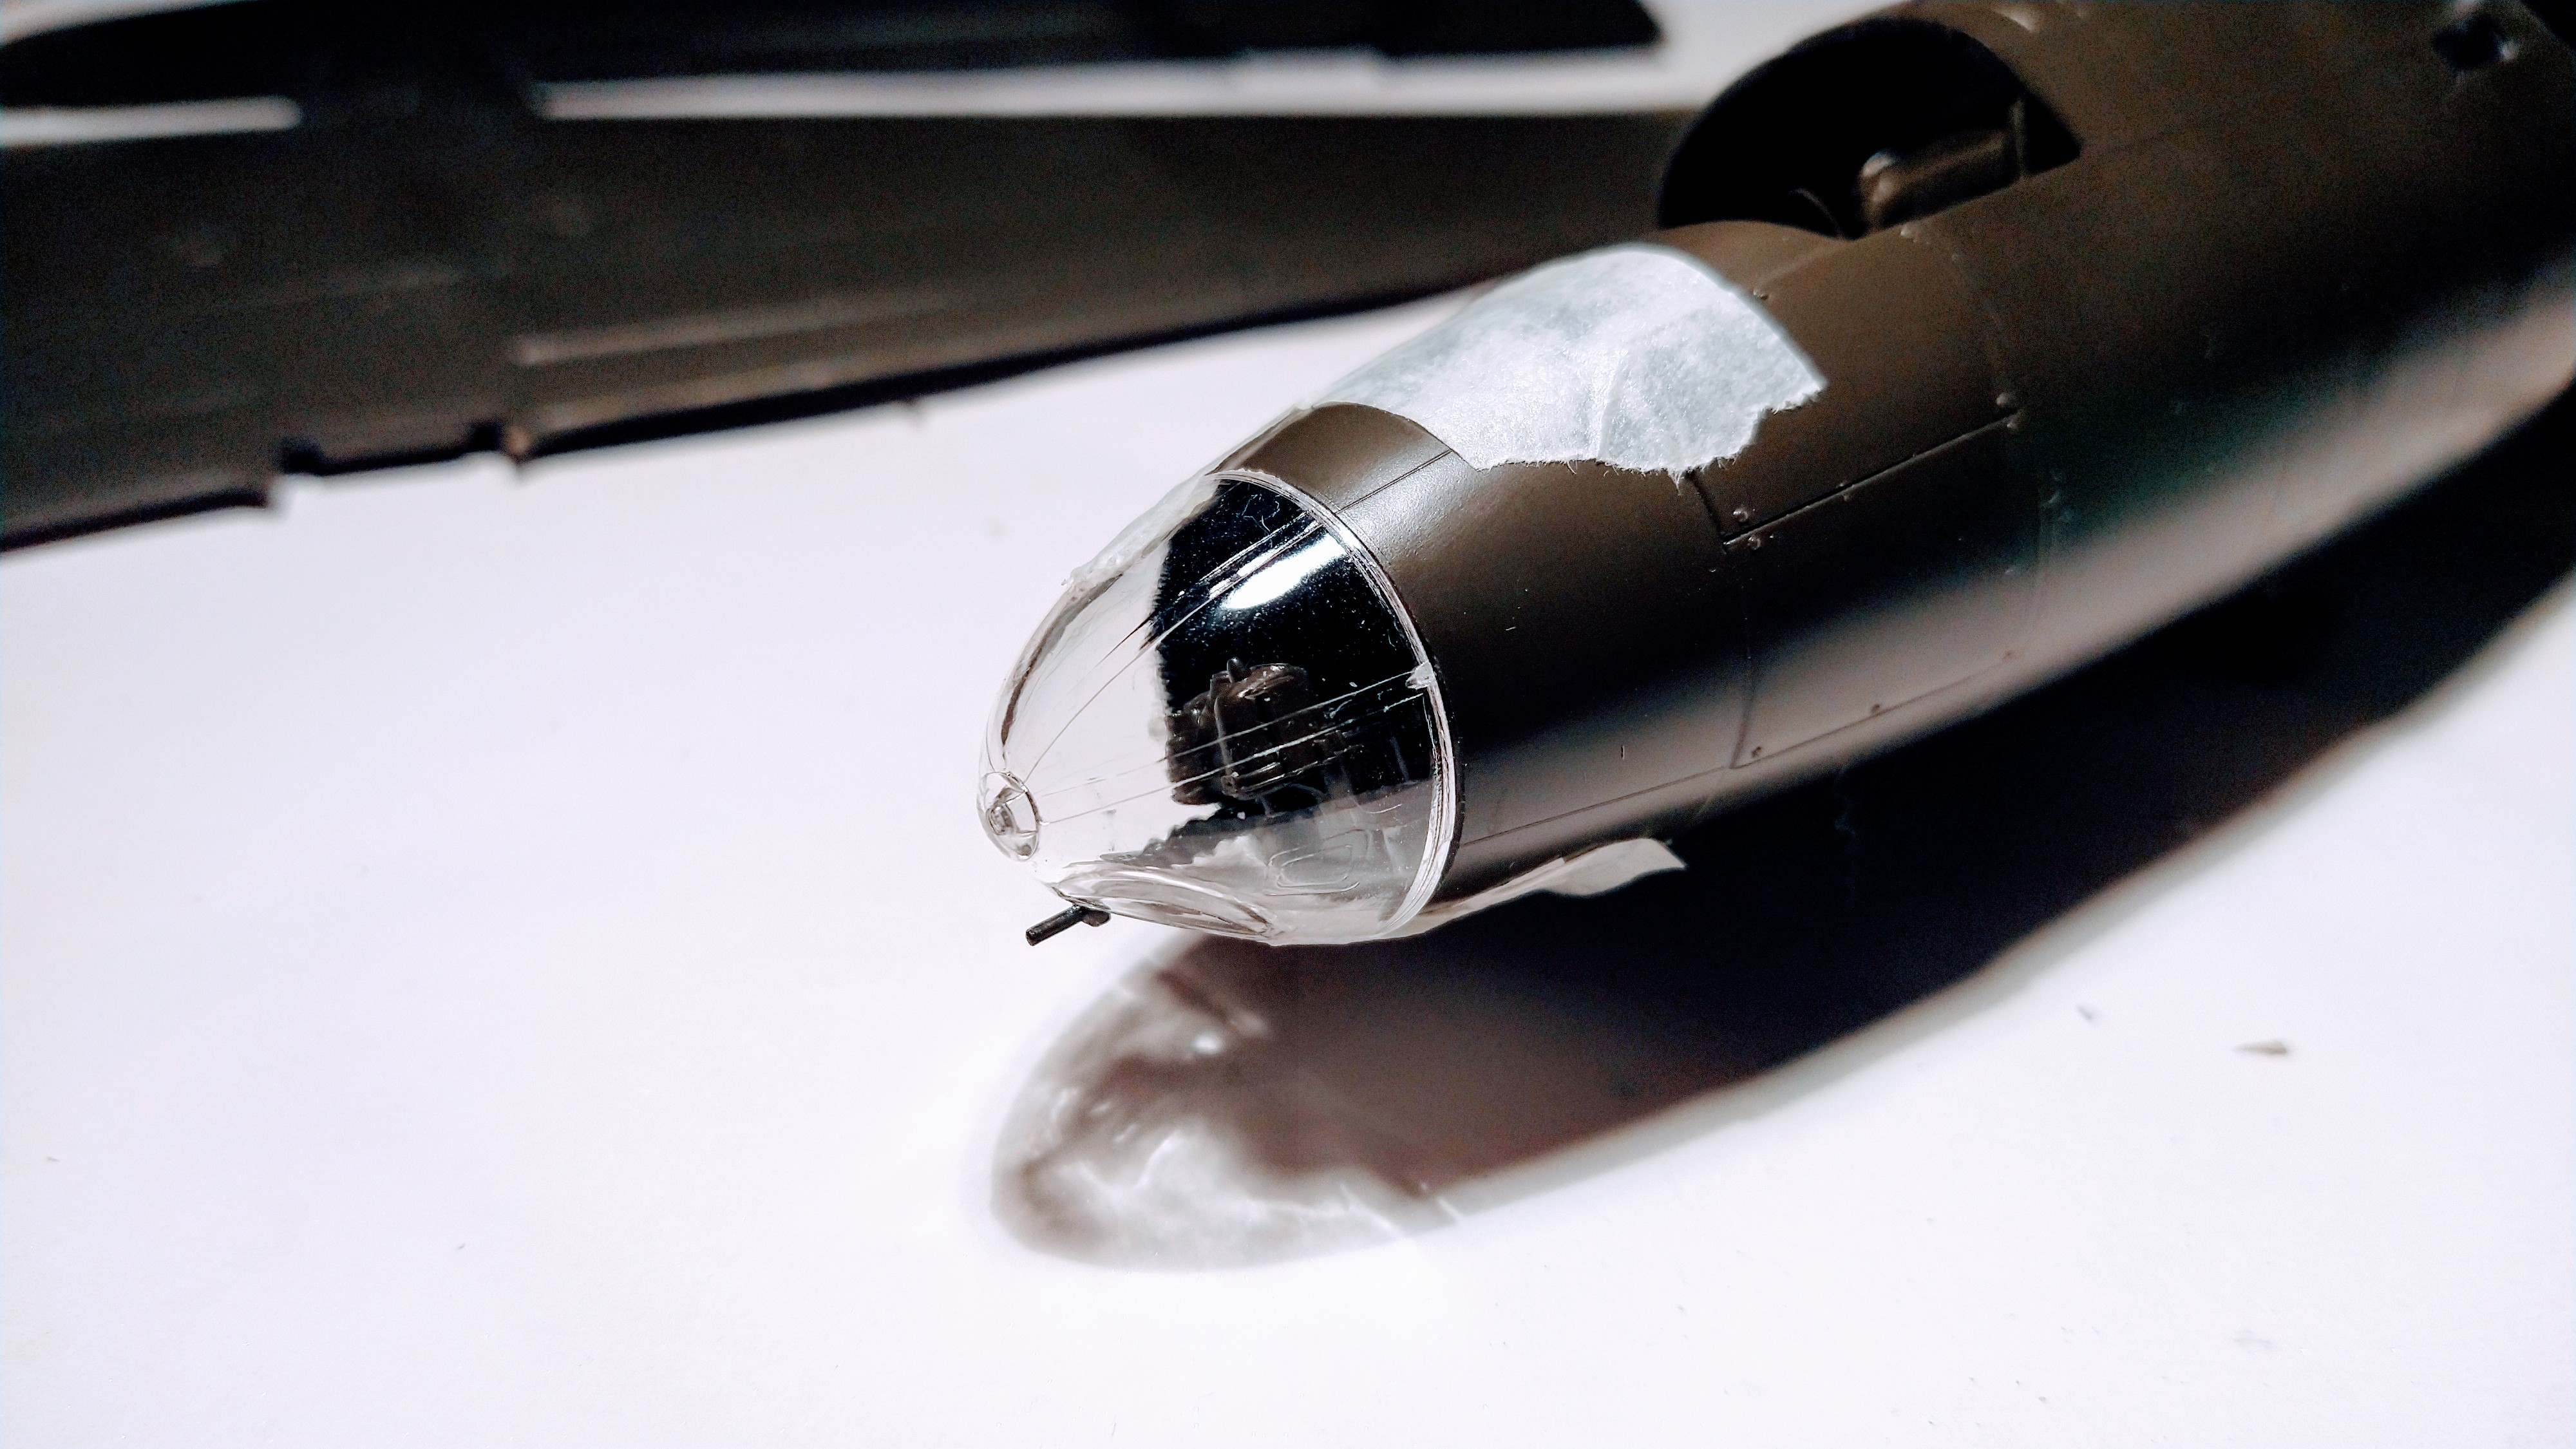
Lots of excitement when I start painting and my workbench proves it.
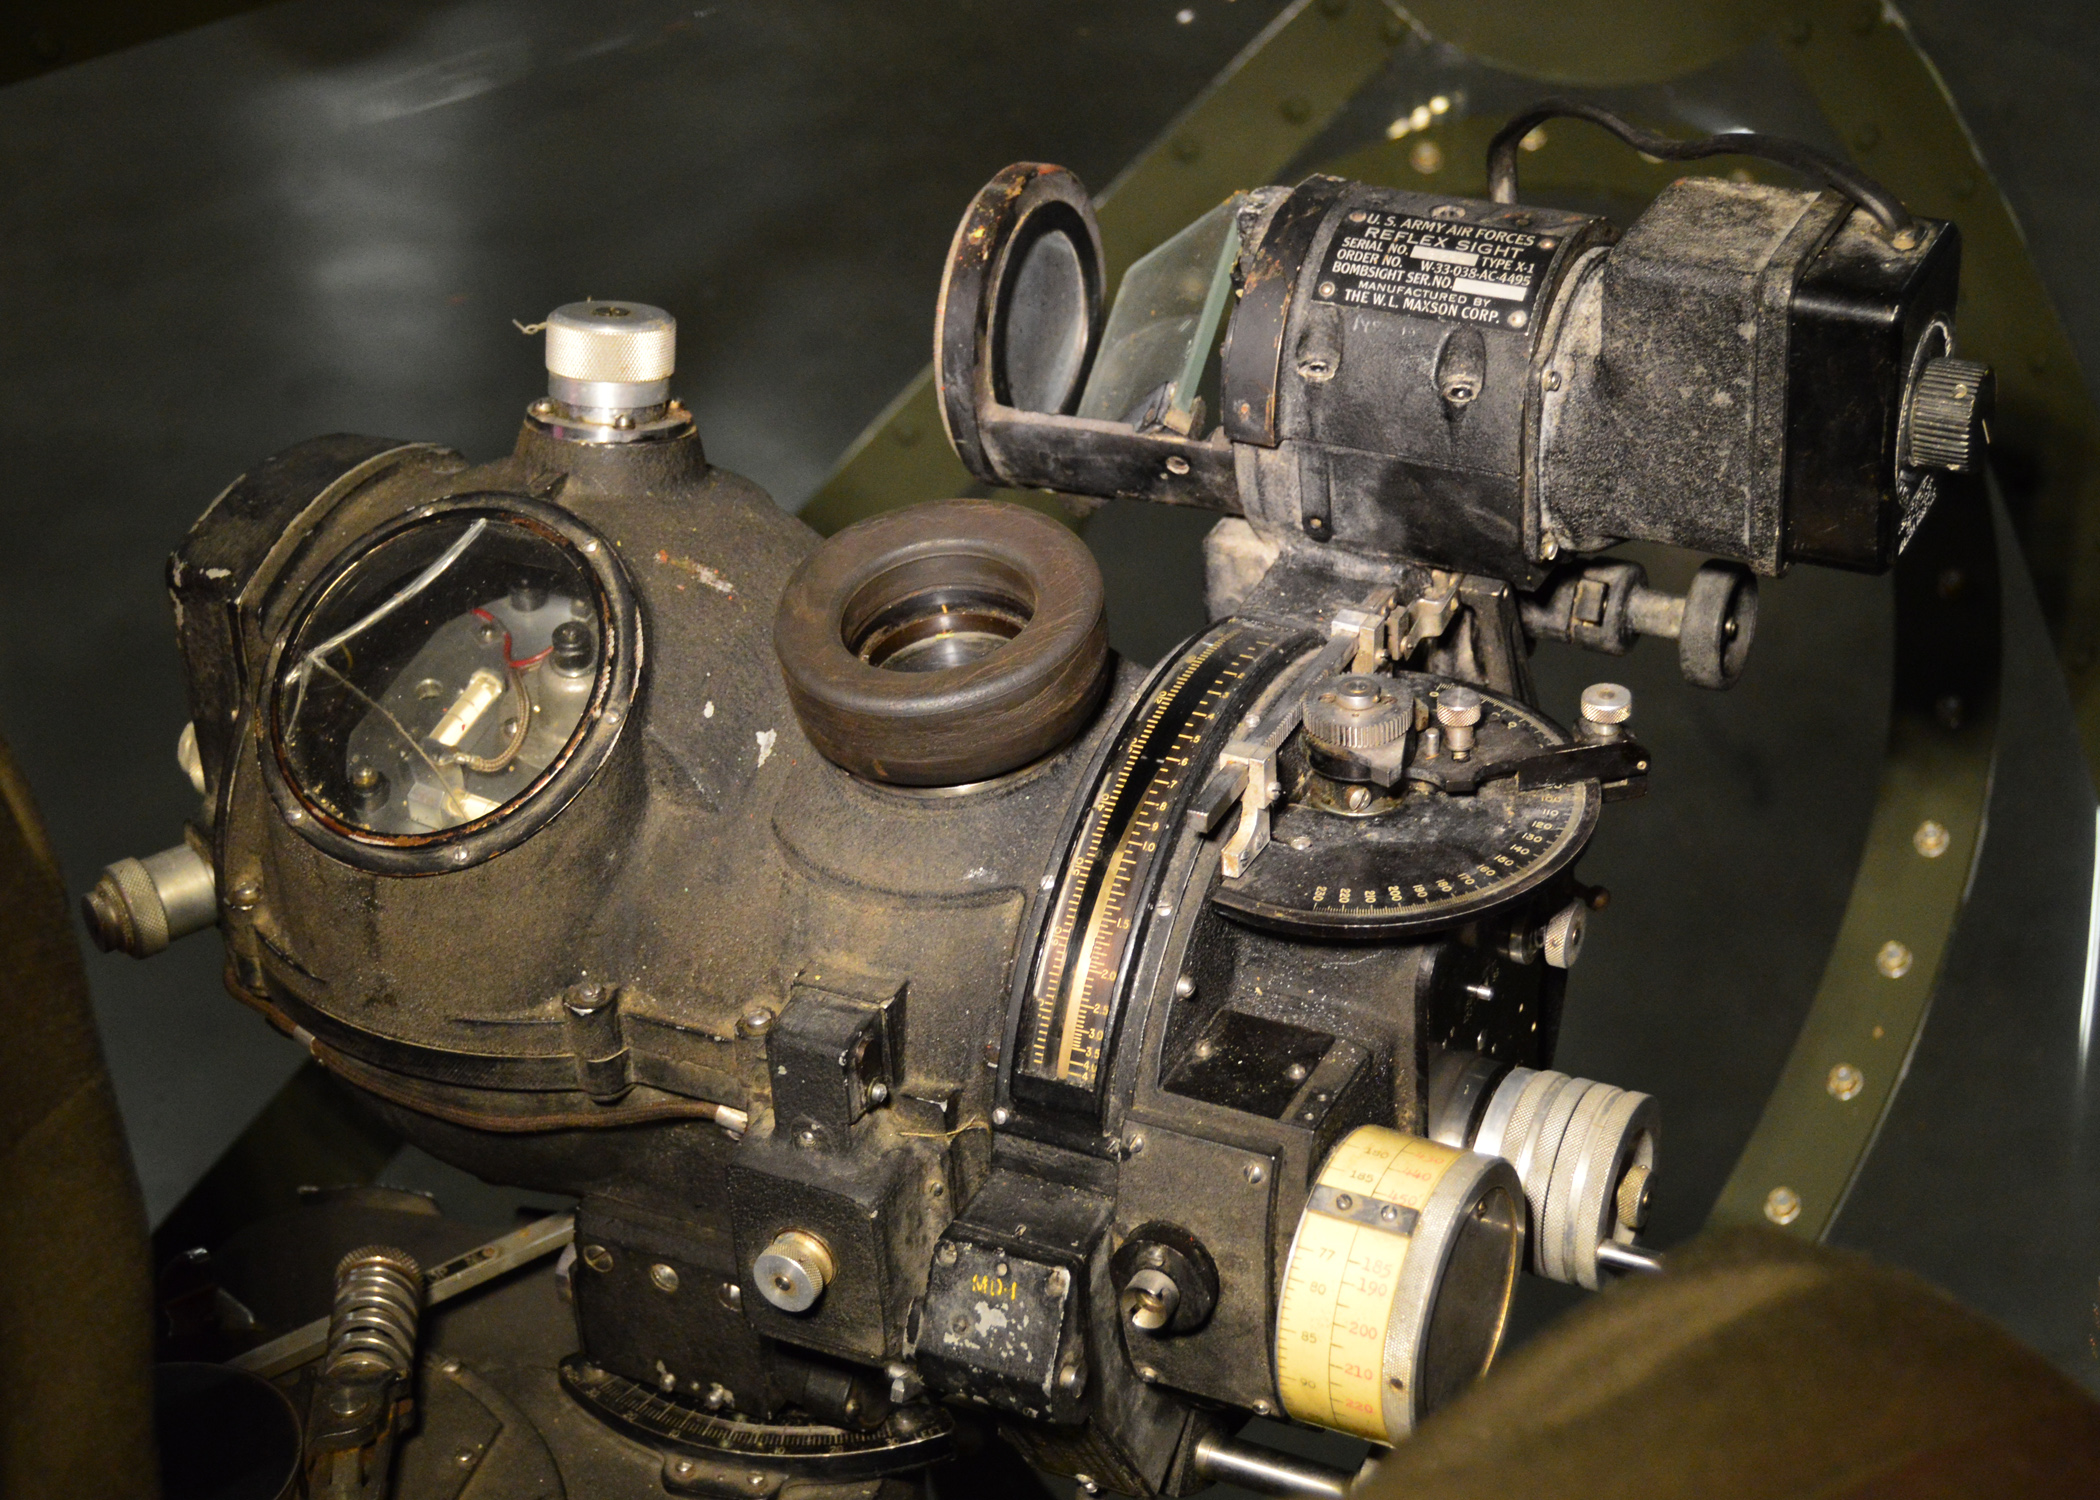
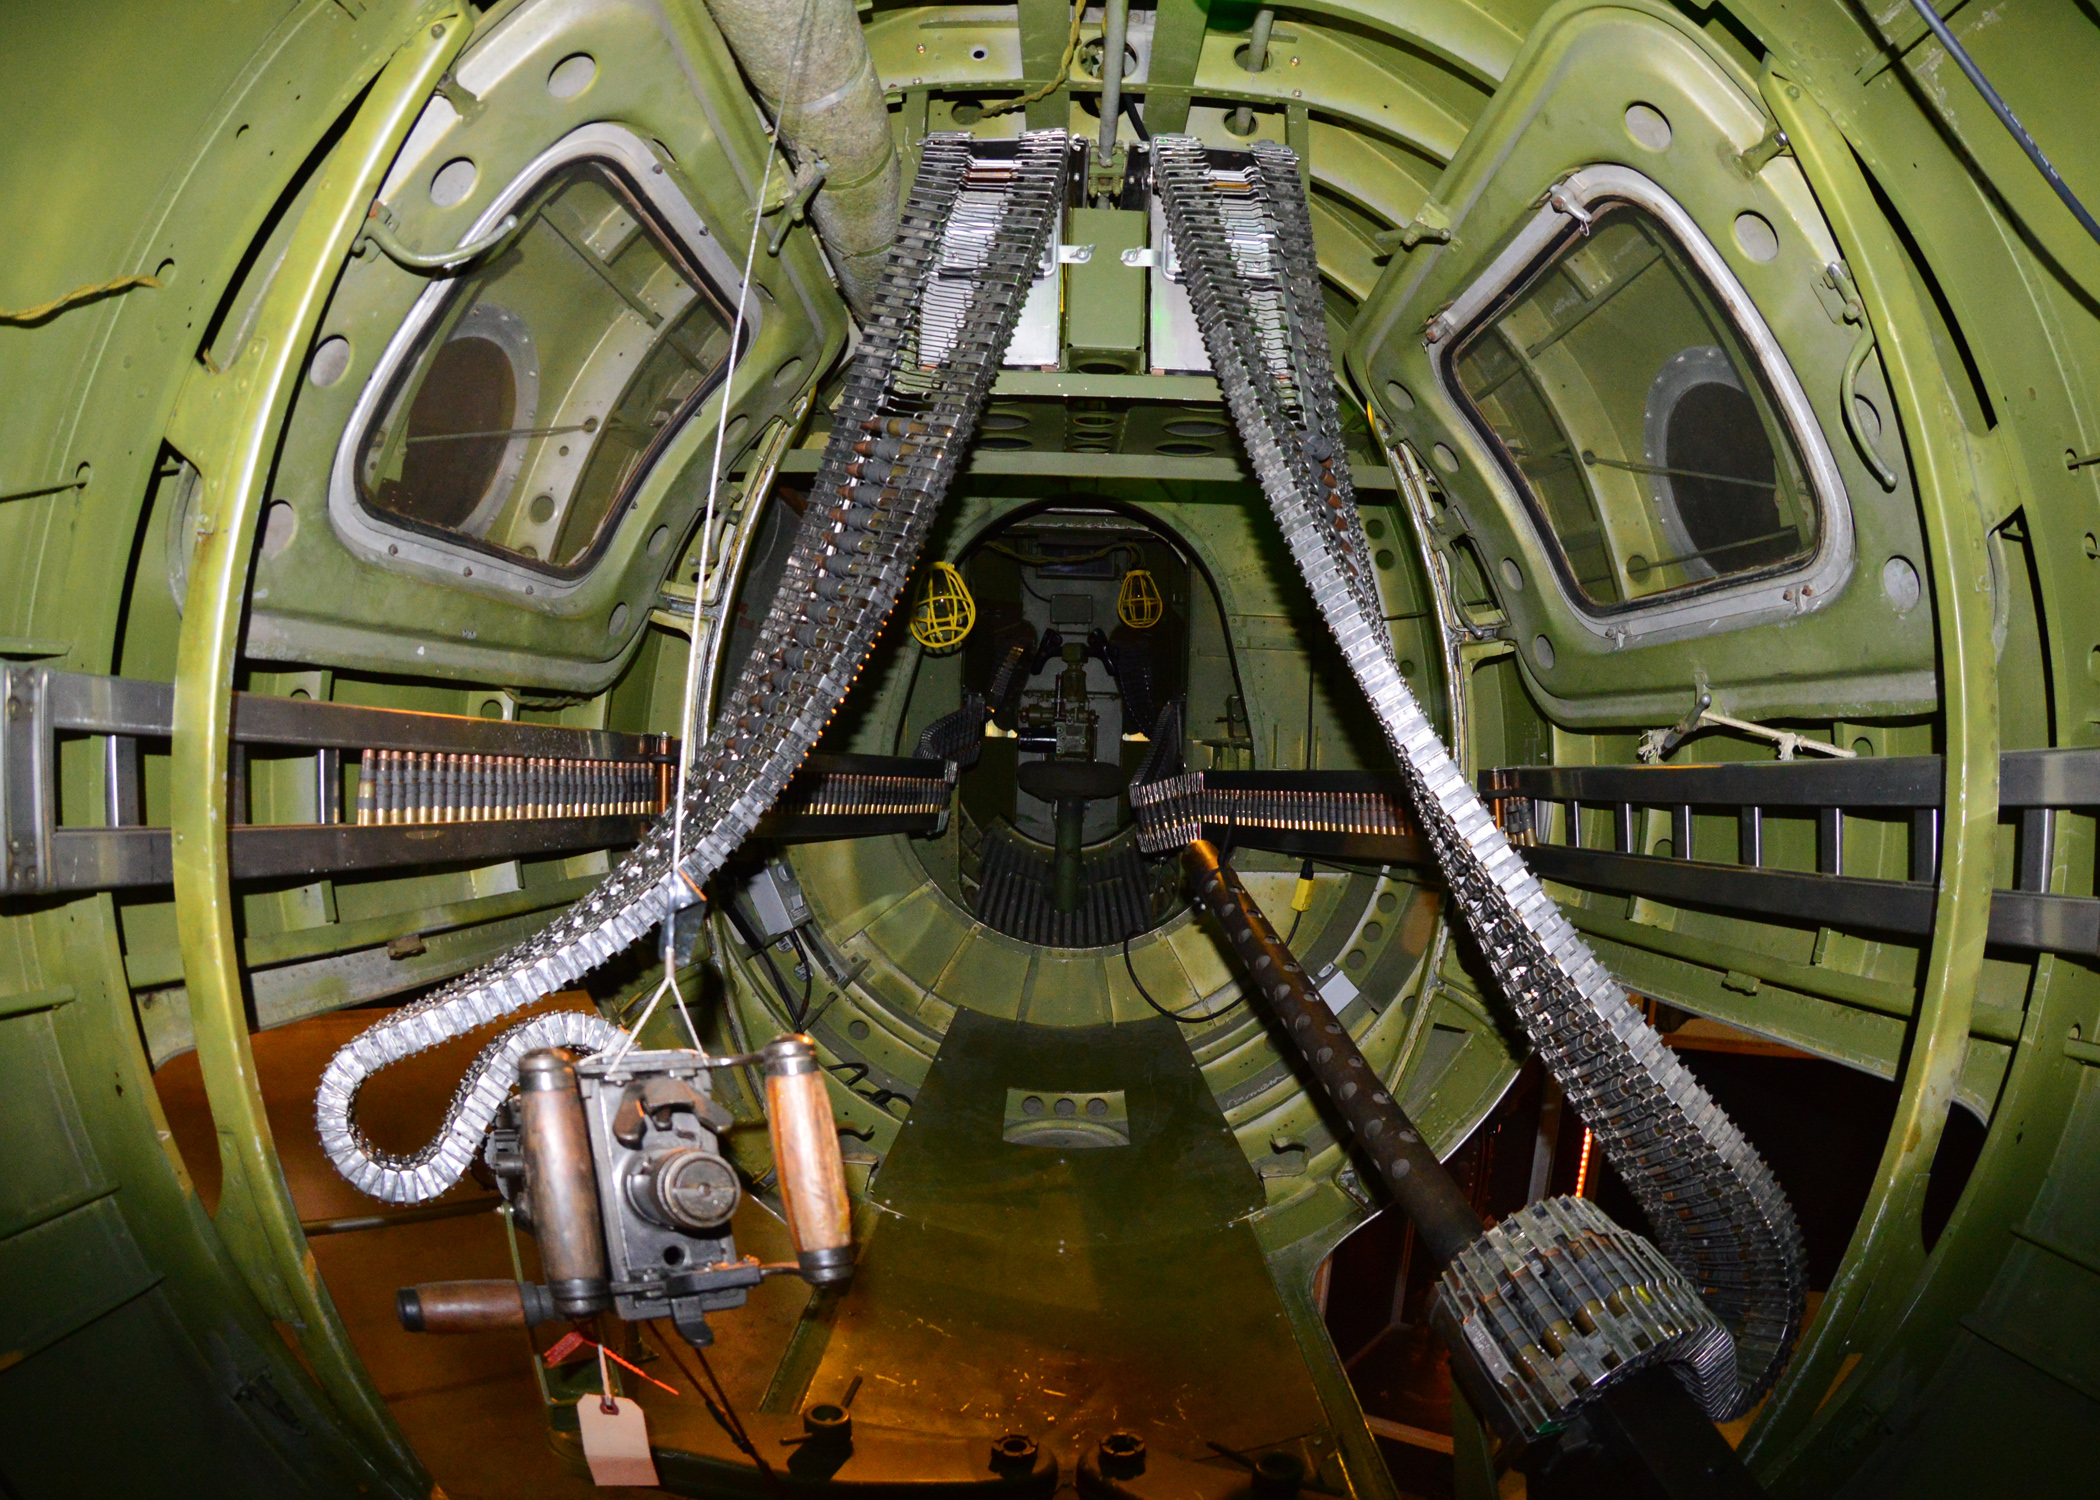
I first tried this shade of green which looks more a dark gray on some parts and then I changed my mind when I saw these photos on this Website…
98.3%, that’s how much I have uploaded on my 3GB upload limit on My Forgotten Hobby III. I will have to migrate sooner or later to My Forgotten Hobby IV.
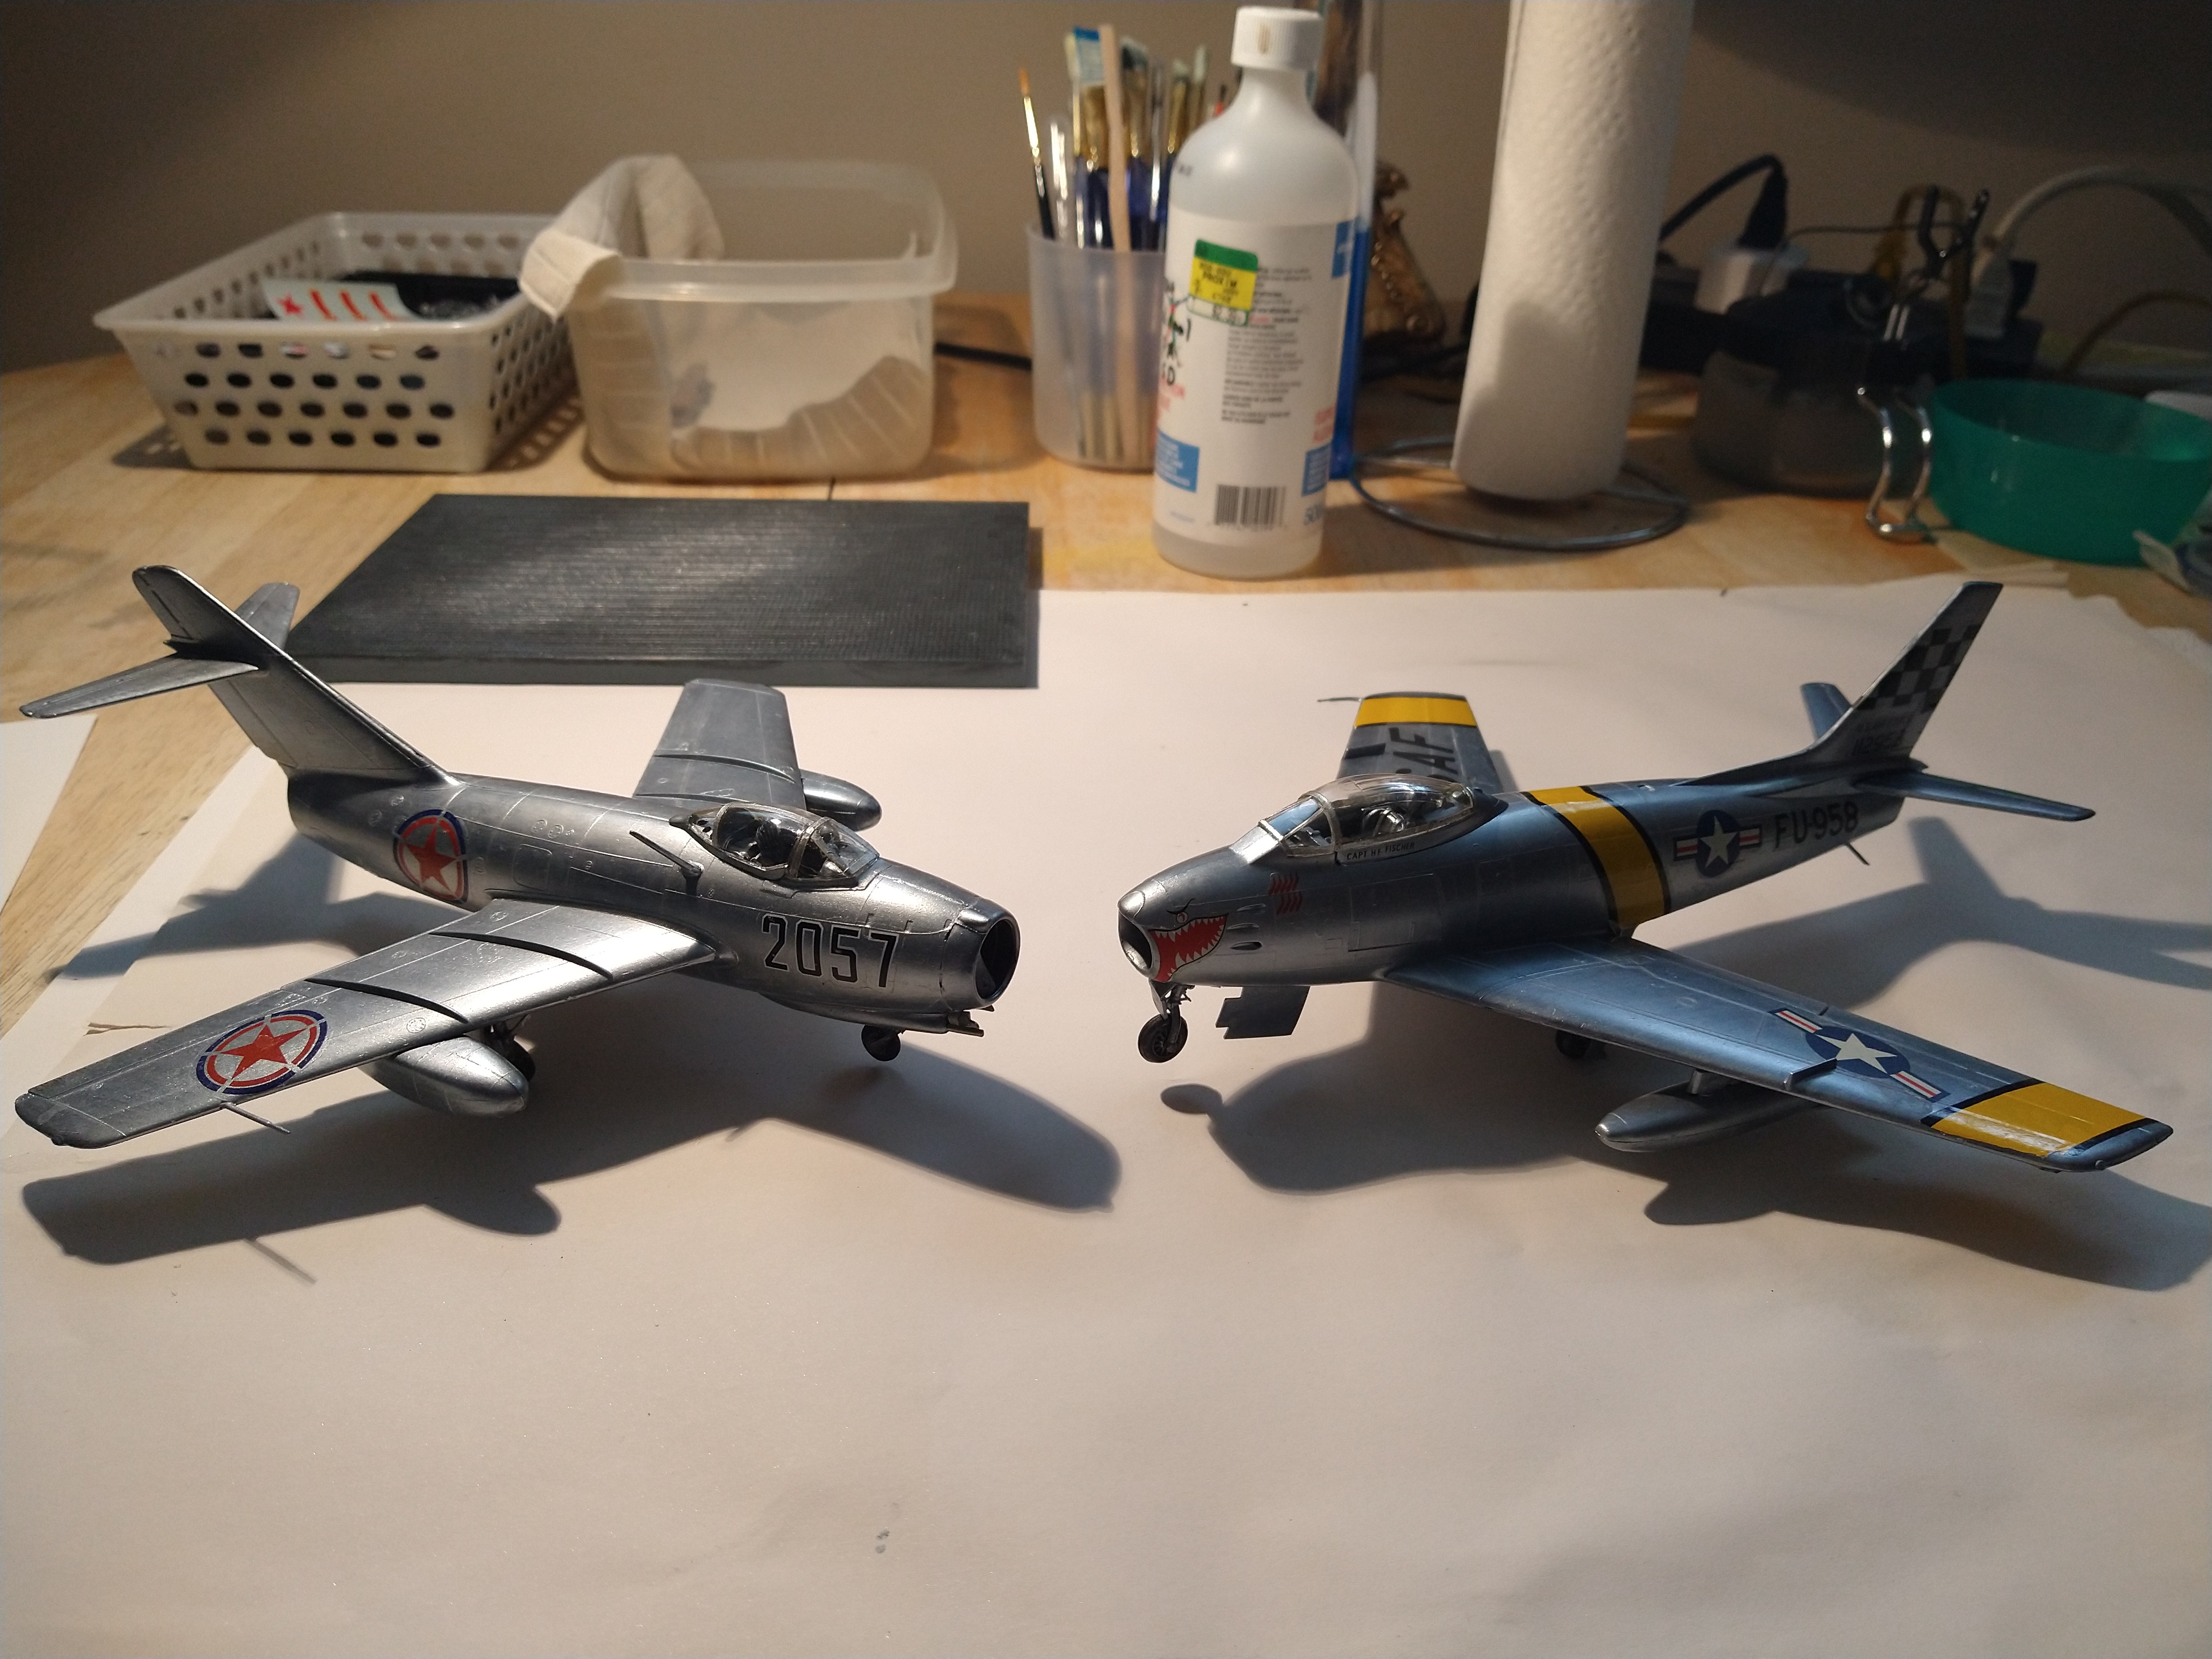
I have updated my collection. The F-86 and the MiG-15 are now part of history so I only have 80 model kits in my collection.
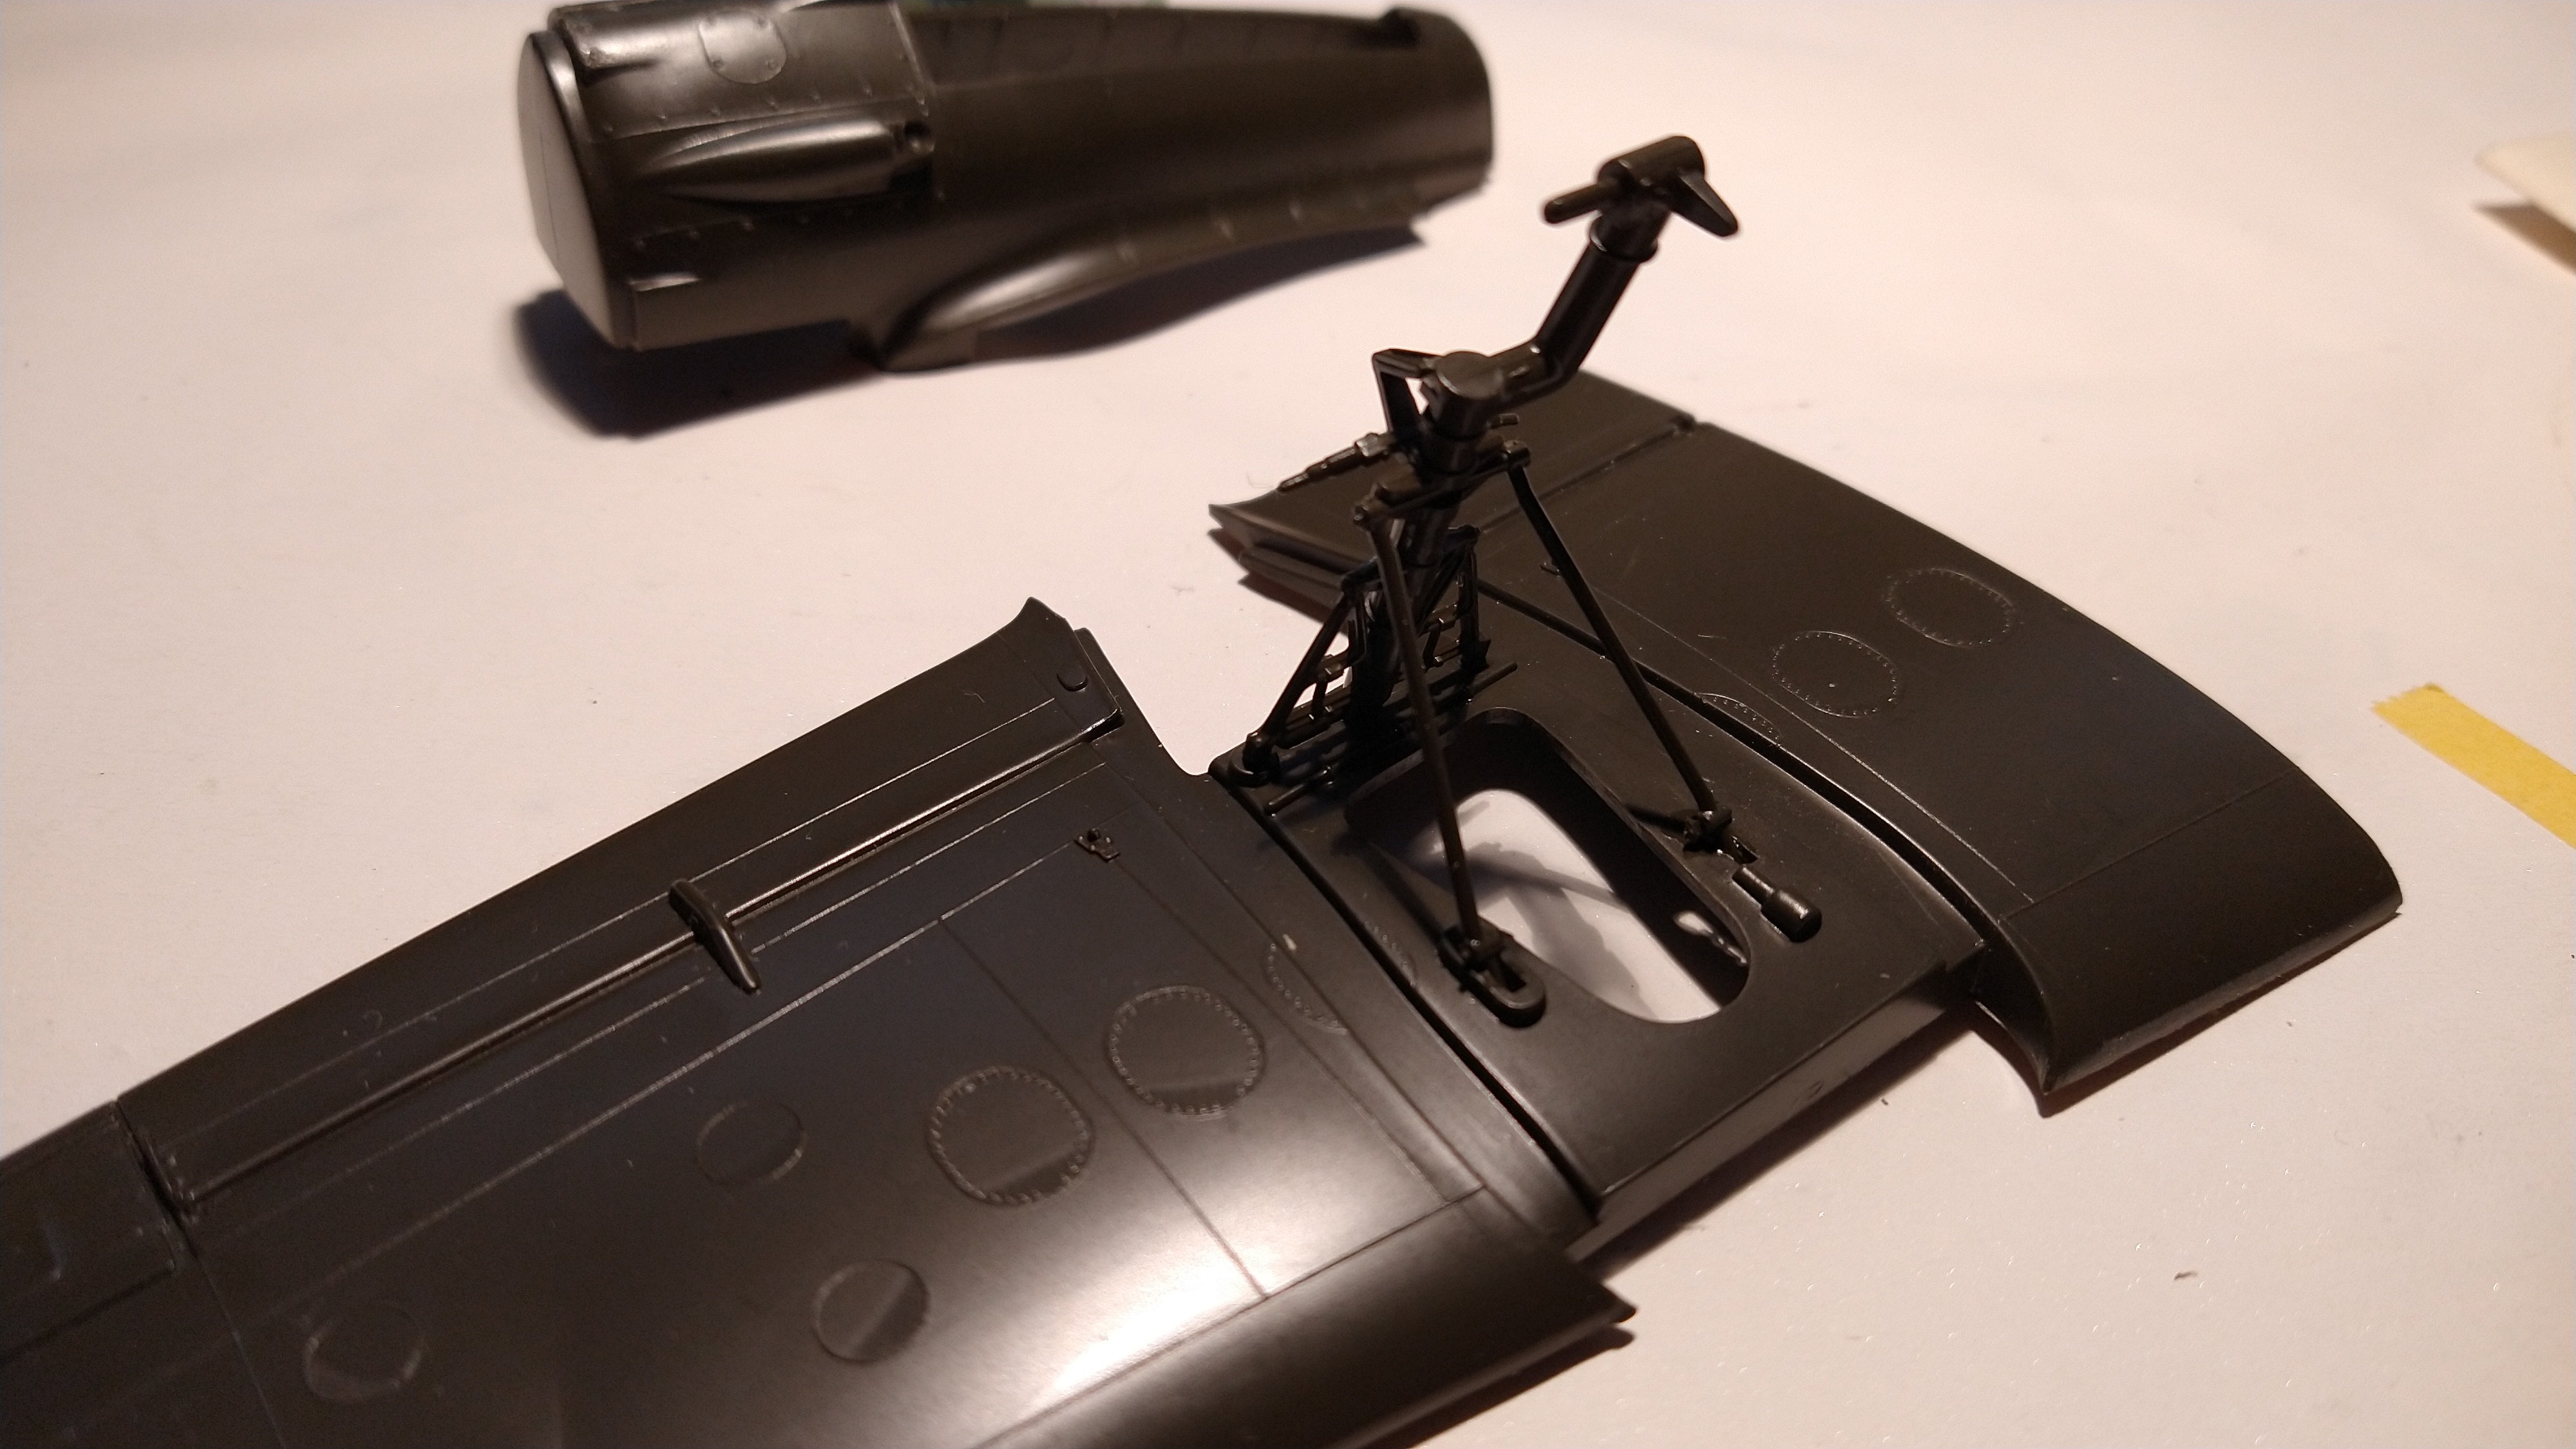
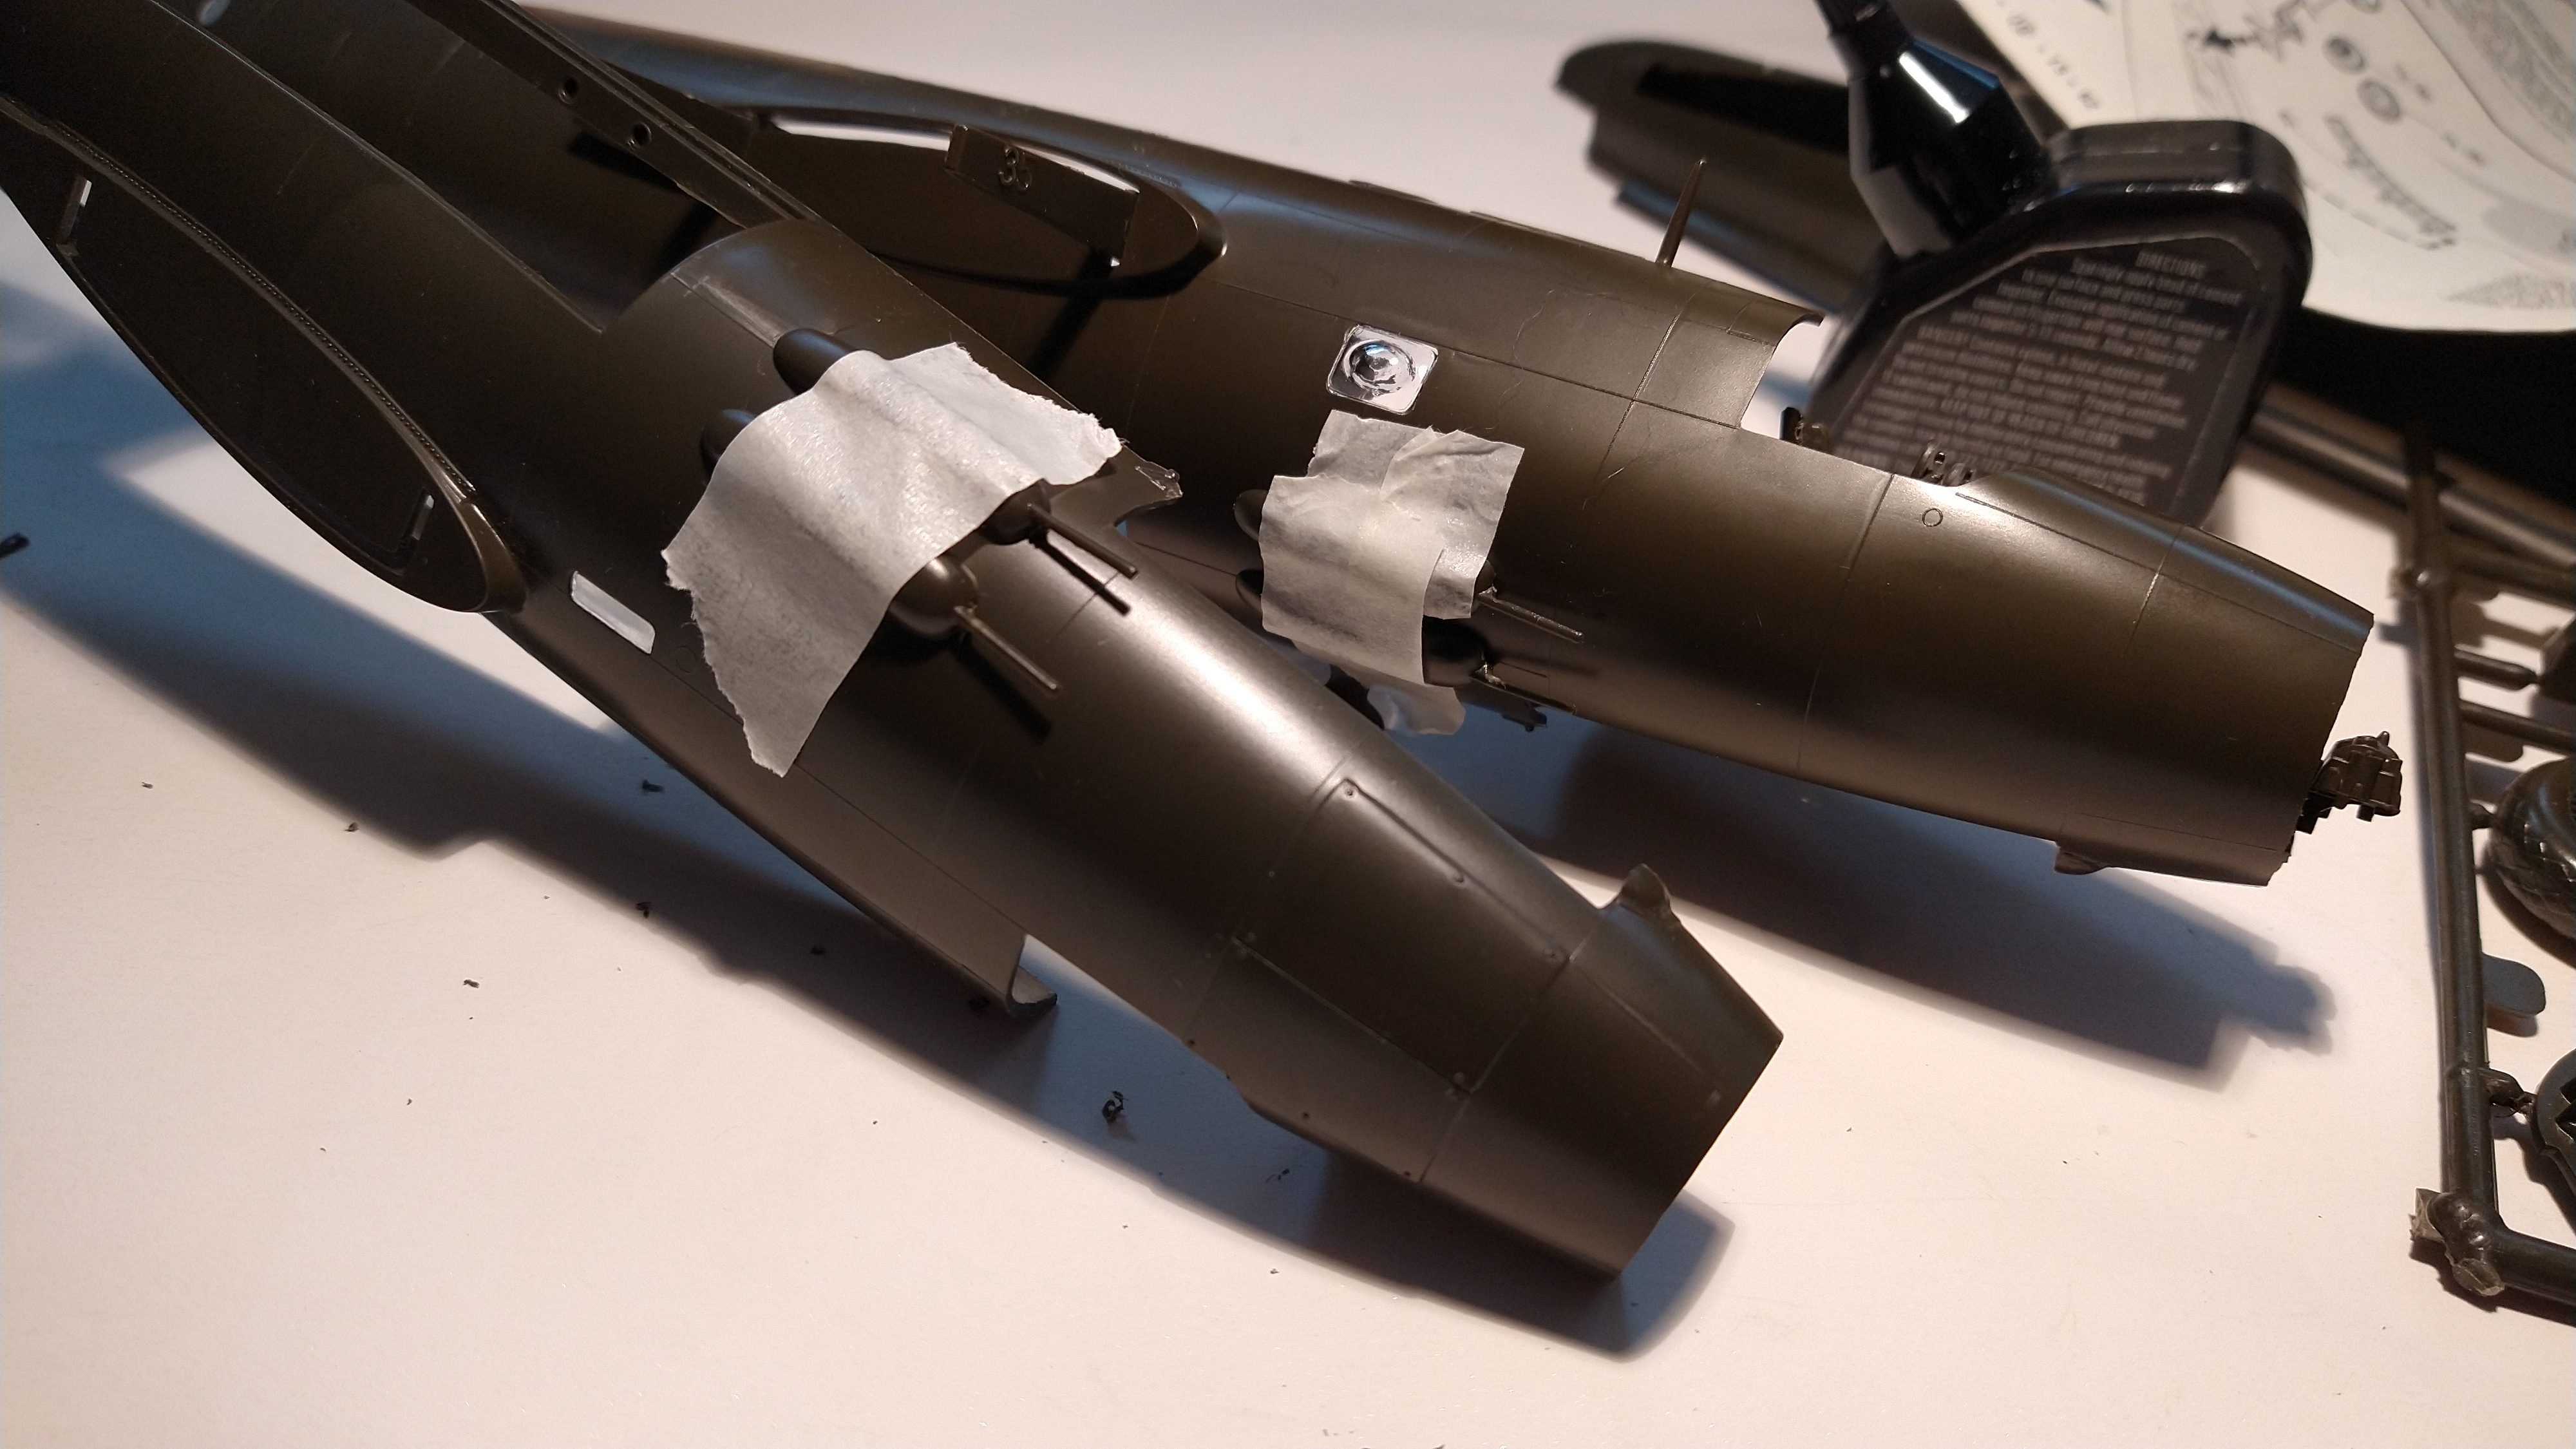
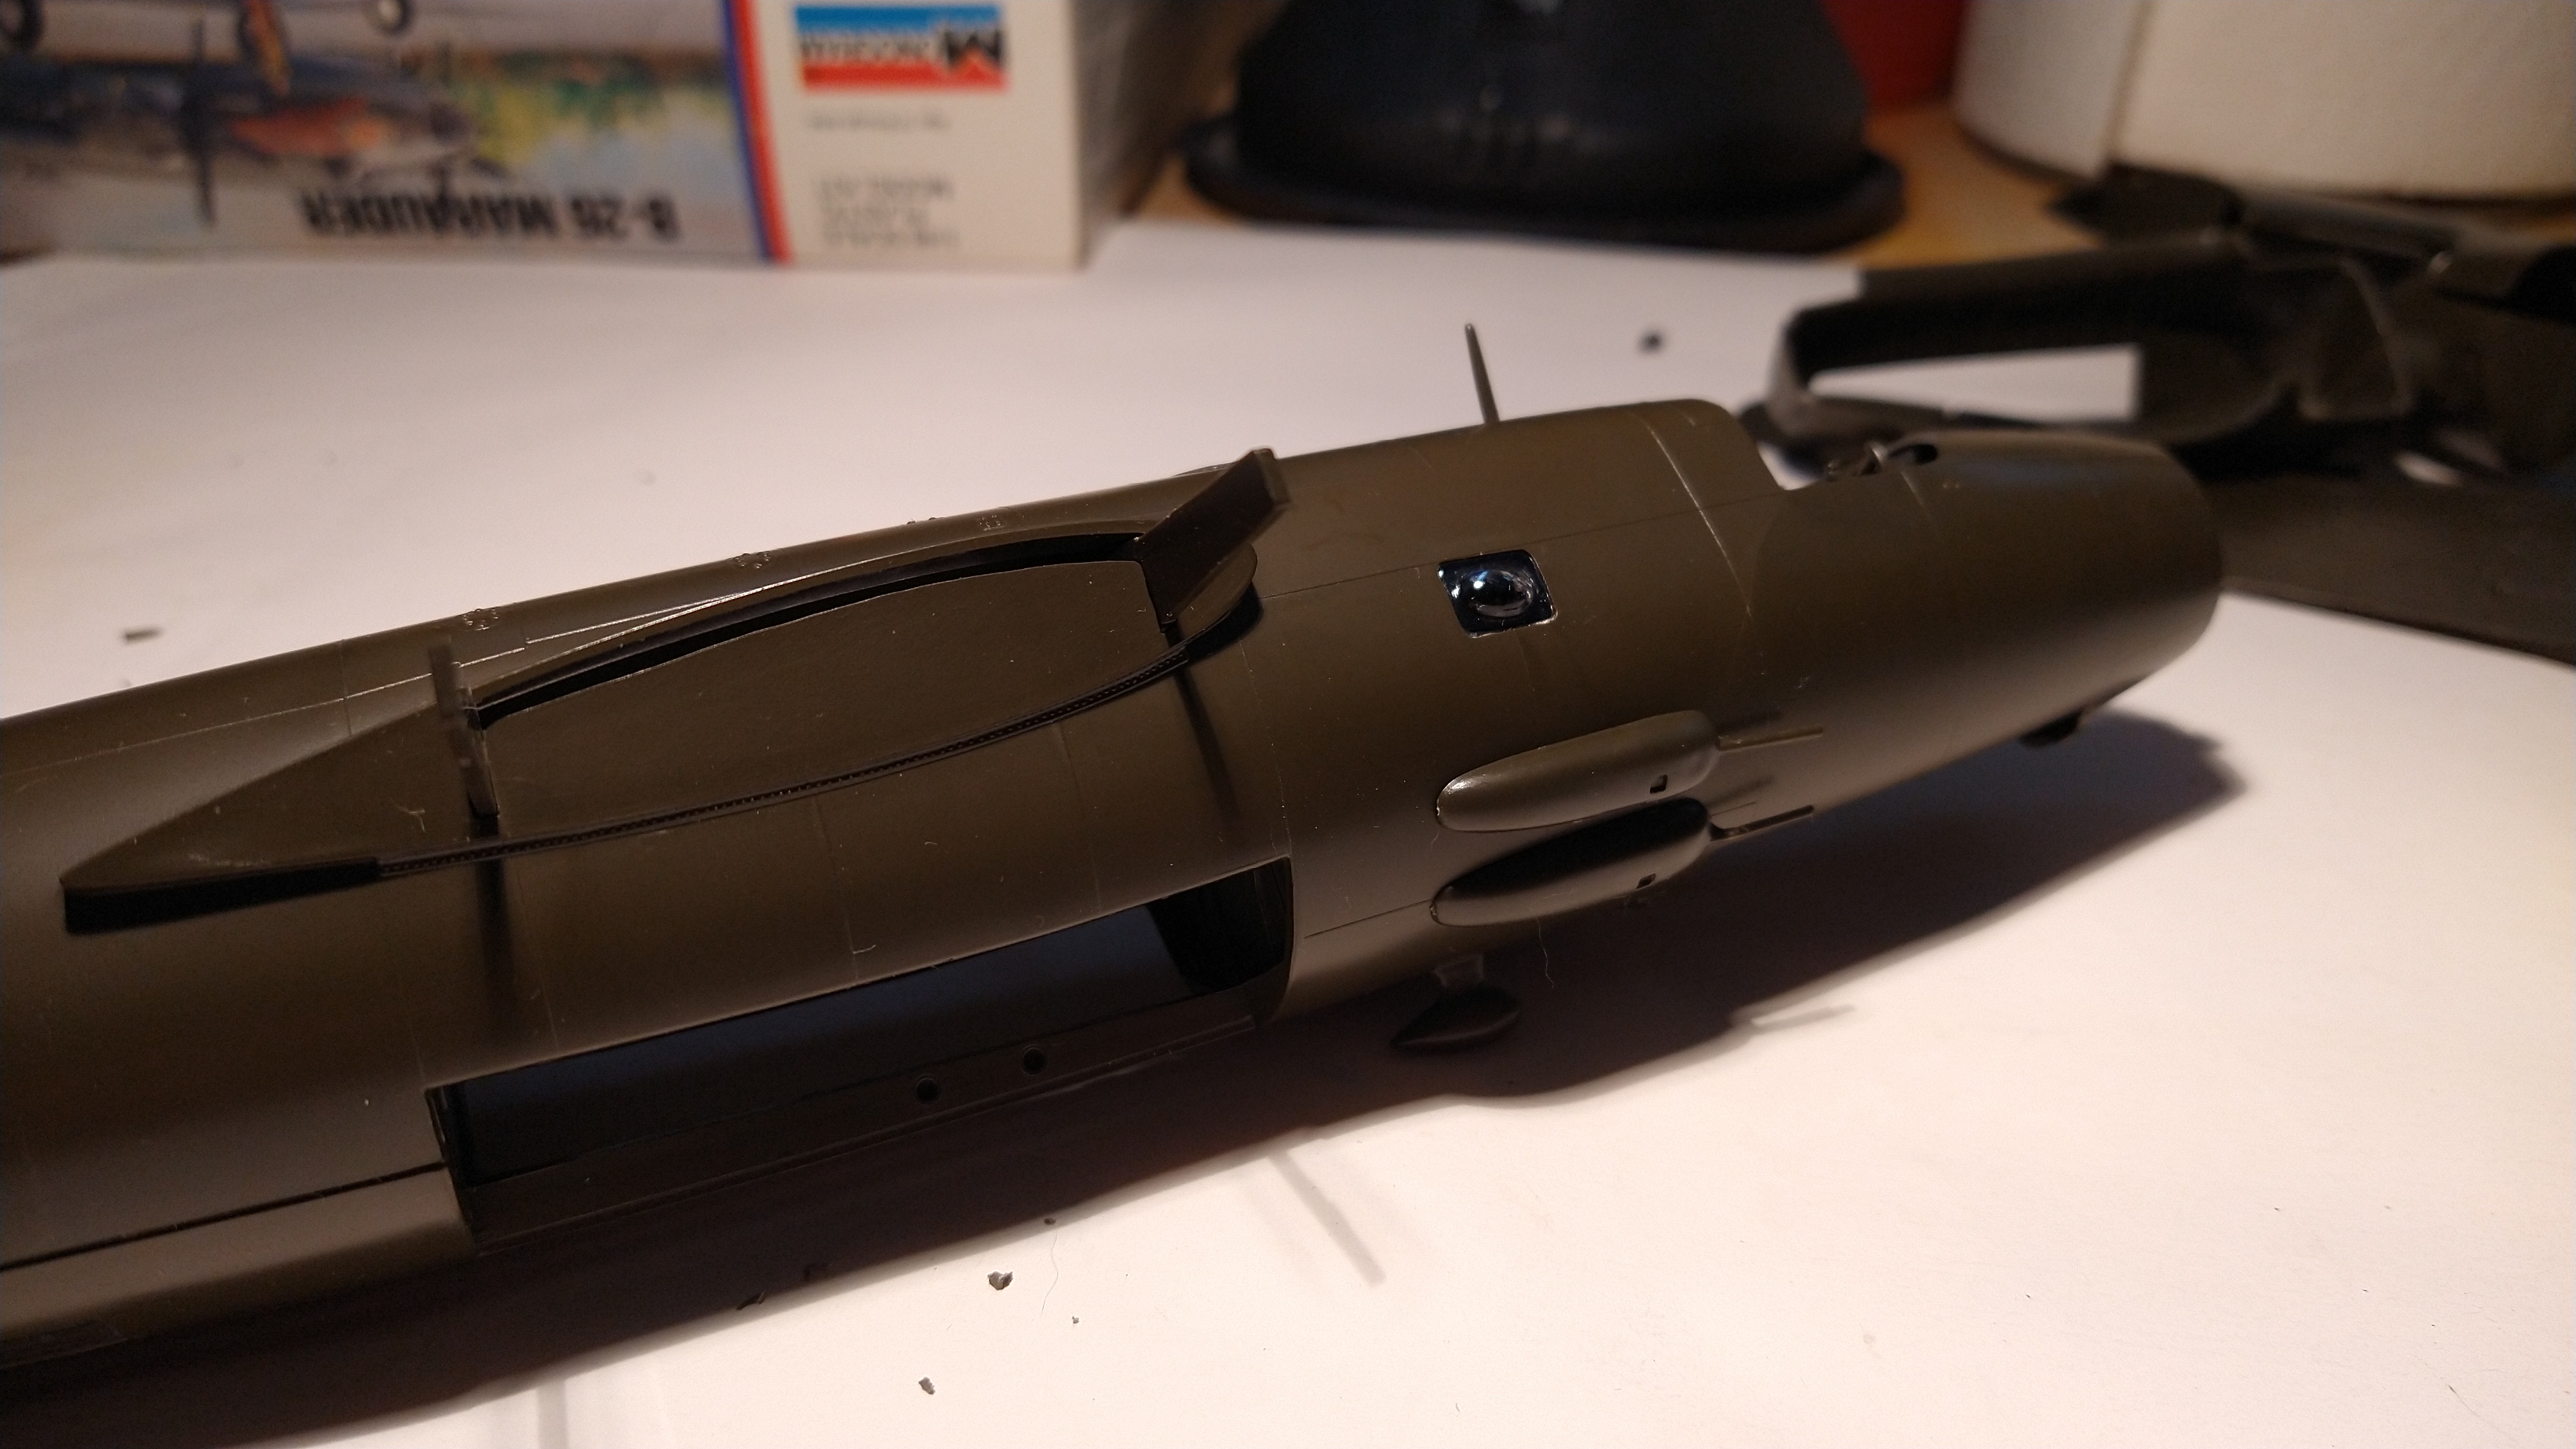
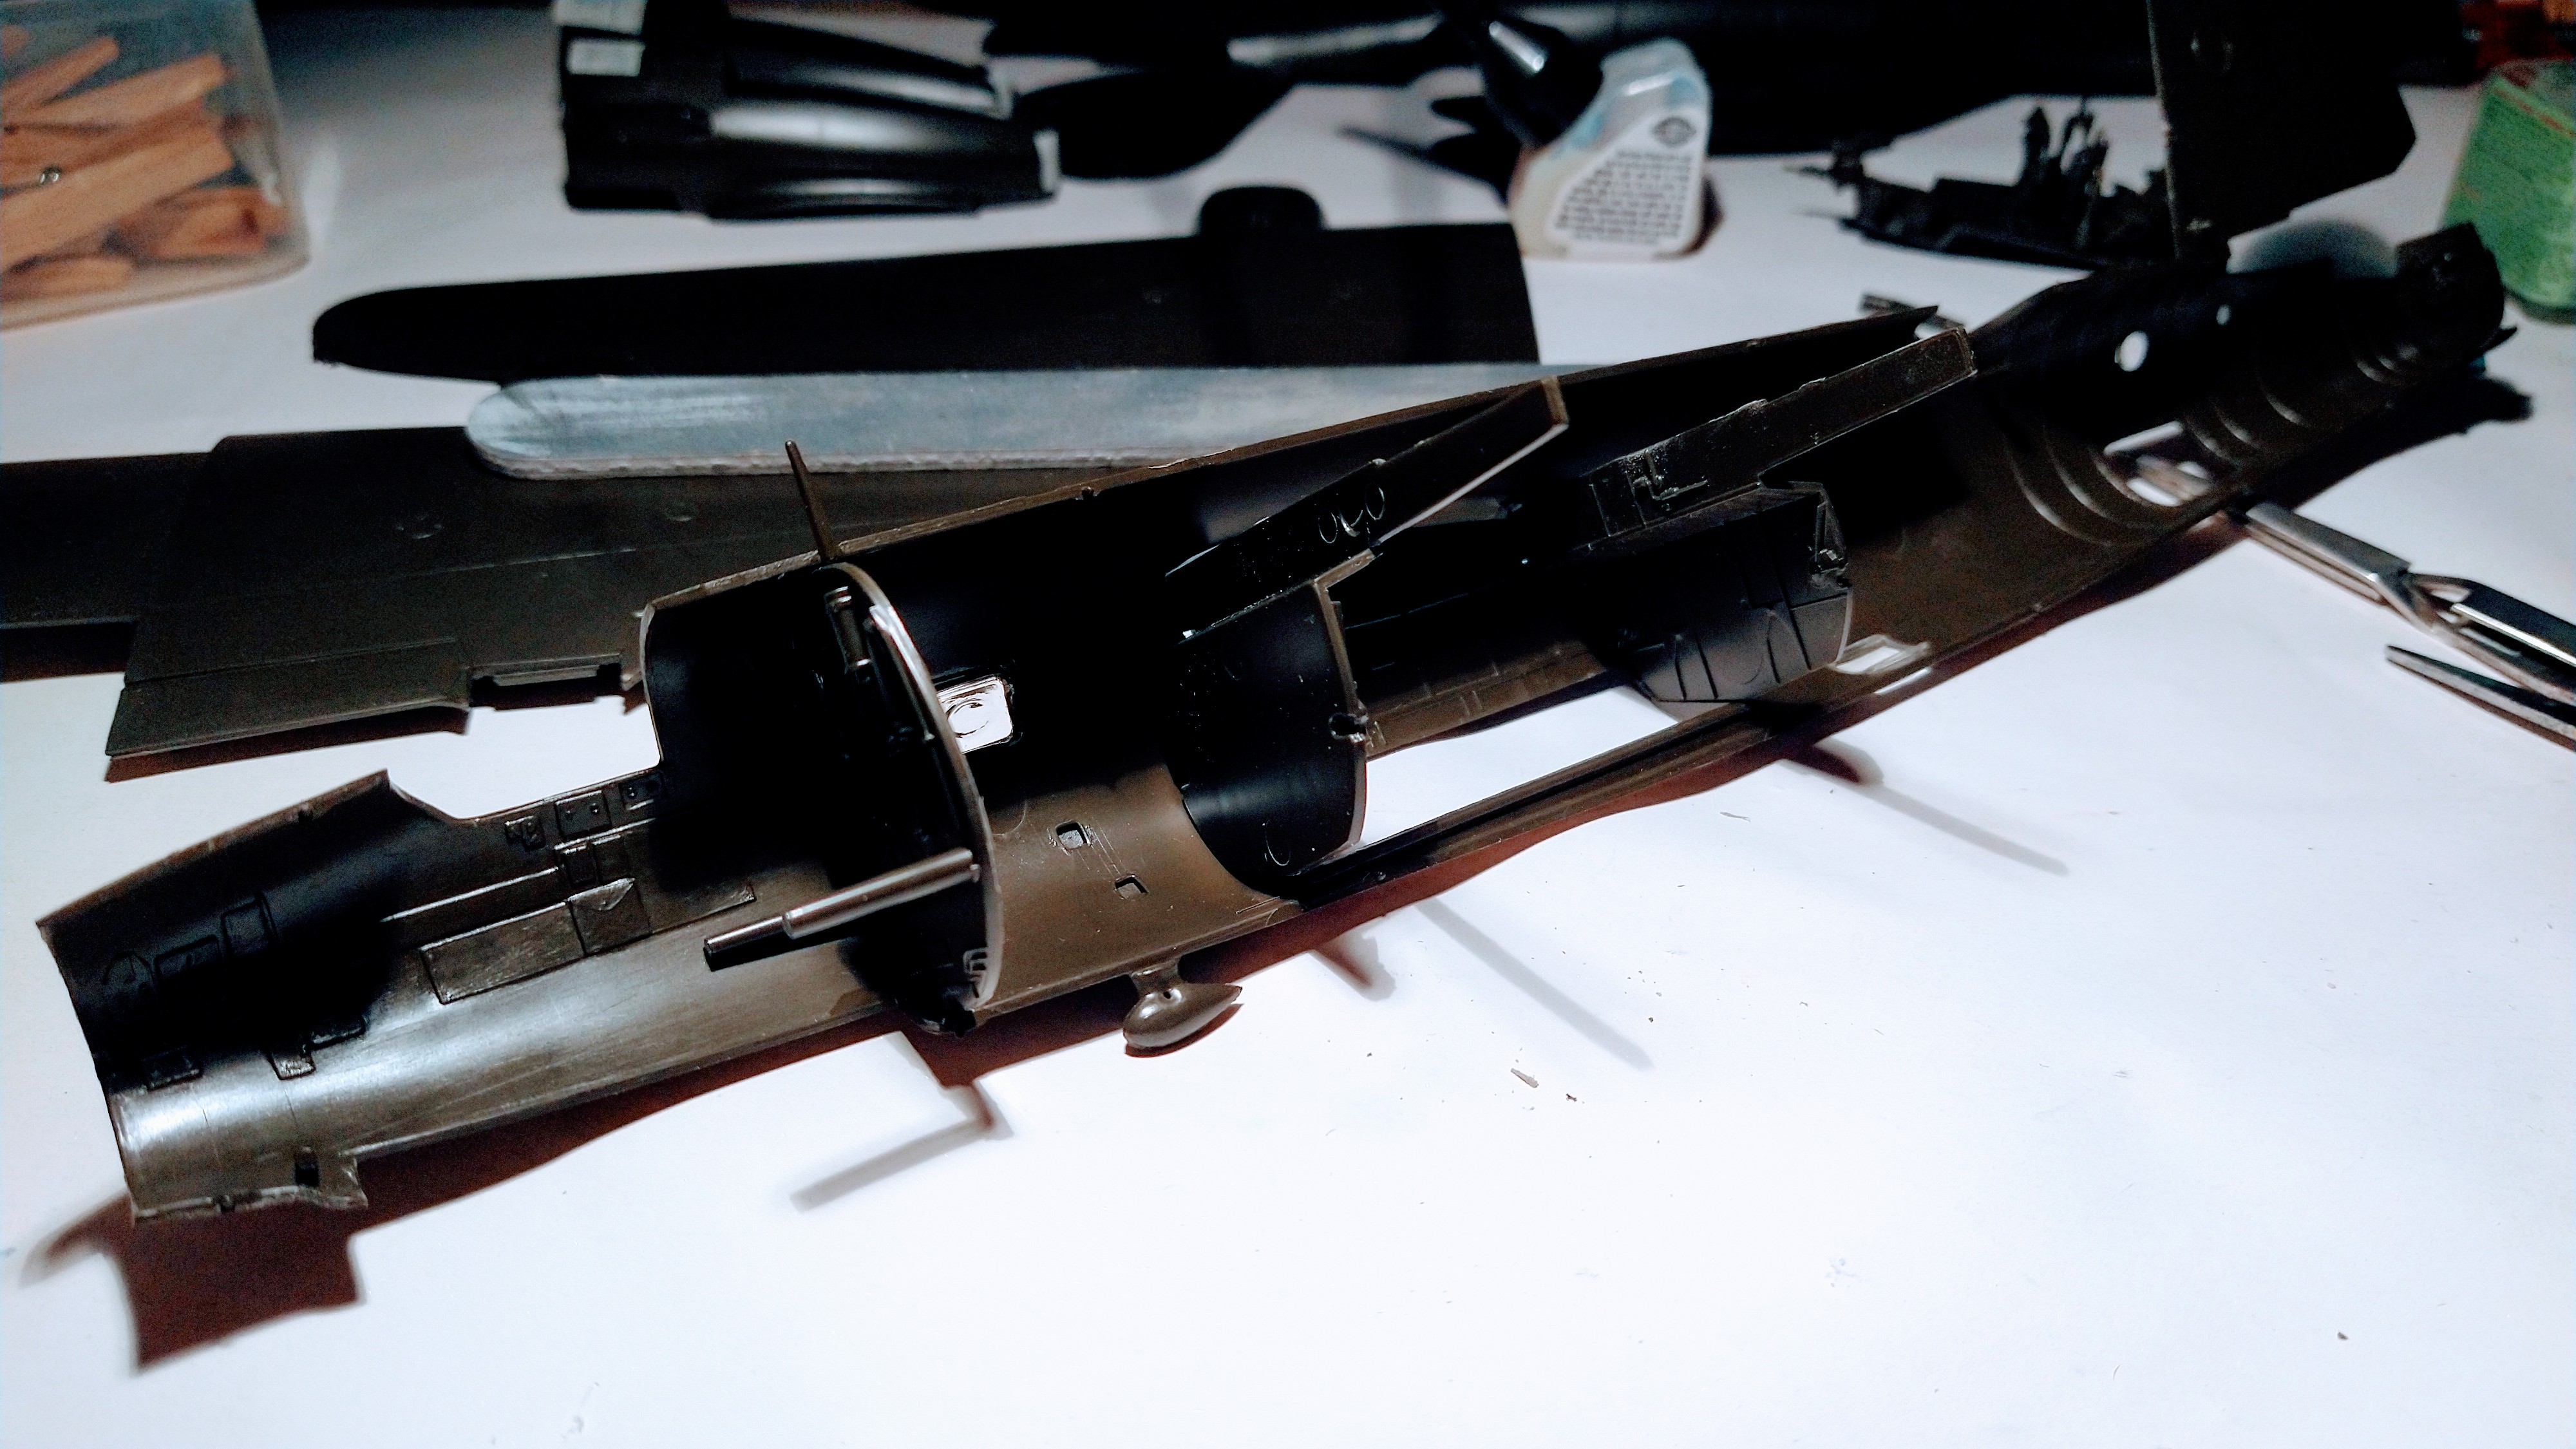
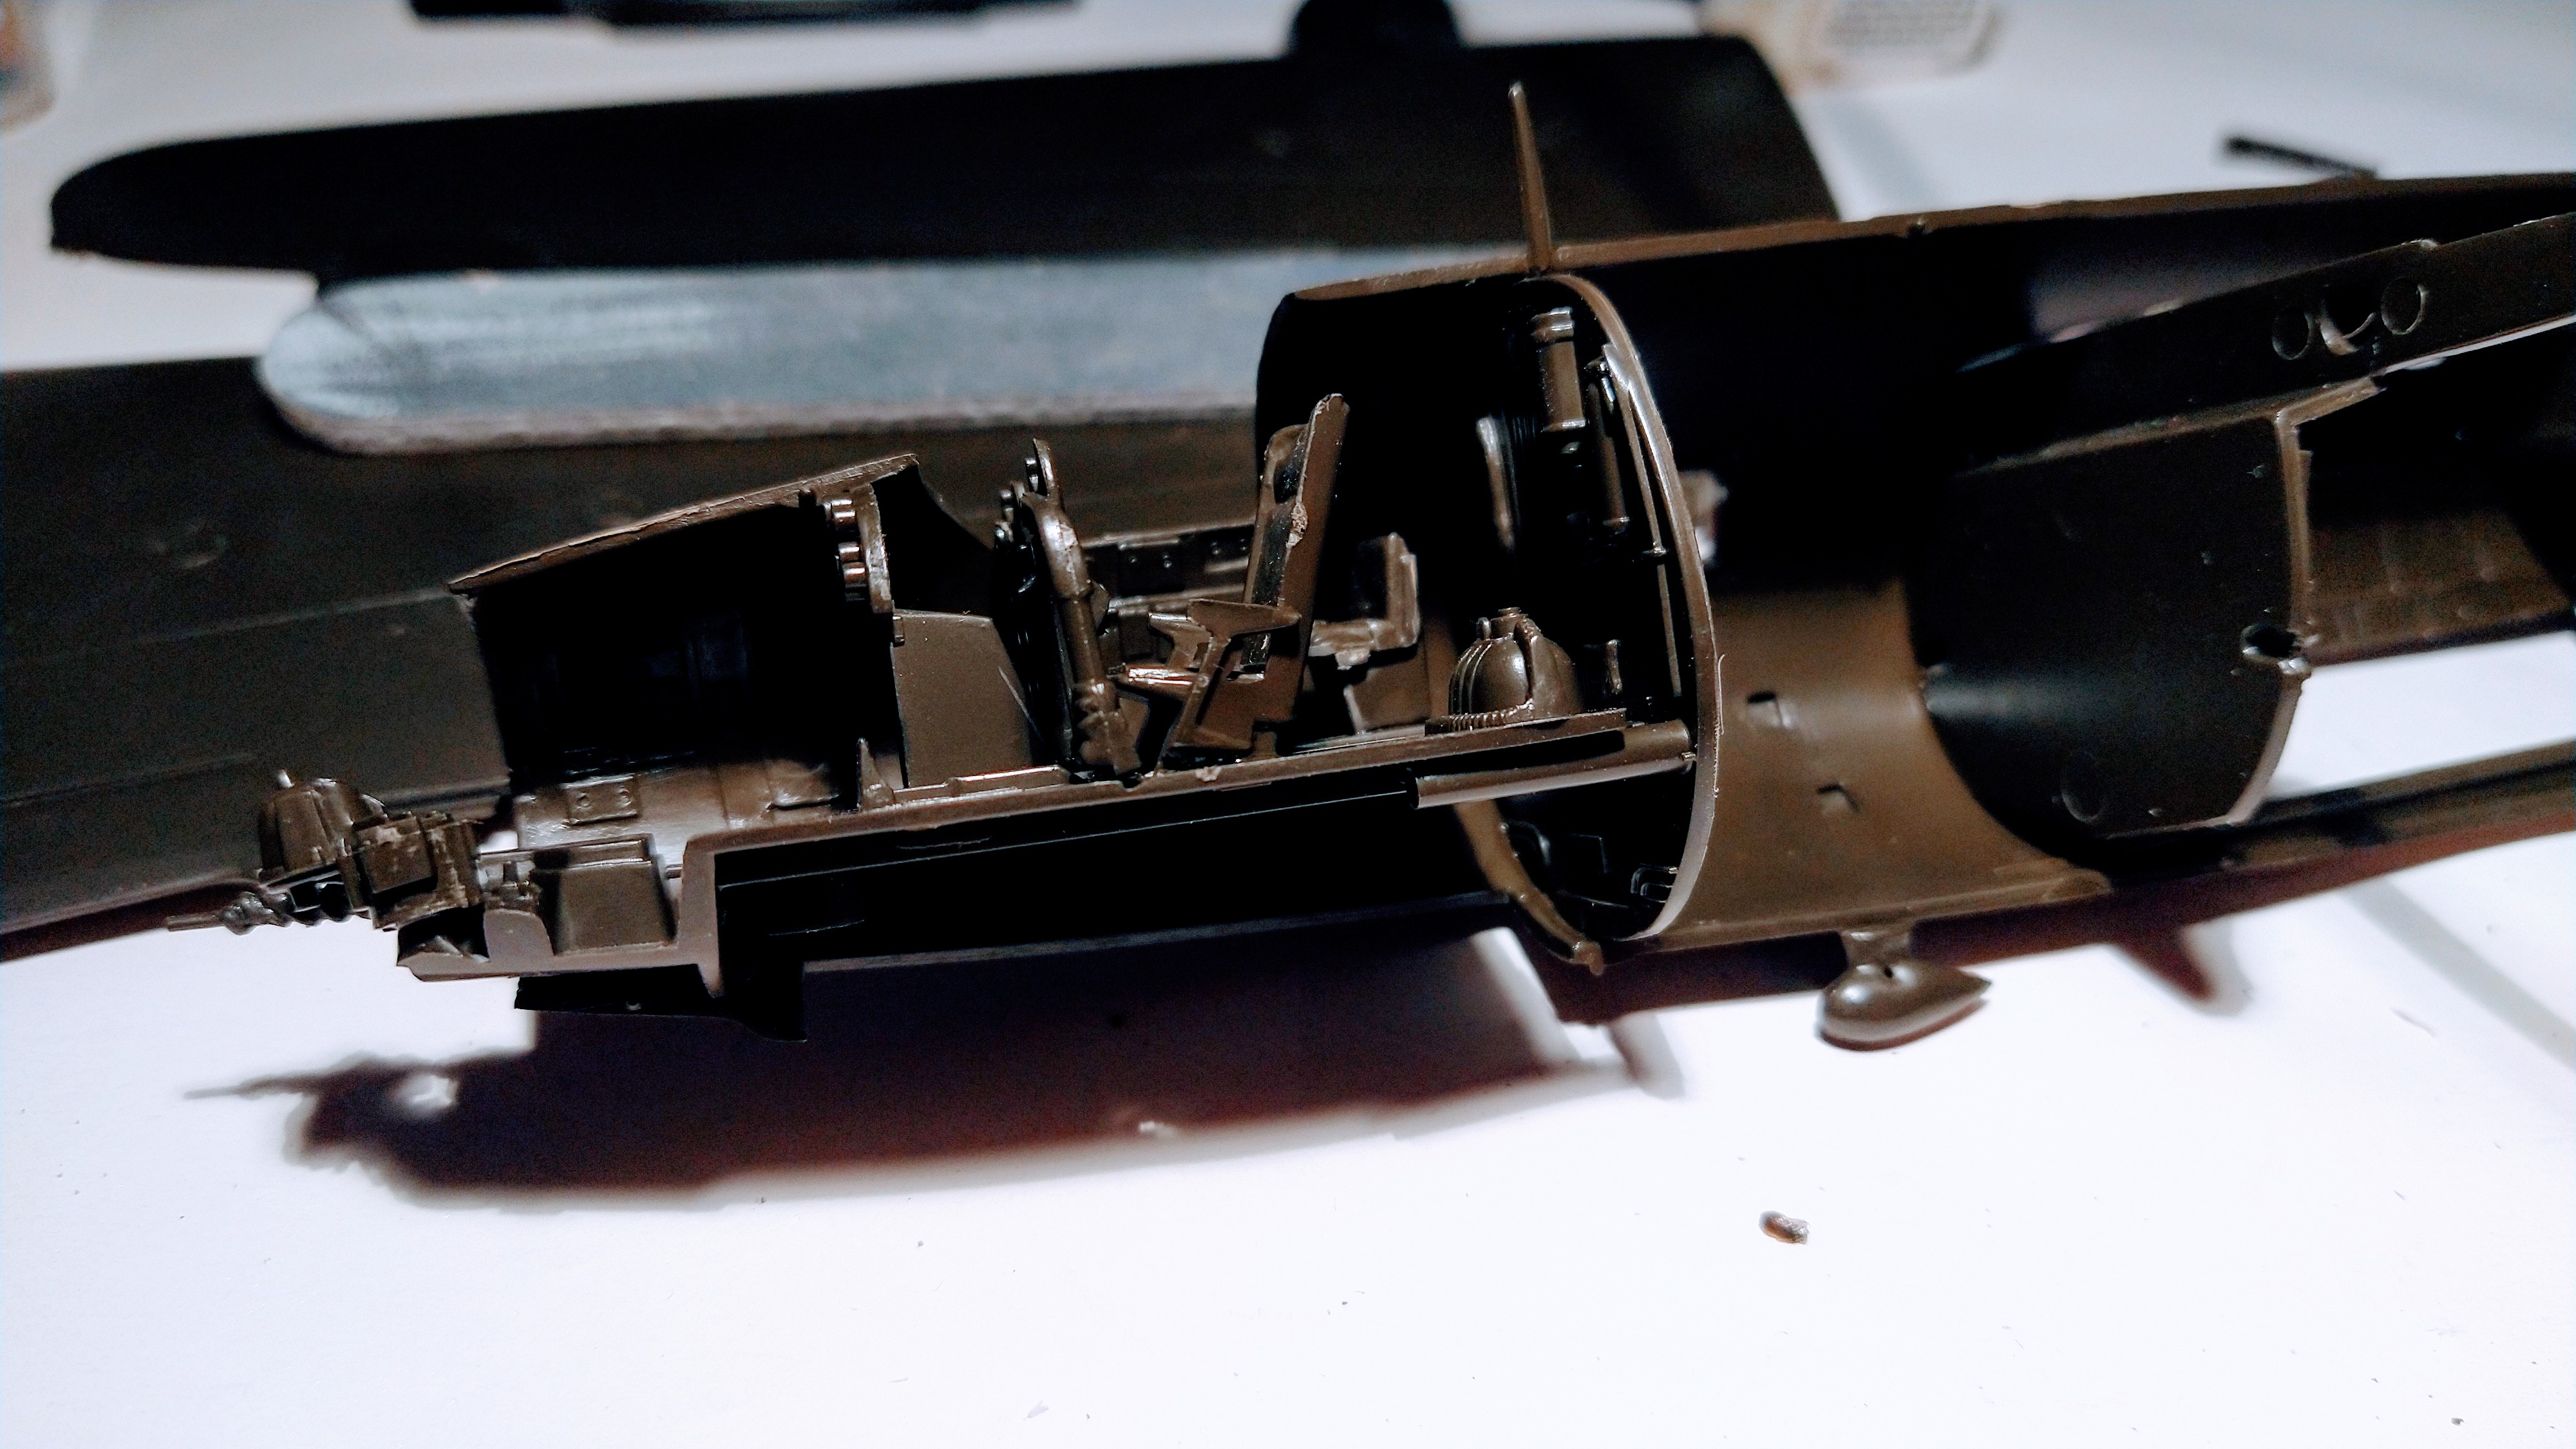
With this in mind I am moving a little faster now as I am waiting to start painting the interior.
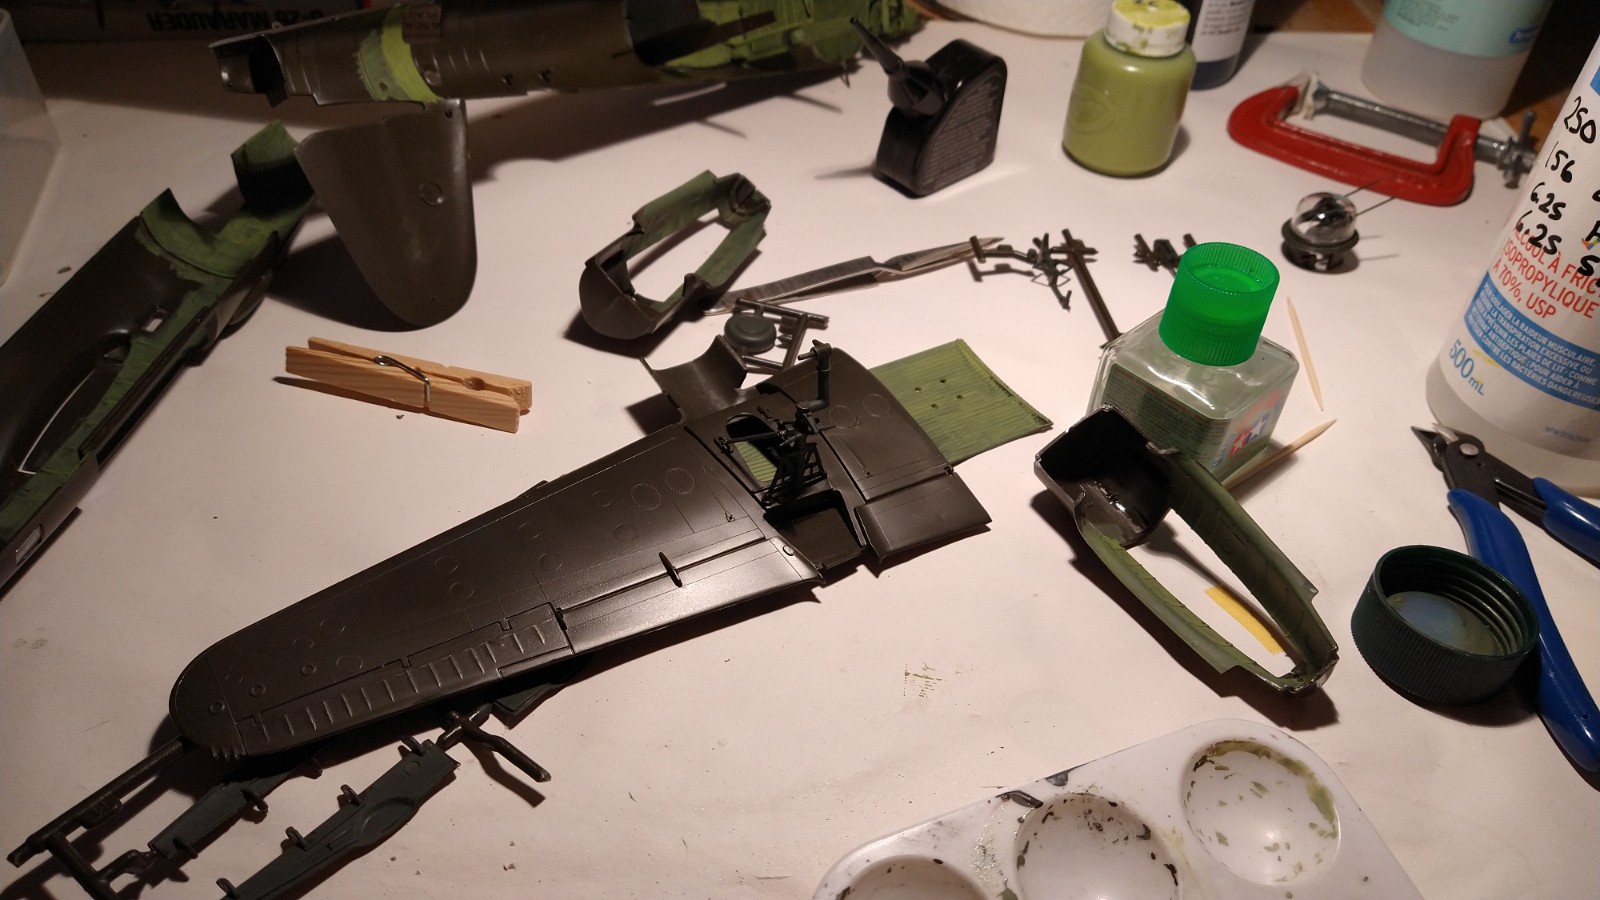
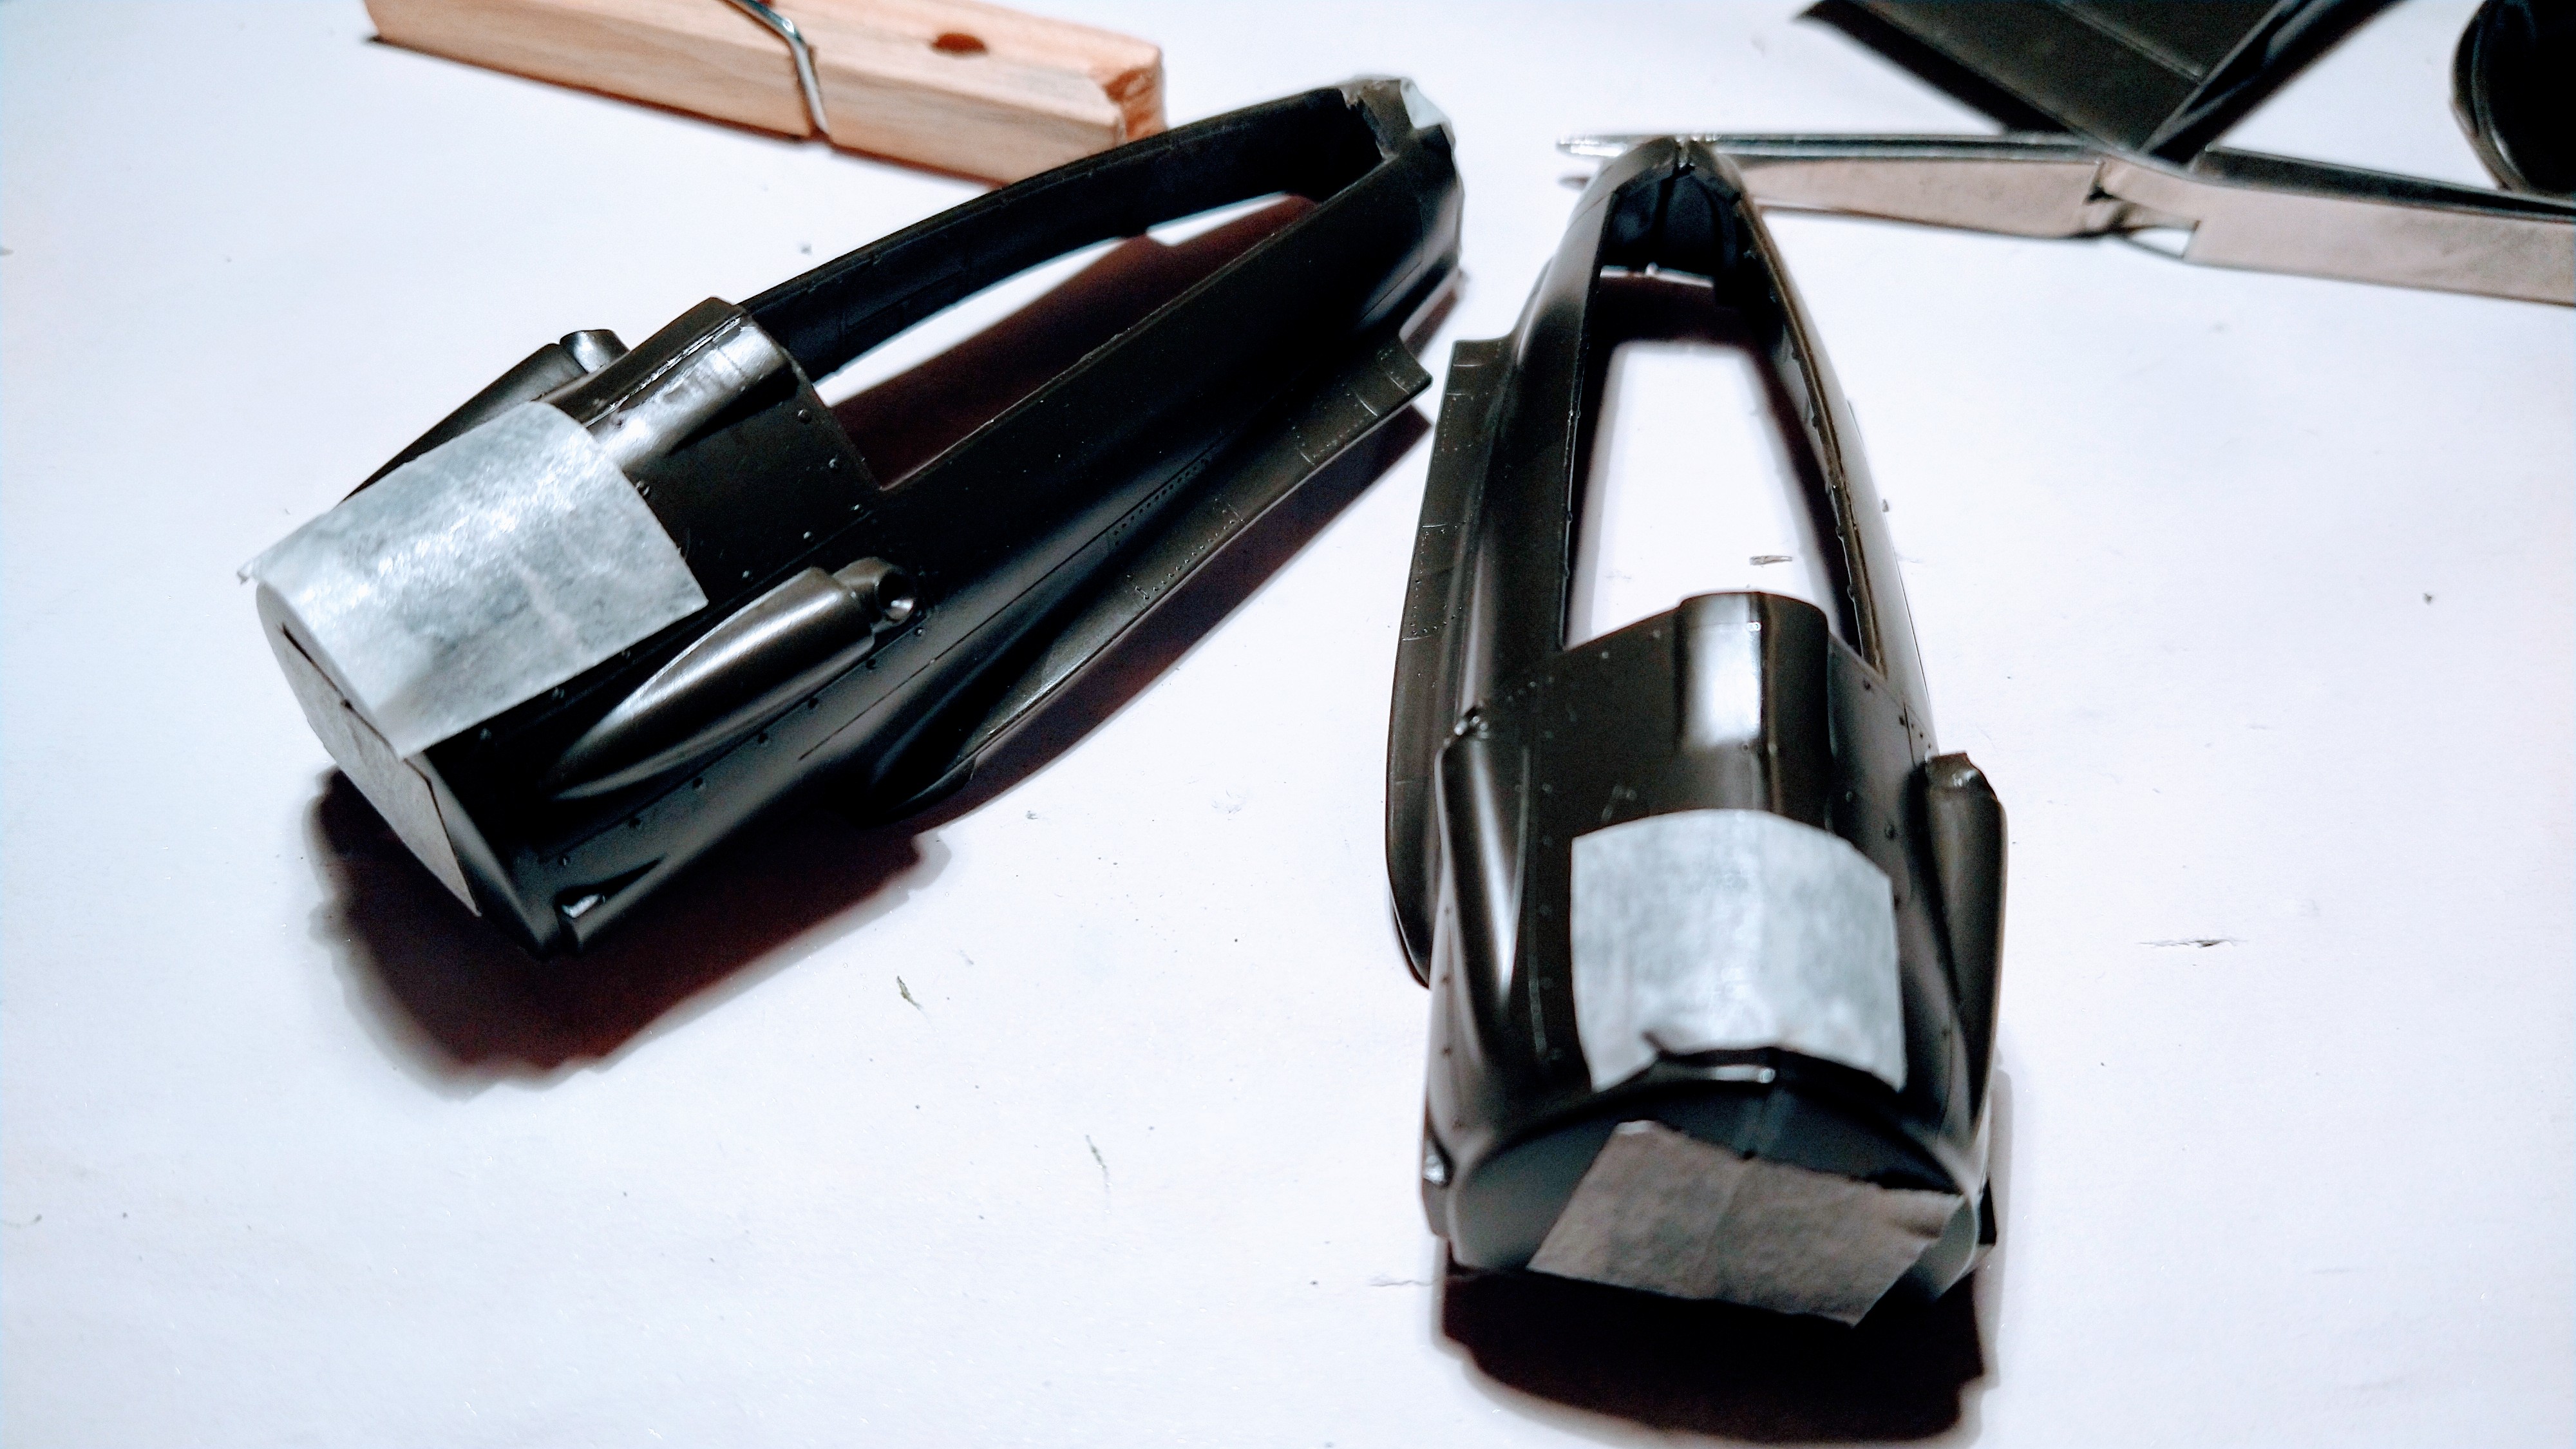
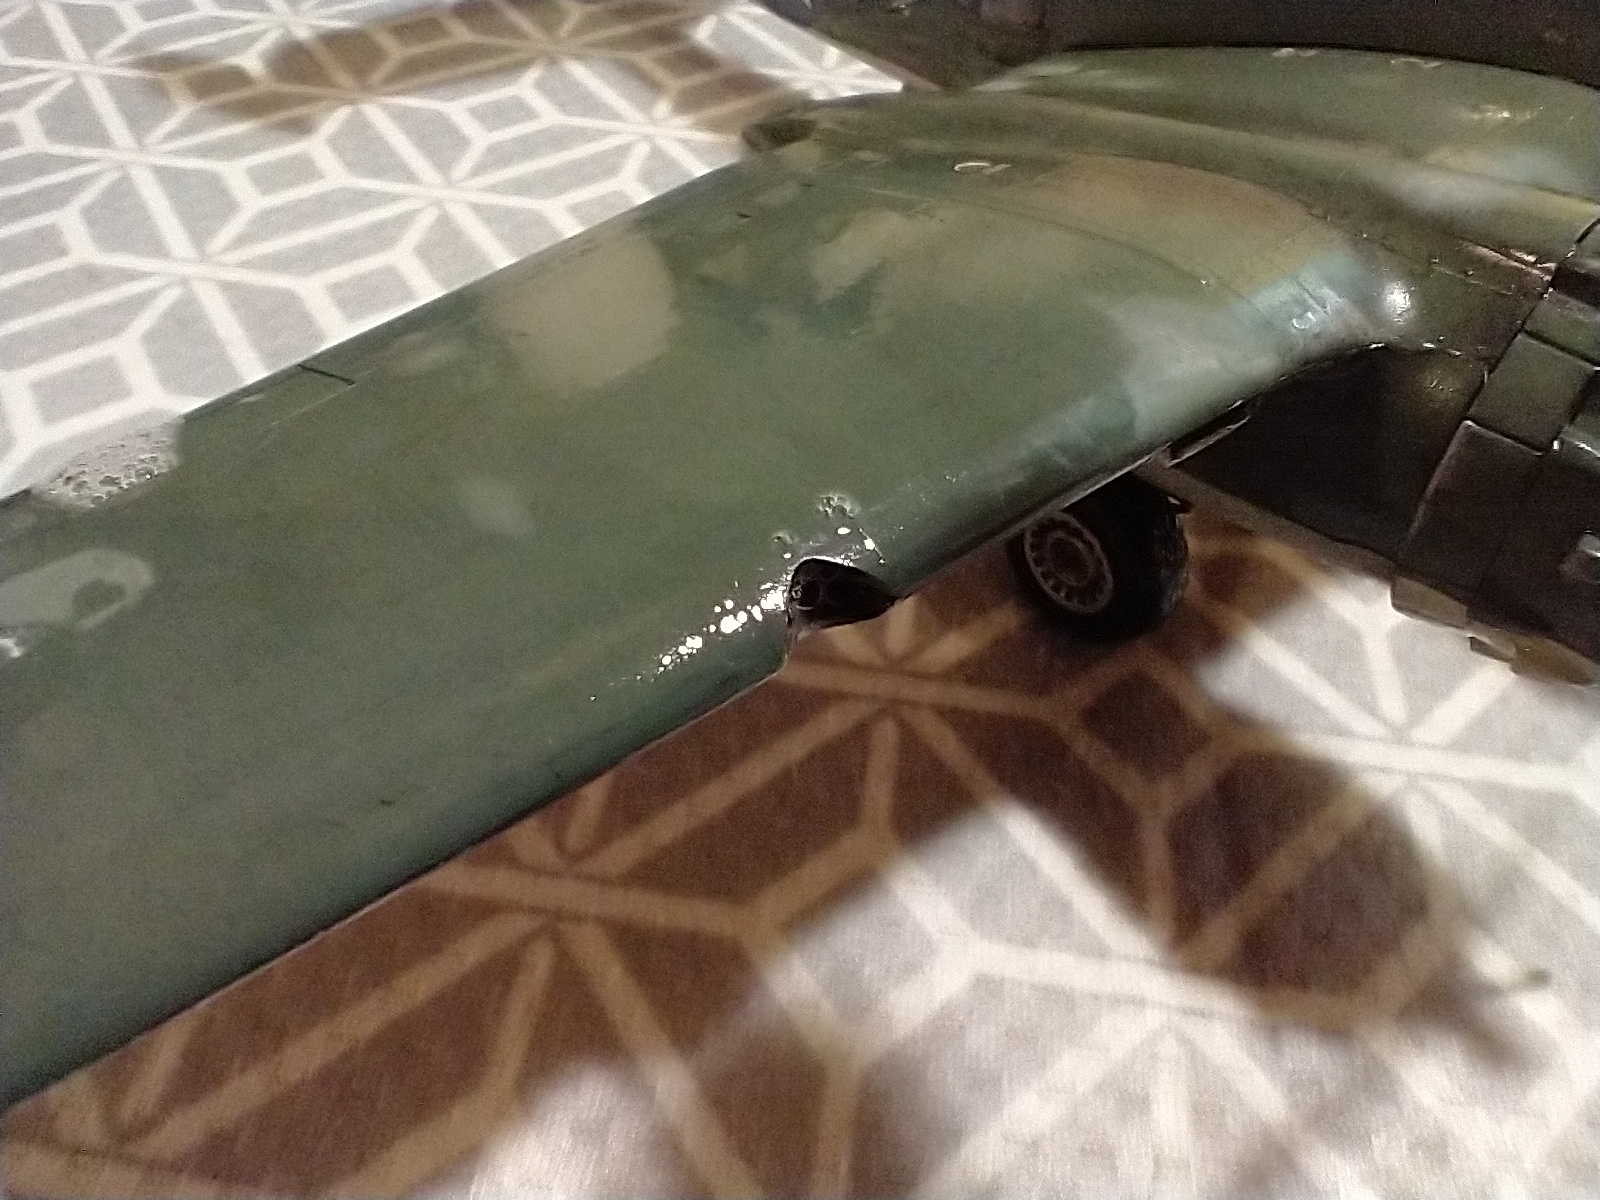
The main landing gears have been glued. The turret has been dry fitted.
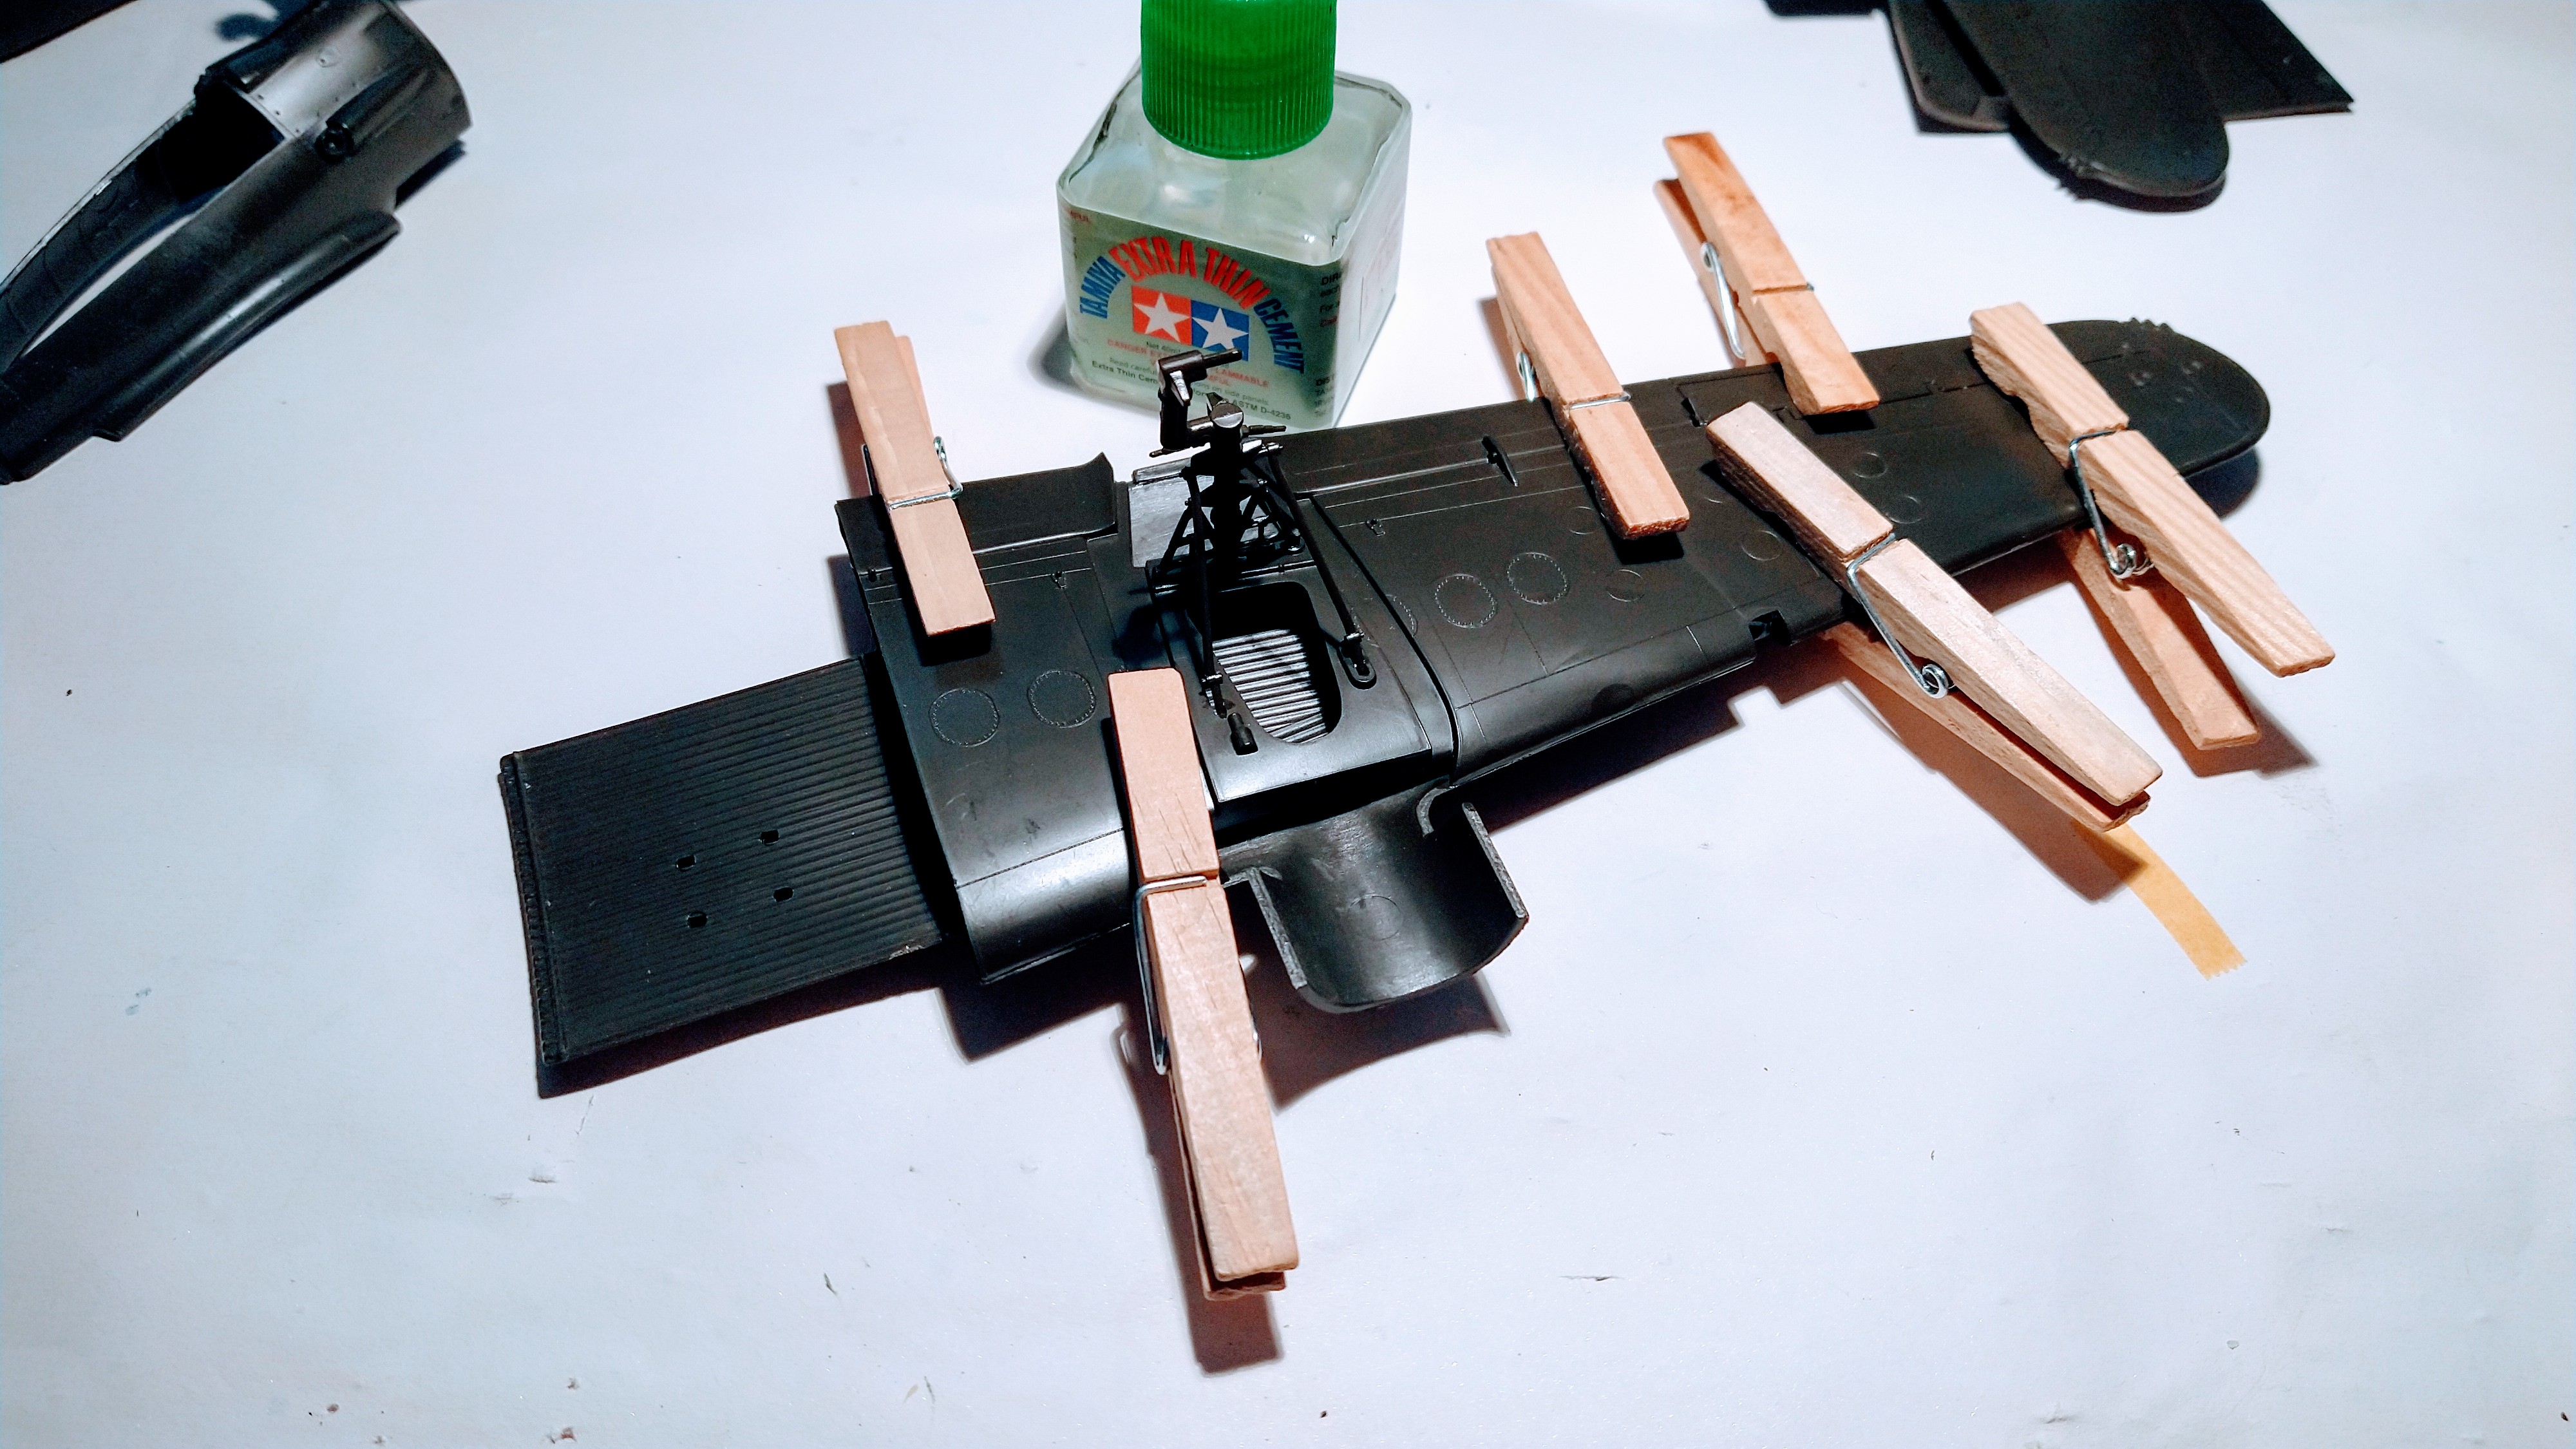
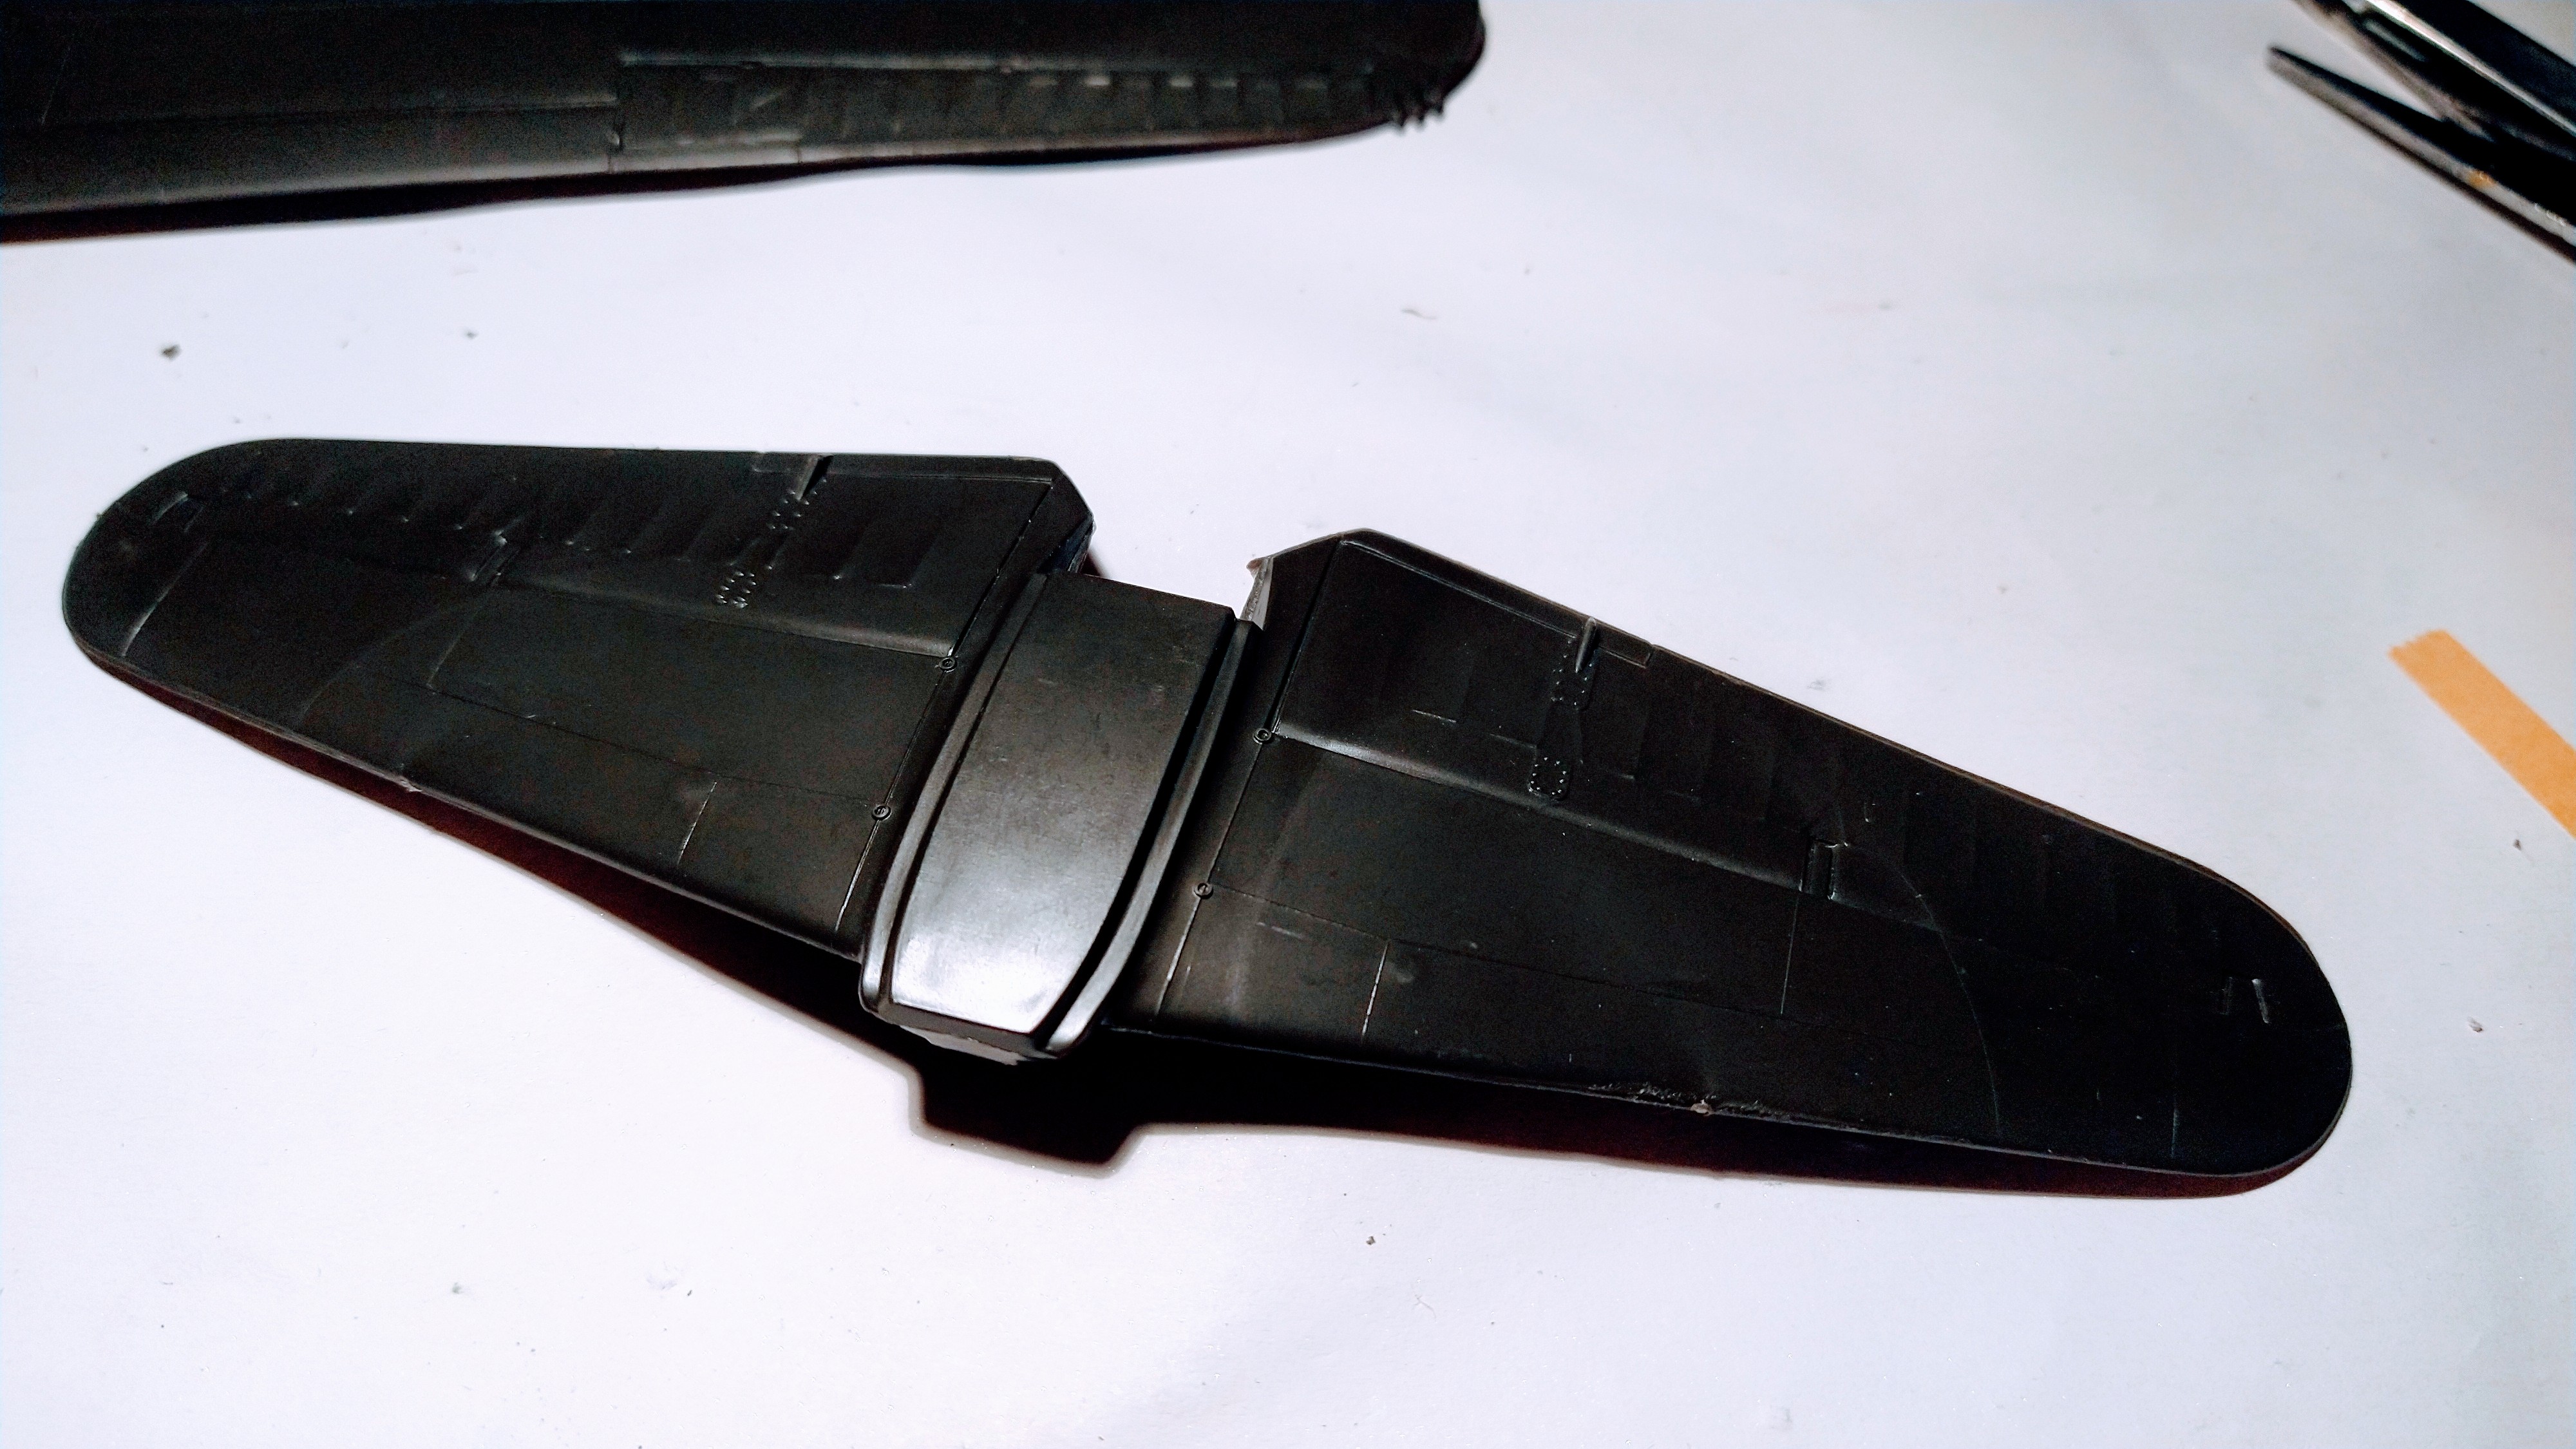
One wing has been glued in sections using extra thin cement.
The other wing will receive the same treatment later.
I still have to encounter that “horrible” fit Plane Dave talked about, but I am vigilant, always dry fitting before glueing parts. Whatever happens I am willing to live with any unsightly gaps.
I am moving right along taking small steps as I am waiting to start painting the interior.
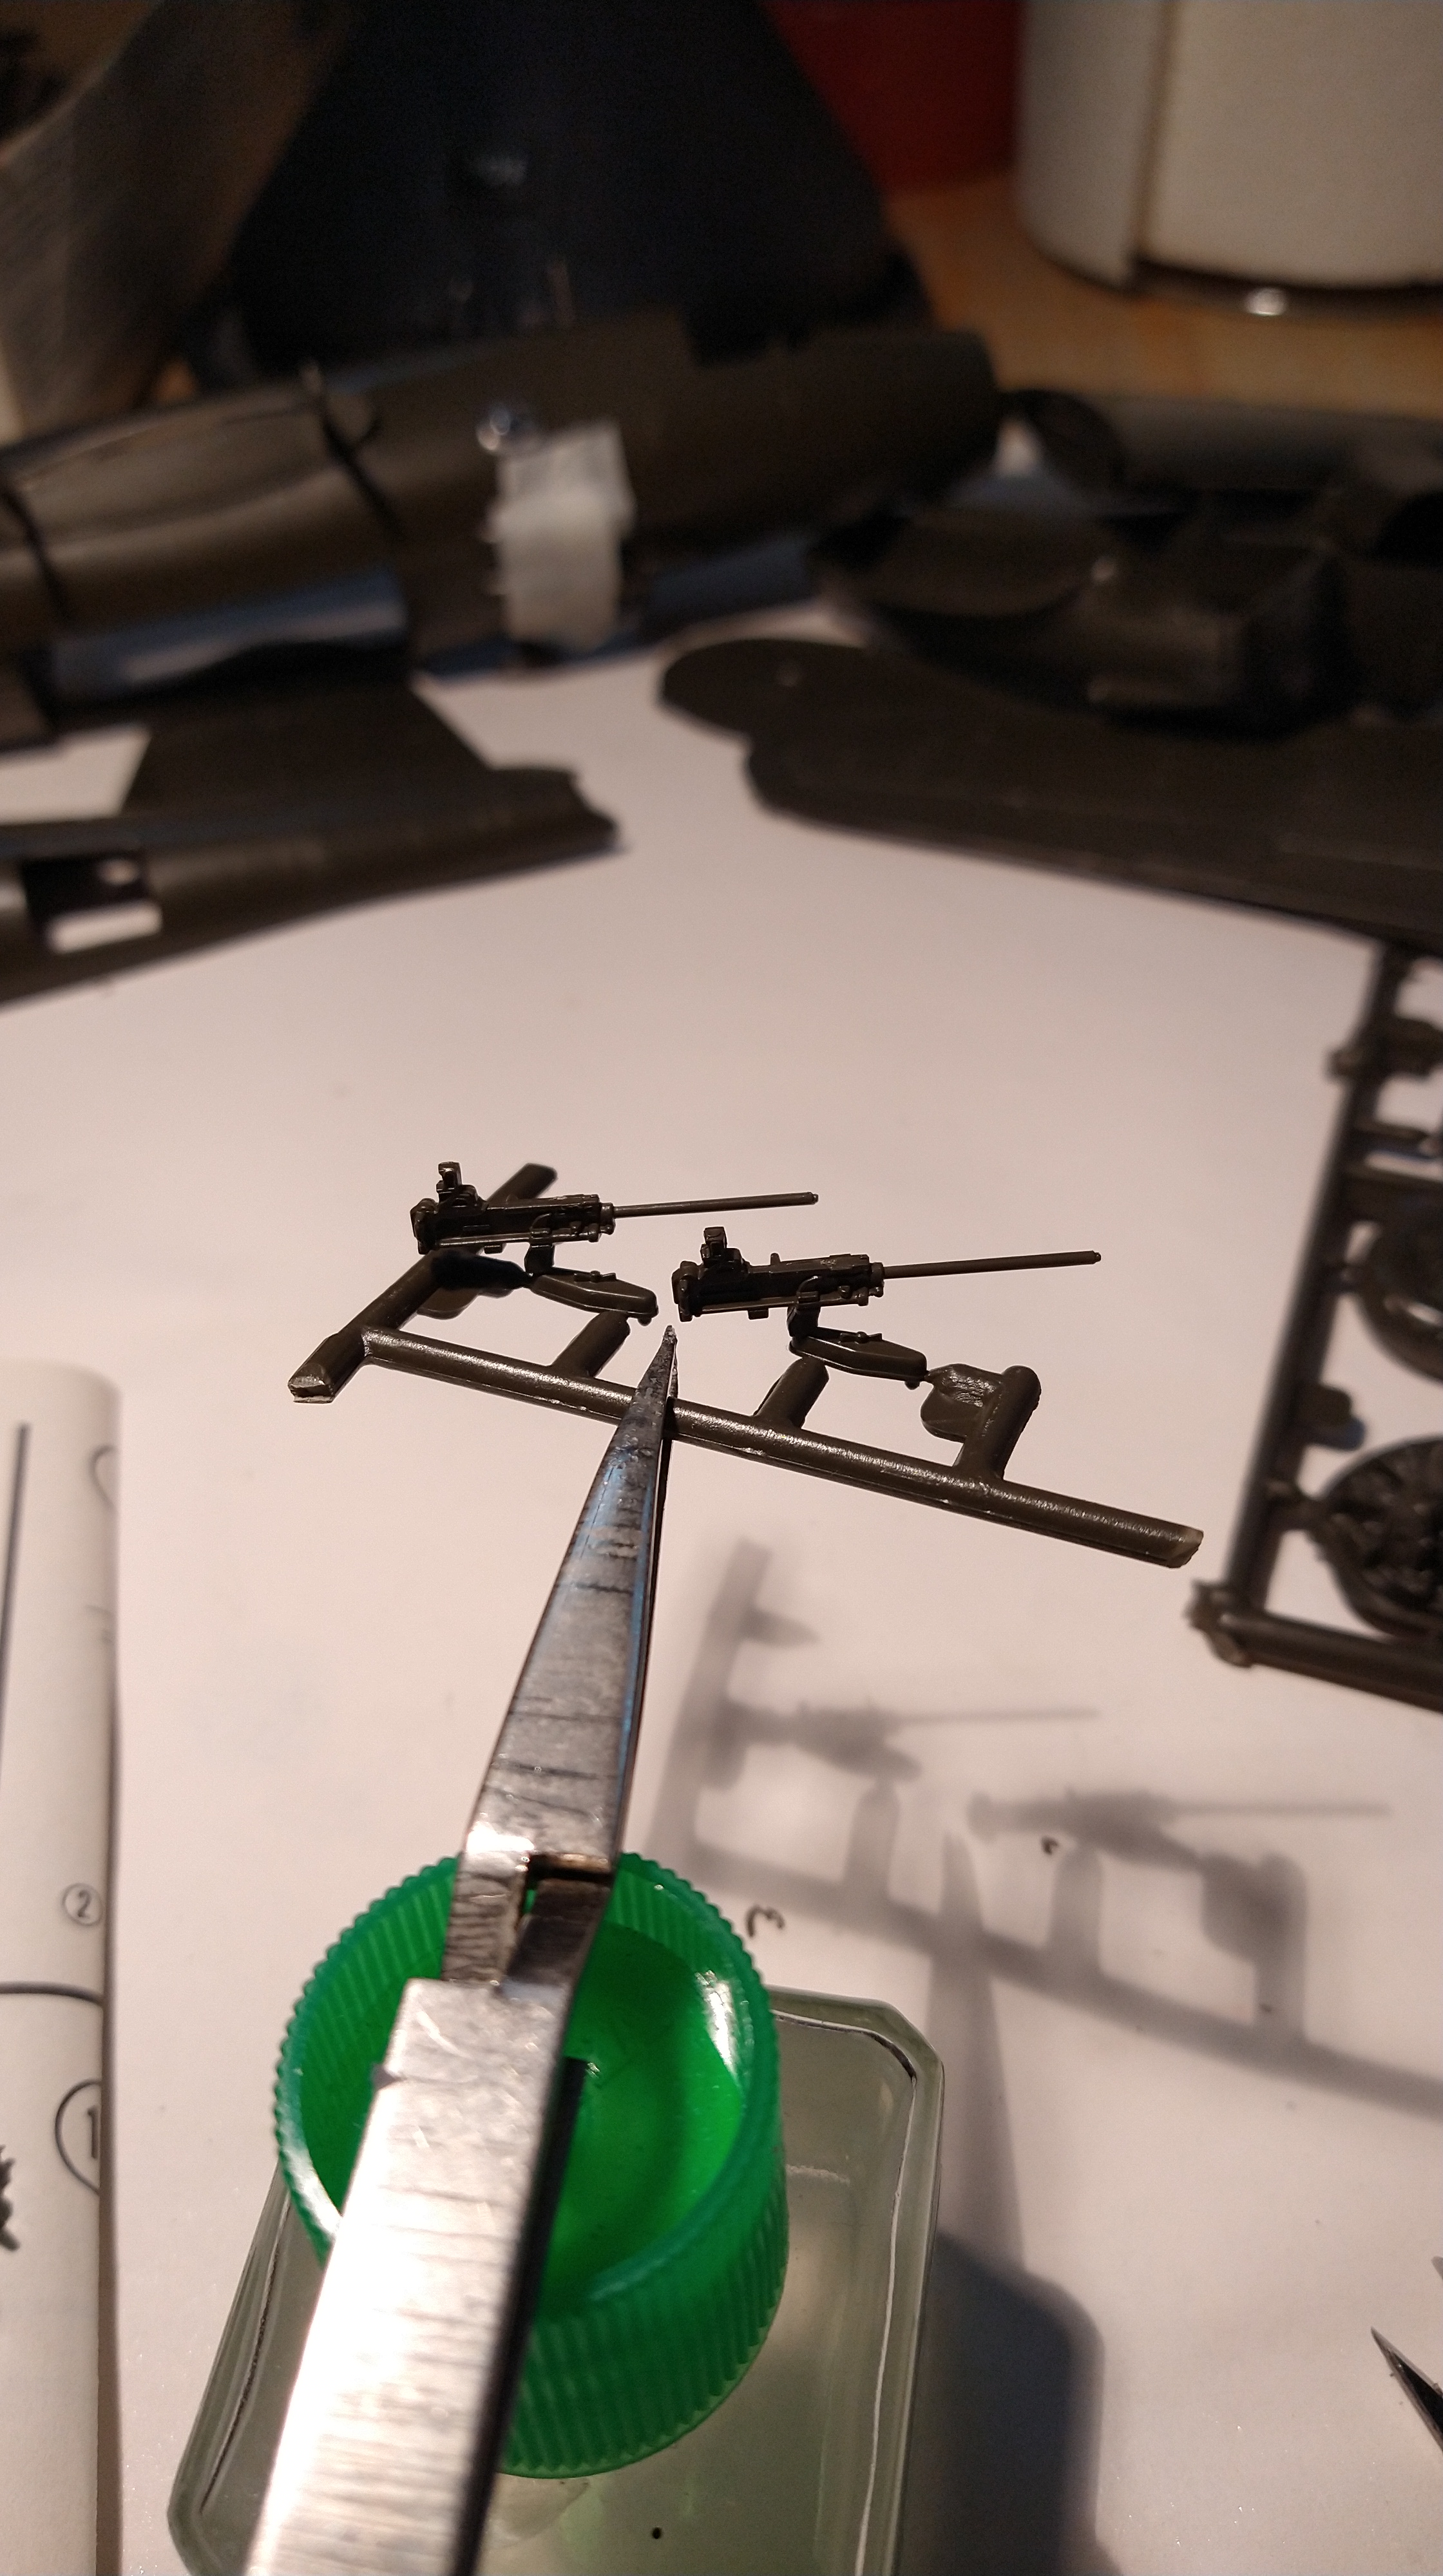
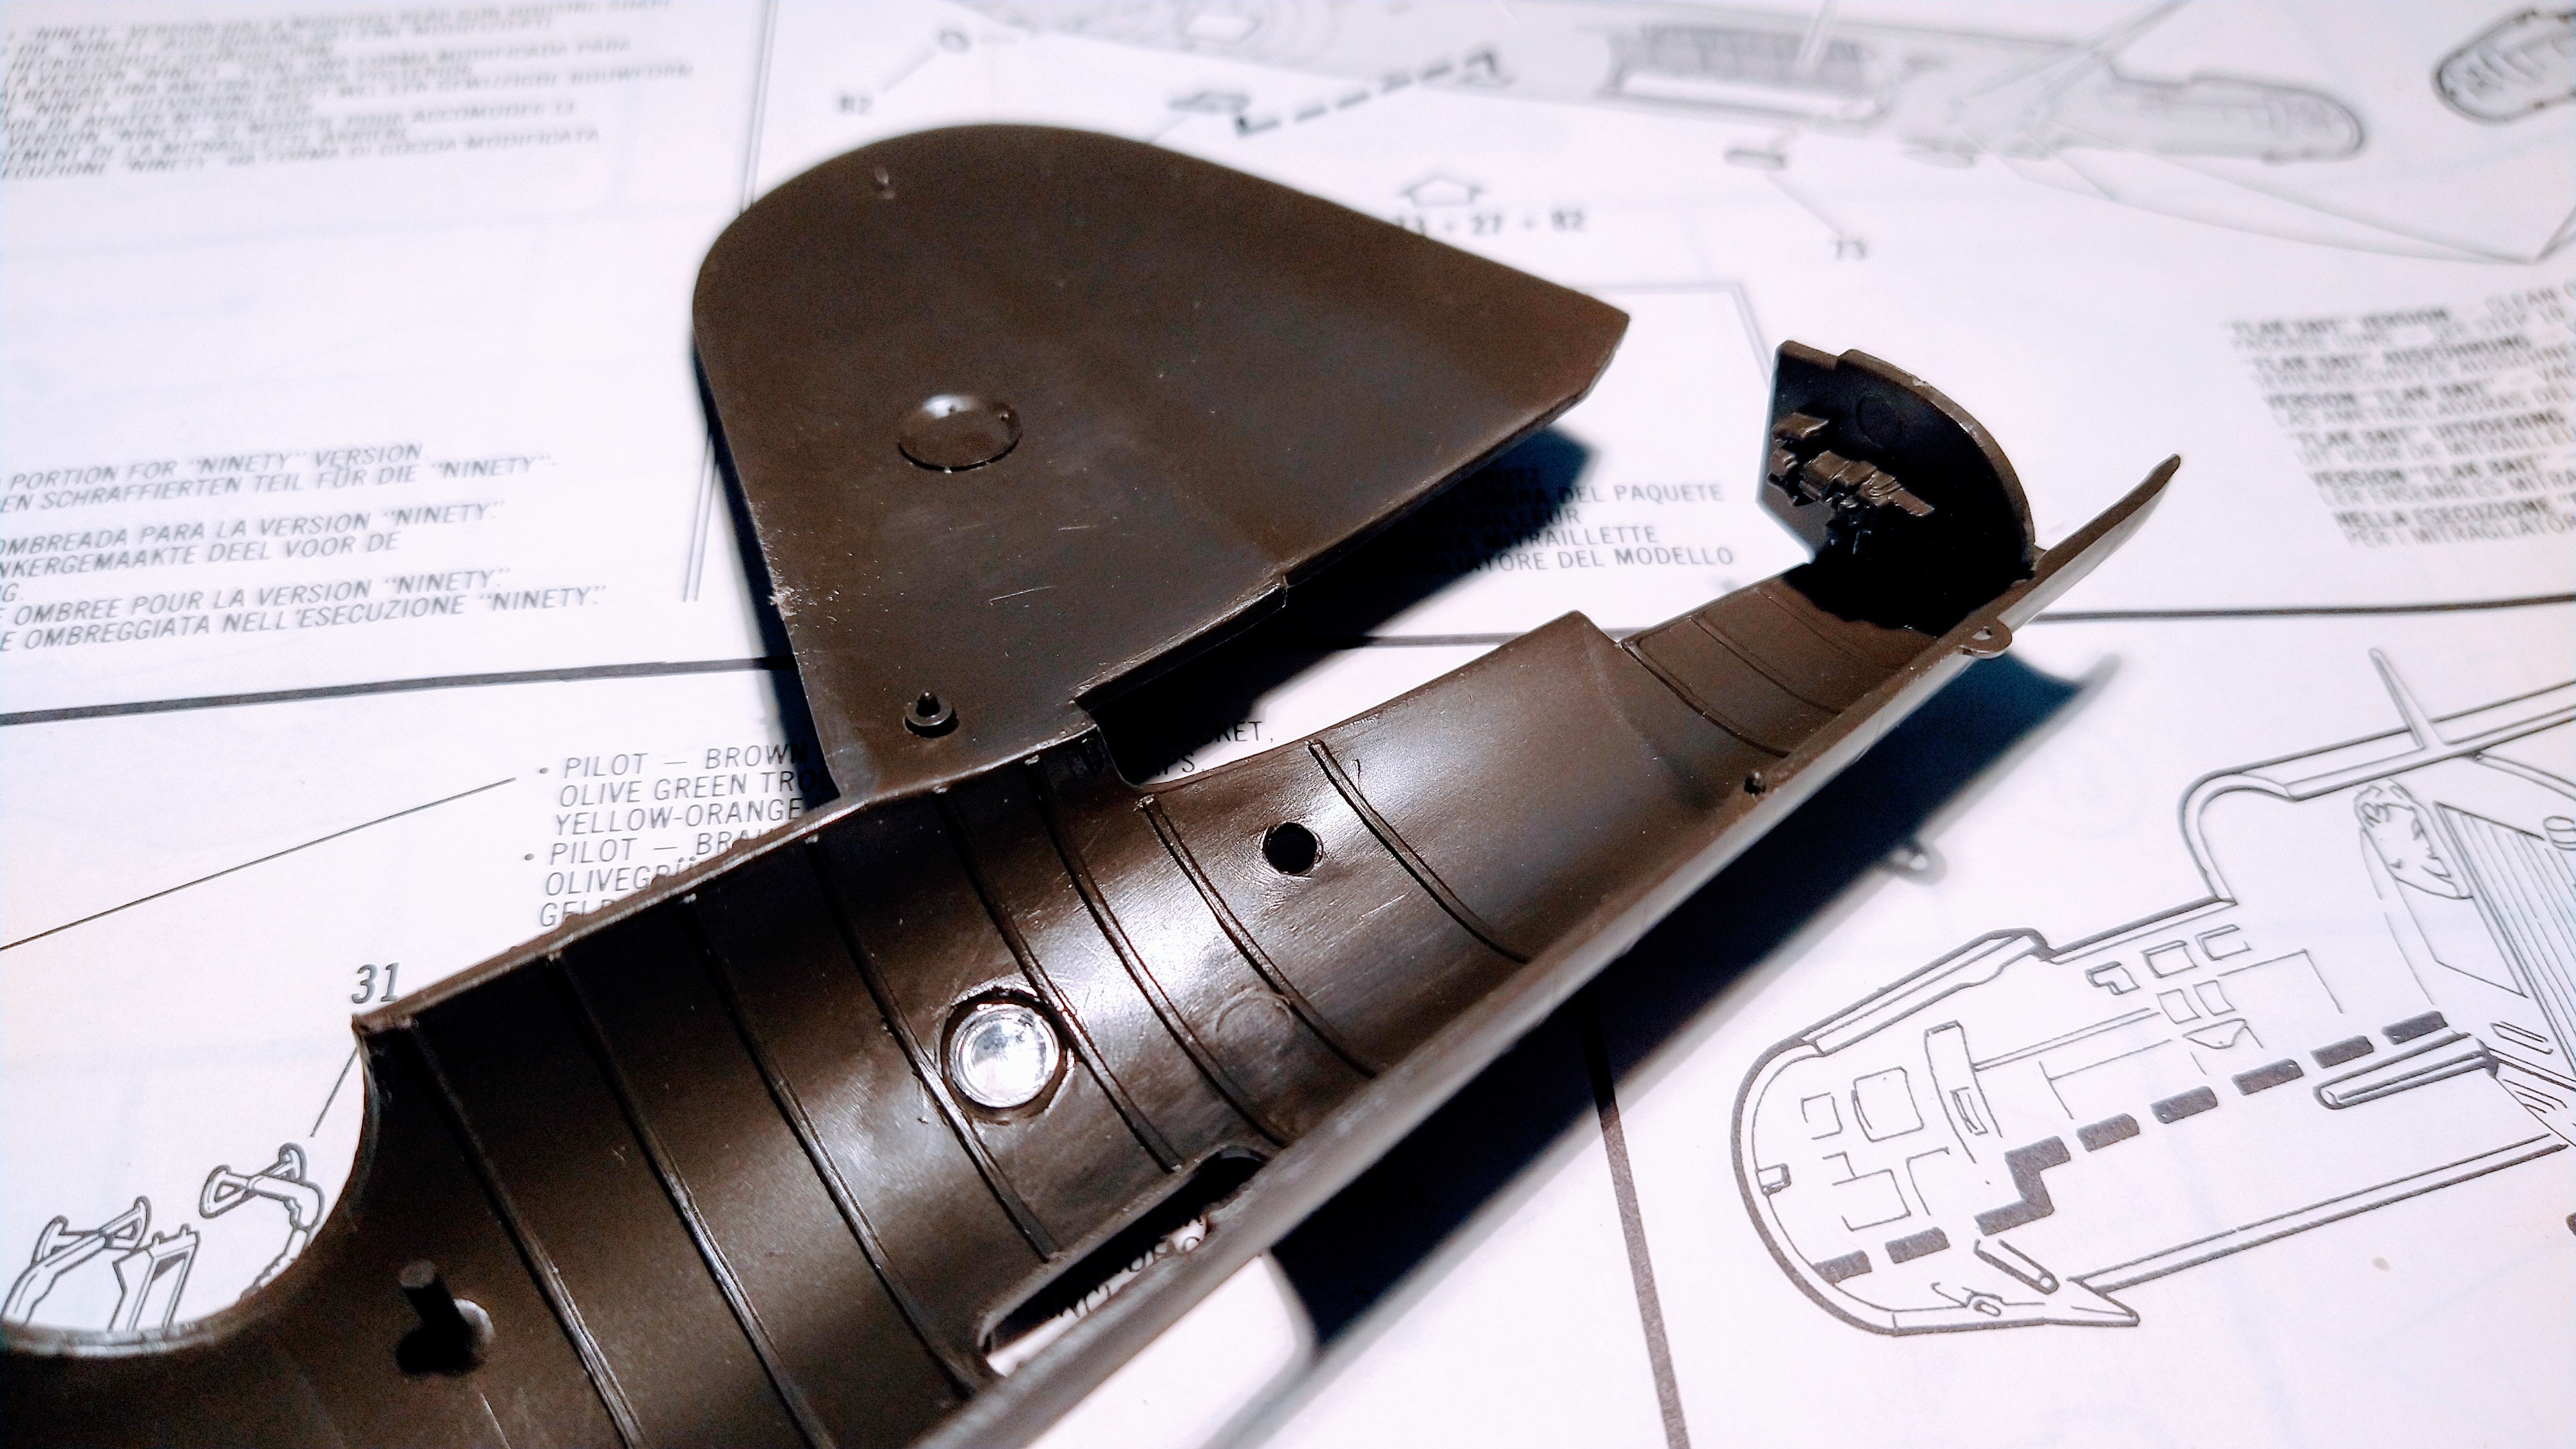
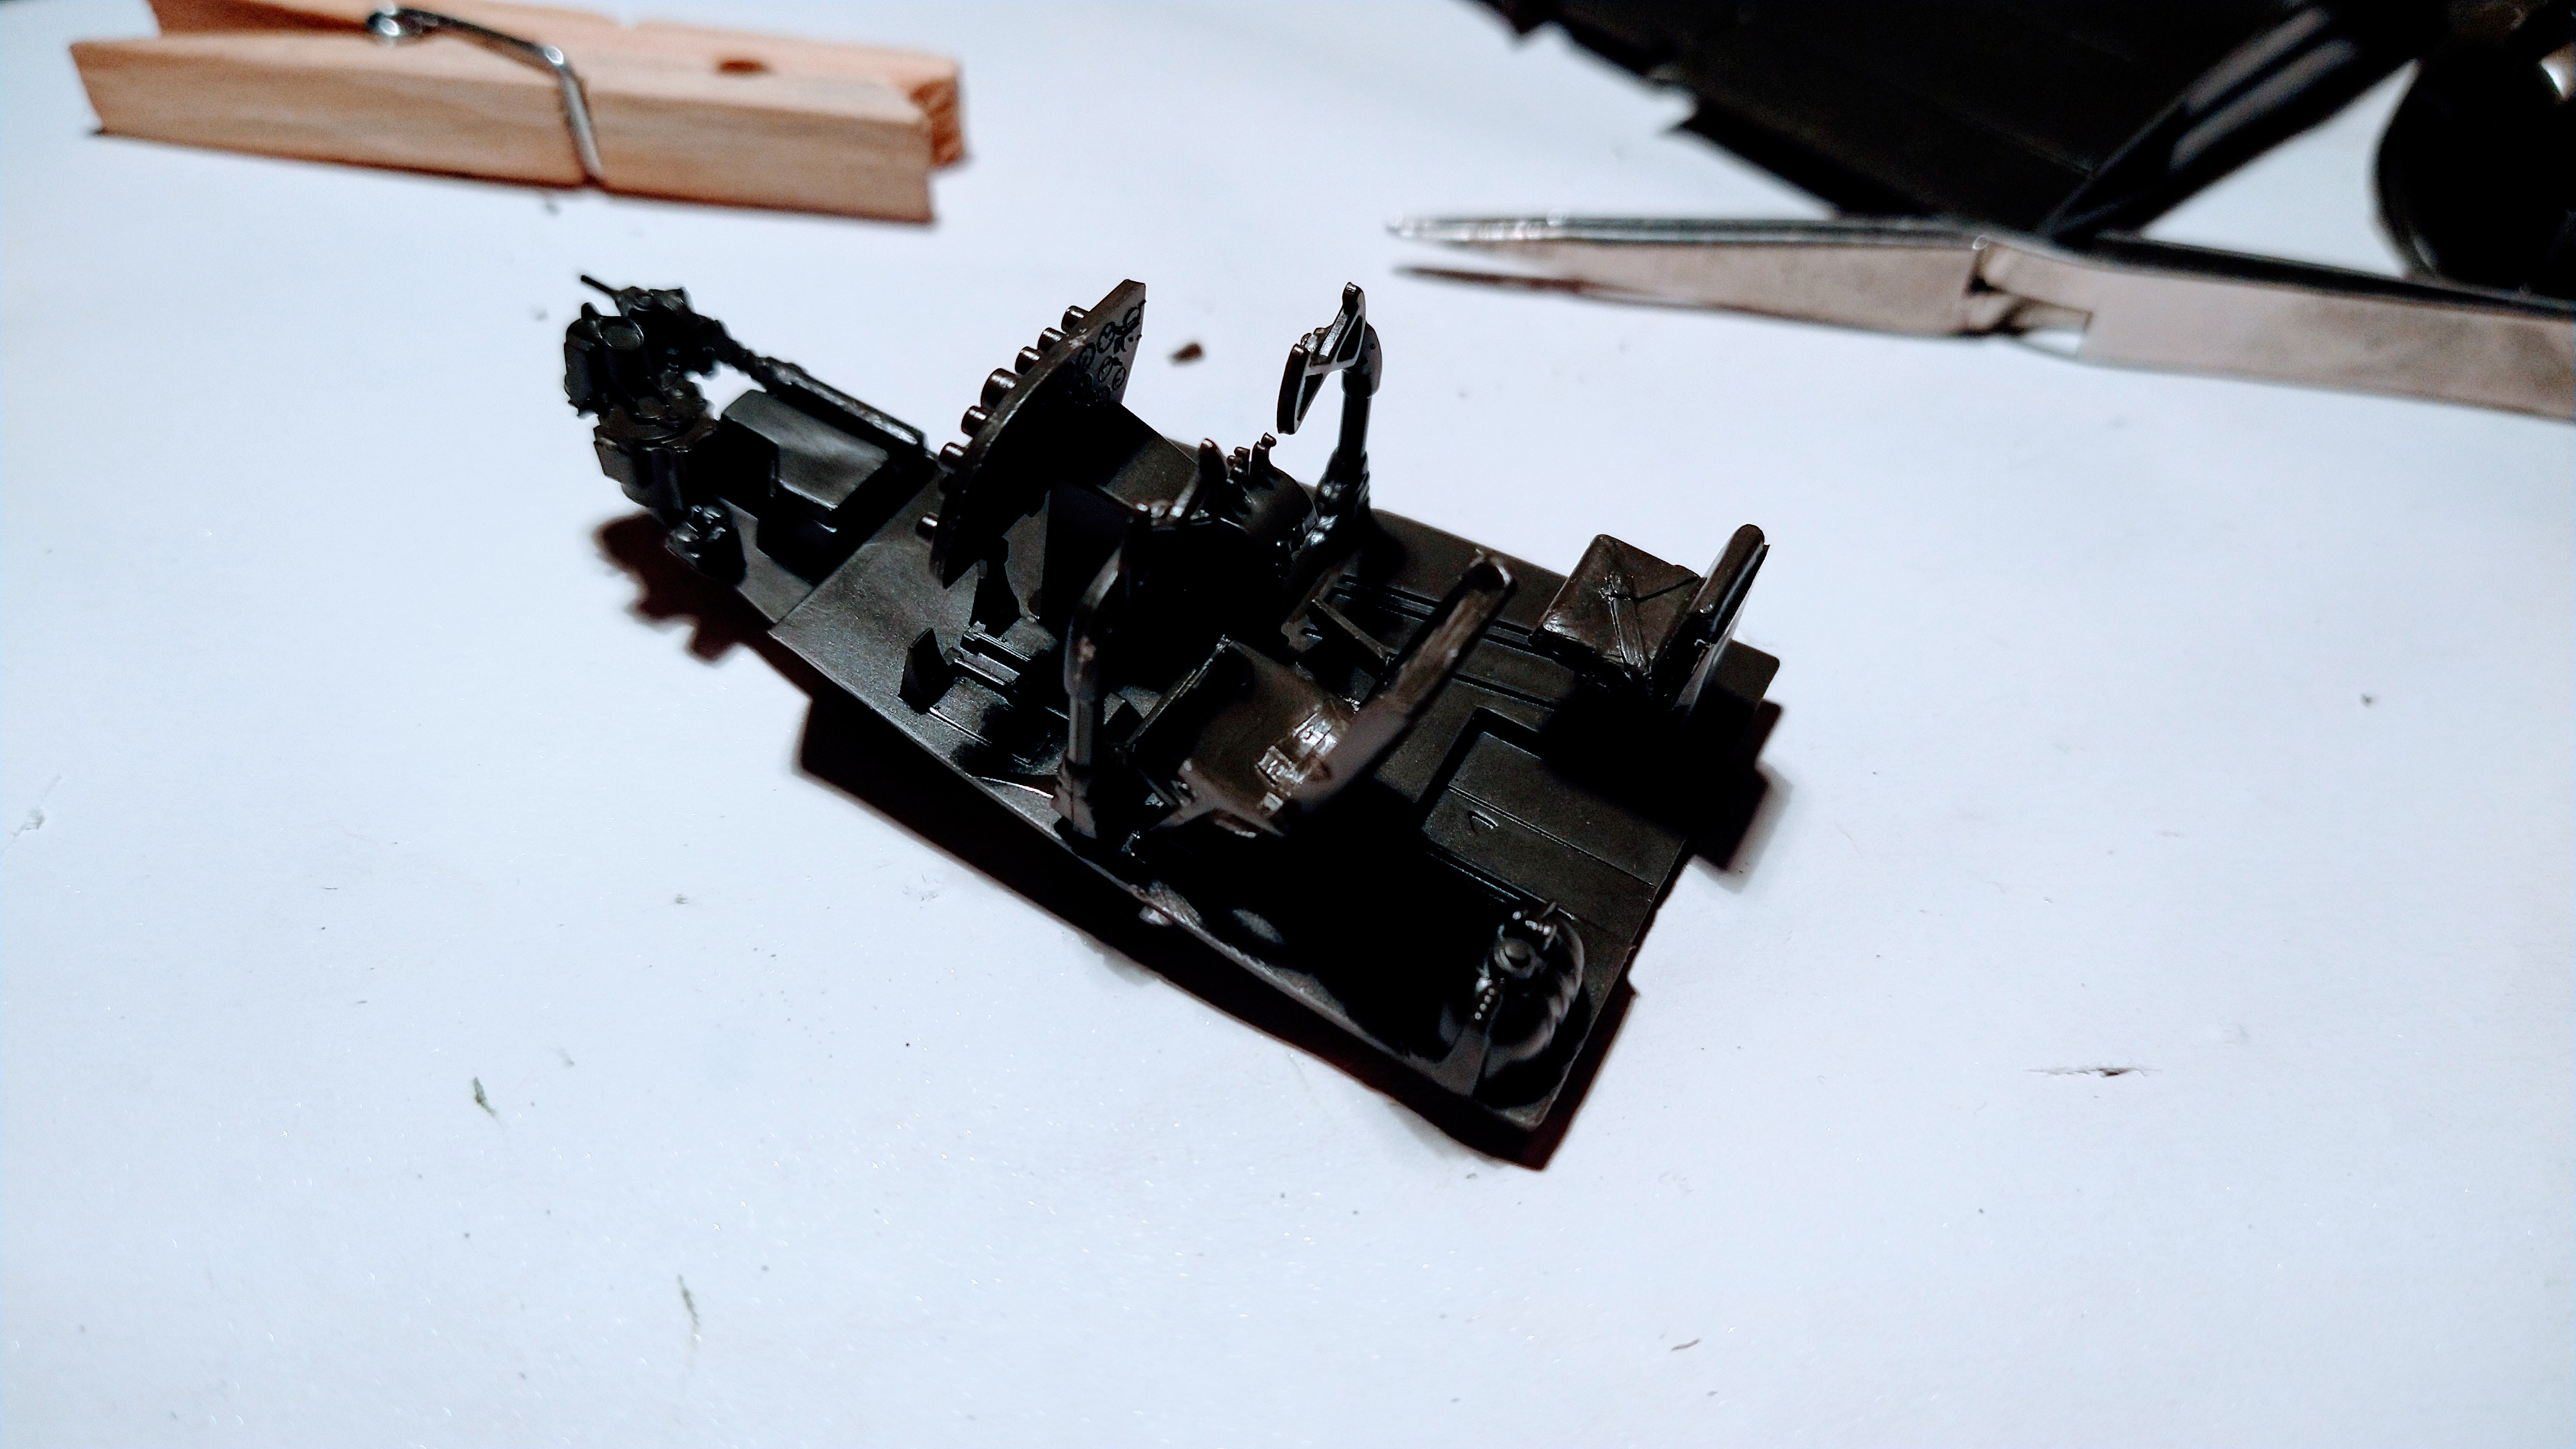
I prefer glueing small parts while they are still attached on the sprue.
I have learned to use my tweezers to hold small pieces while the glue sets. I have glued the .50 calibre guns since I won’t play with them. The same for the turret.
Yesterday the guns were glued from the inside using the locating pins.
Again I am quite satisfied with the result but I am still tempted to start this…
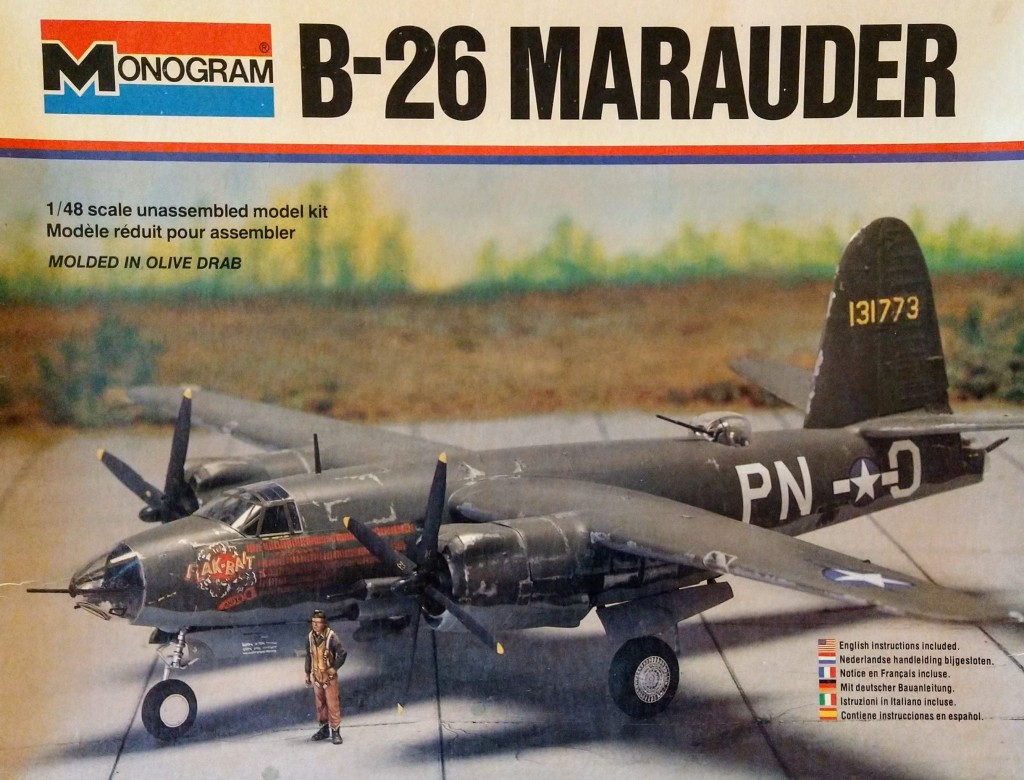
I had made my decision to build the B-26 as if I was building it in 1978. I wish I had told my readers about it.
I got this comment which was warning me not to build Suzie Q using Monogram’s B-26.
Unfortunately, you cannot get there from here with the Monogram kit. The kit is a B-26B/C, very different from the B-26A. The A model has smaller tail feathers, a completely different rear gun position from anything in the kit, the wings are four feet less in span (and you can’t just cut off the tips) and the engine cowlings are completely different. There’s also some big differences around the nose.
Mike West makes a resin conversion kit that provides a different rear fuselage with the correct gun position, different tail, outer wings (from the engine nacelle out), different cowlings, and a resin nose. Unfortunately, due to family medical problems, he has closed Lone Star Models and isn’t producing things right now. He has announced he will re-open in September, but from what he told me in a recent e-mail, that is now « iffy » due to the continuing medical problem in the family.
The best thing to do is what I have done: set the kit aside until he reopens and you can get the resin set, or decide to do one of the many colorful B-26B/C Marauders for which there are lots of decals availabile at eBay for this out-of-production kit.
But trust me, neither you nor anyone else has the skills to just modify the kit to get to a B-26A. You’re talking about half the model being replaced with scratchbuilding. You really cannot get there from here and you’re wasting your time to try, I know whereof I speak.
I won’t be starting this new project right away, but I think I have made a wise decision to go out of box, to pause for awhile, and read some reviews like the one down below.
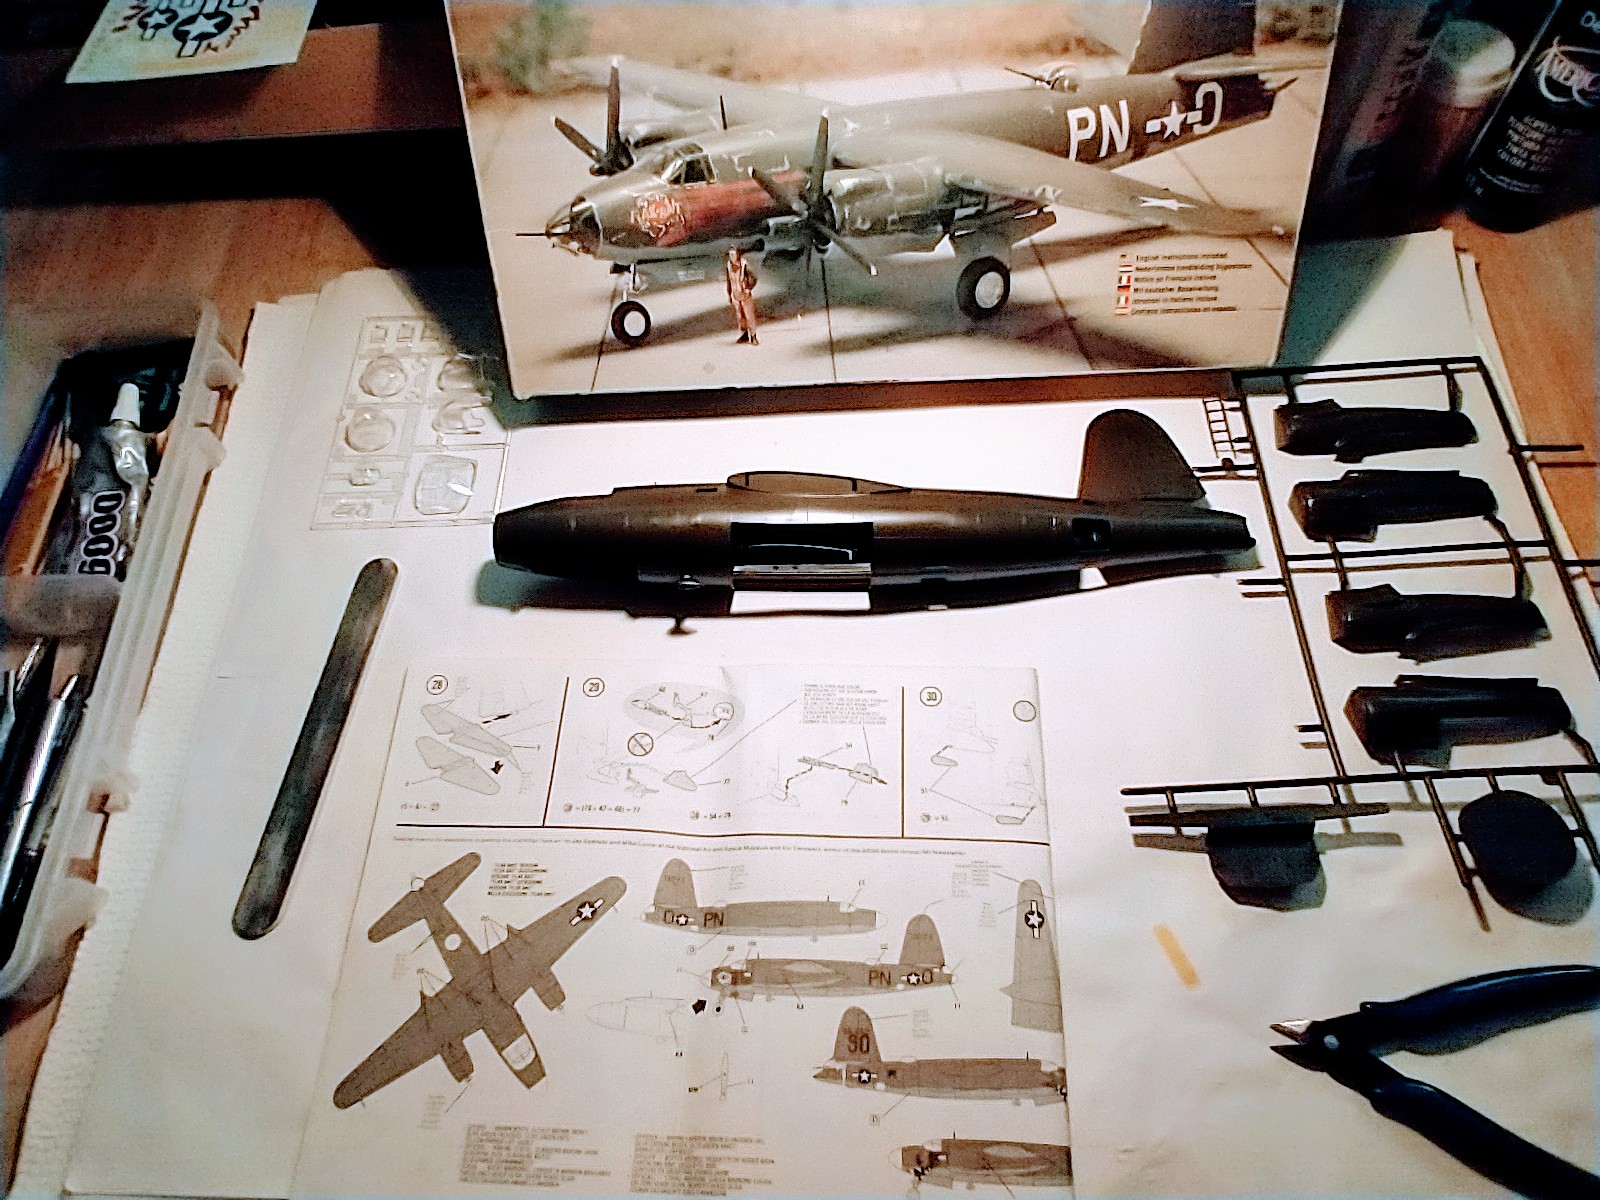
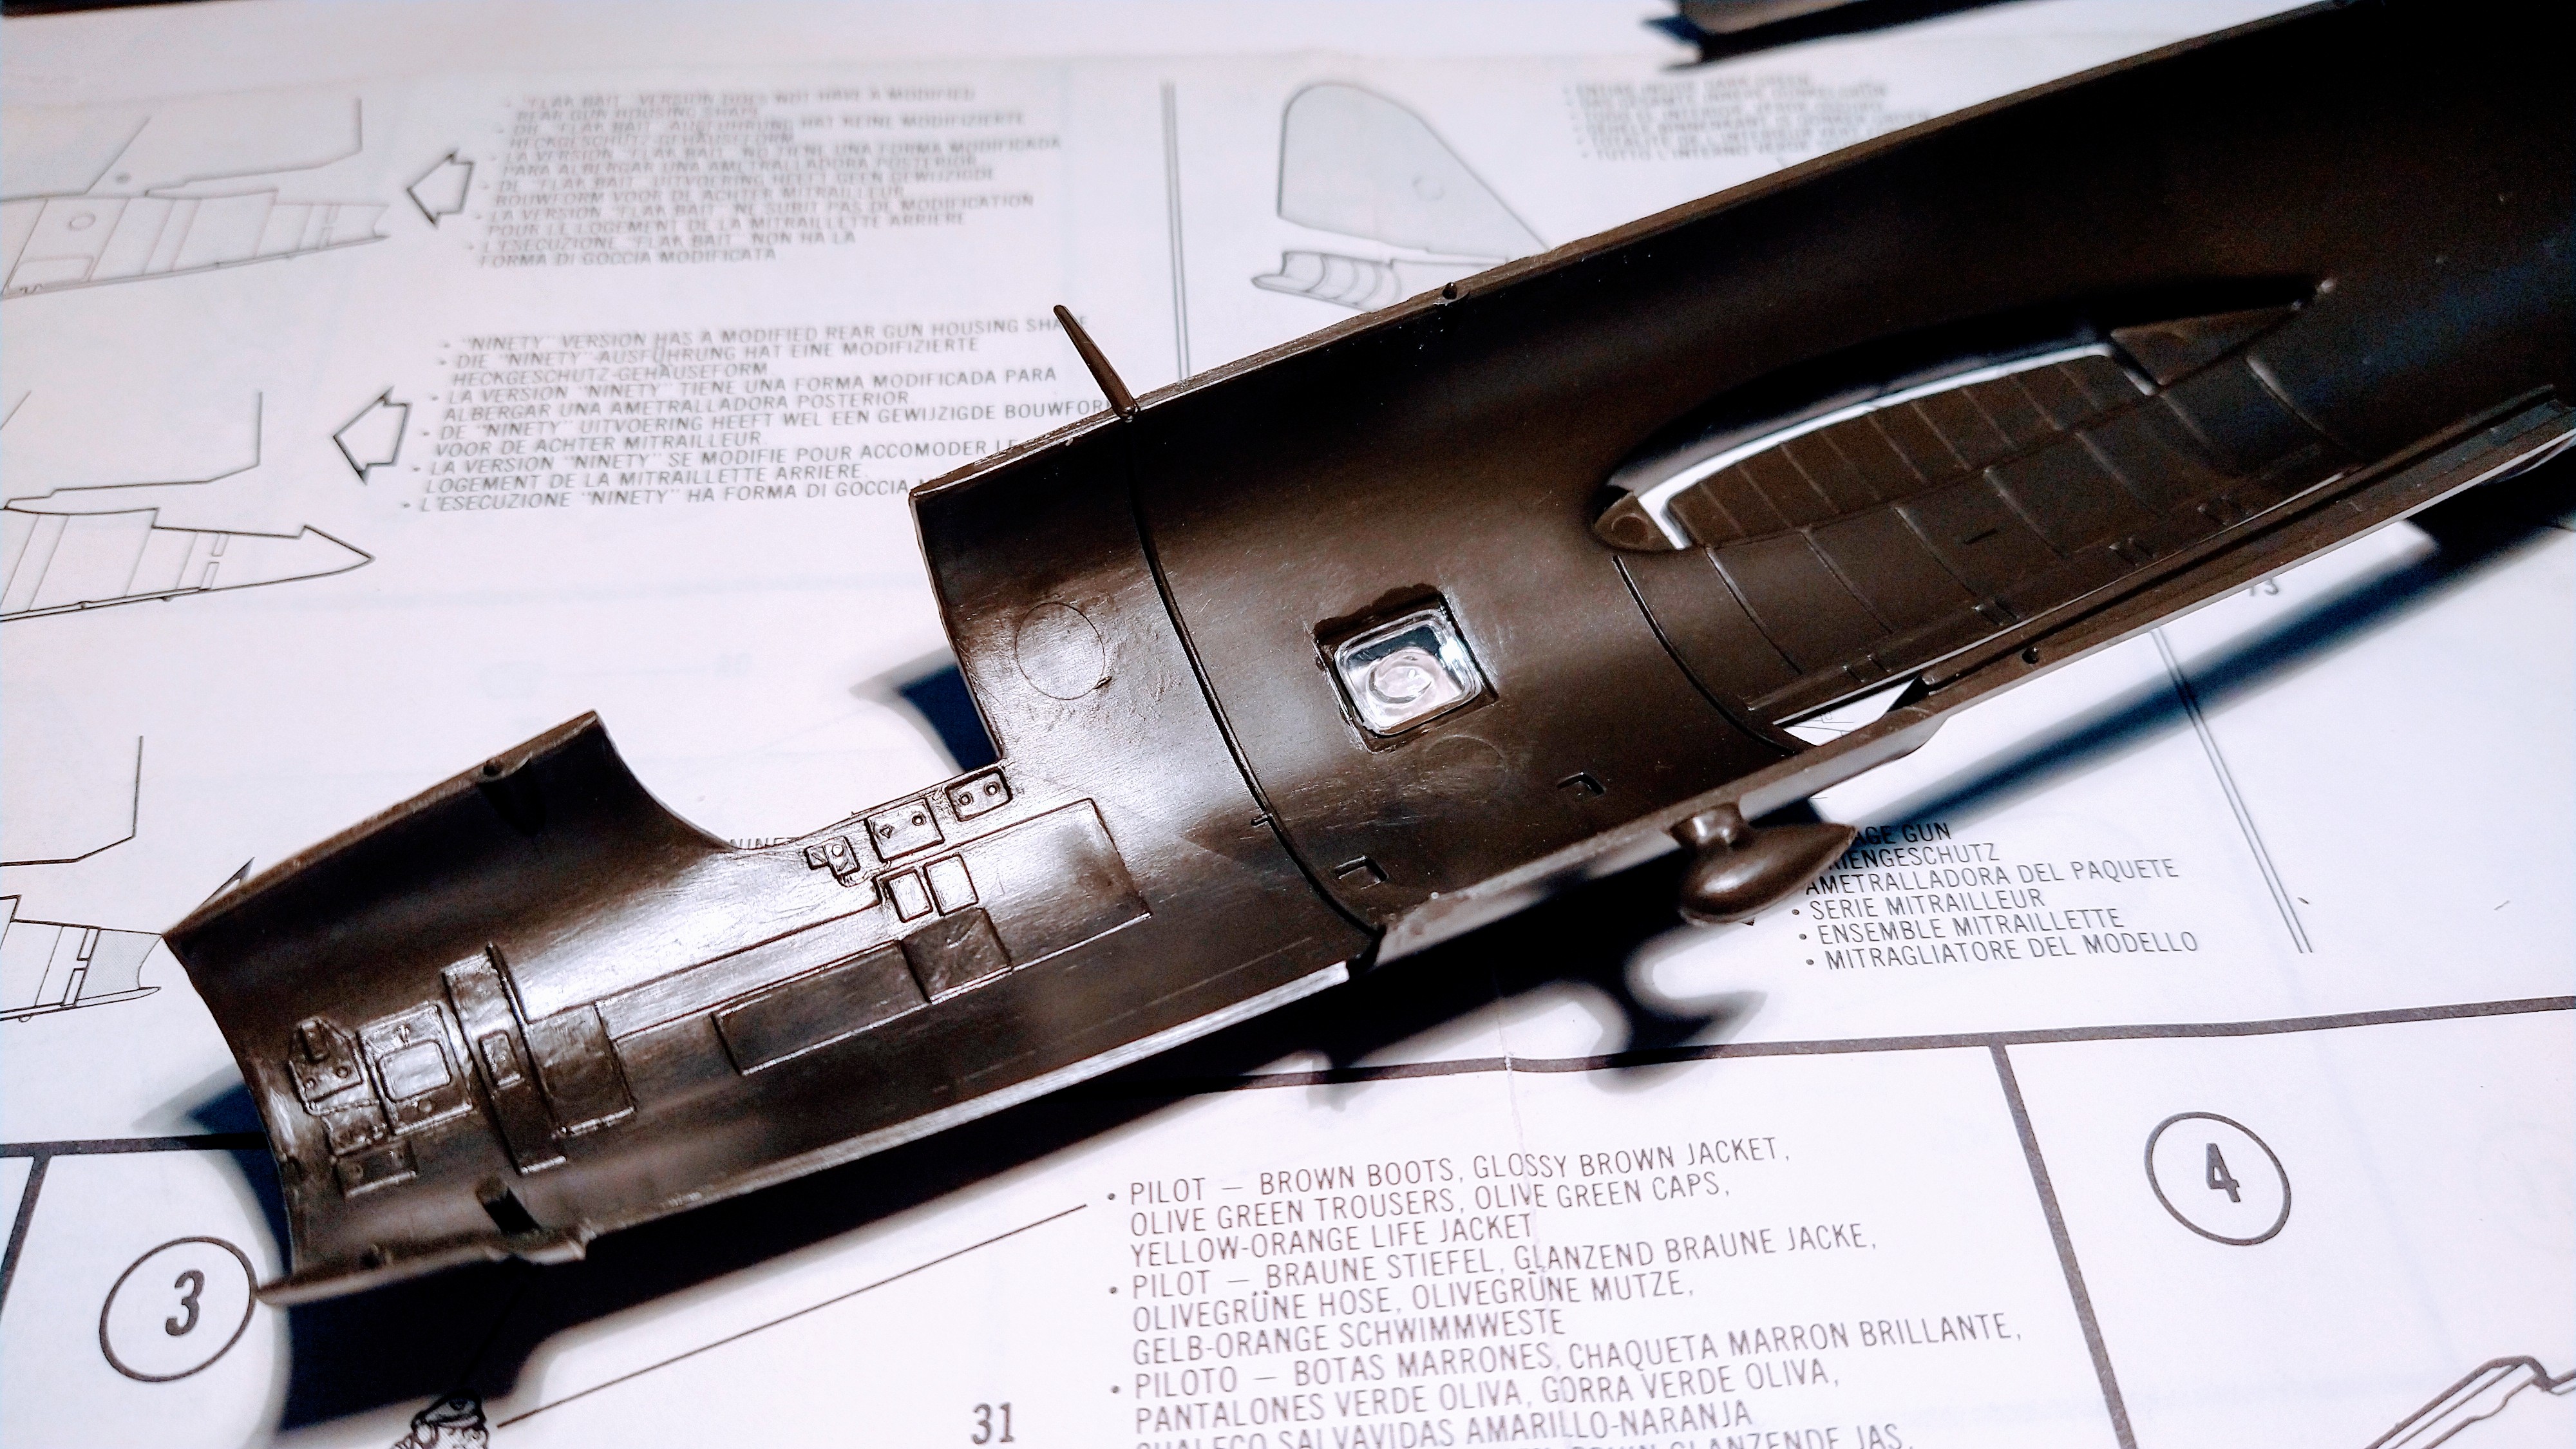
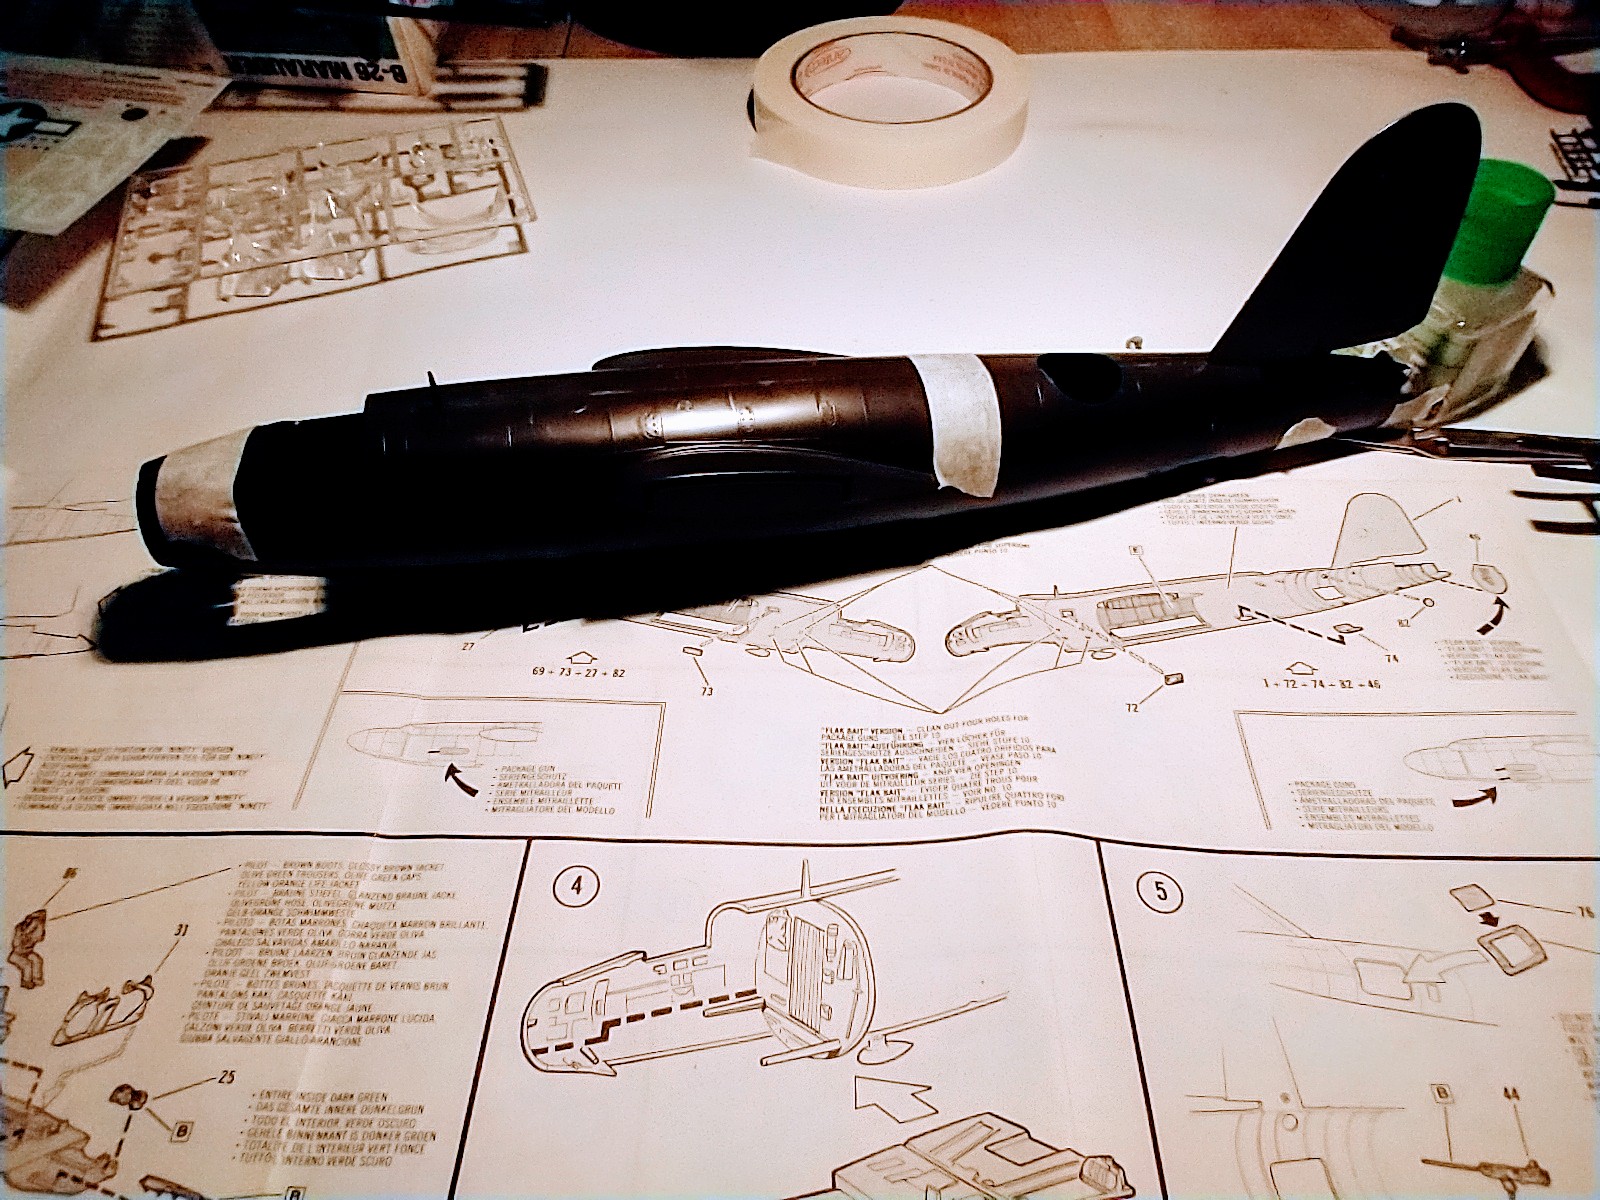
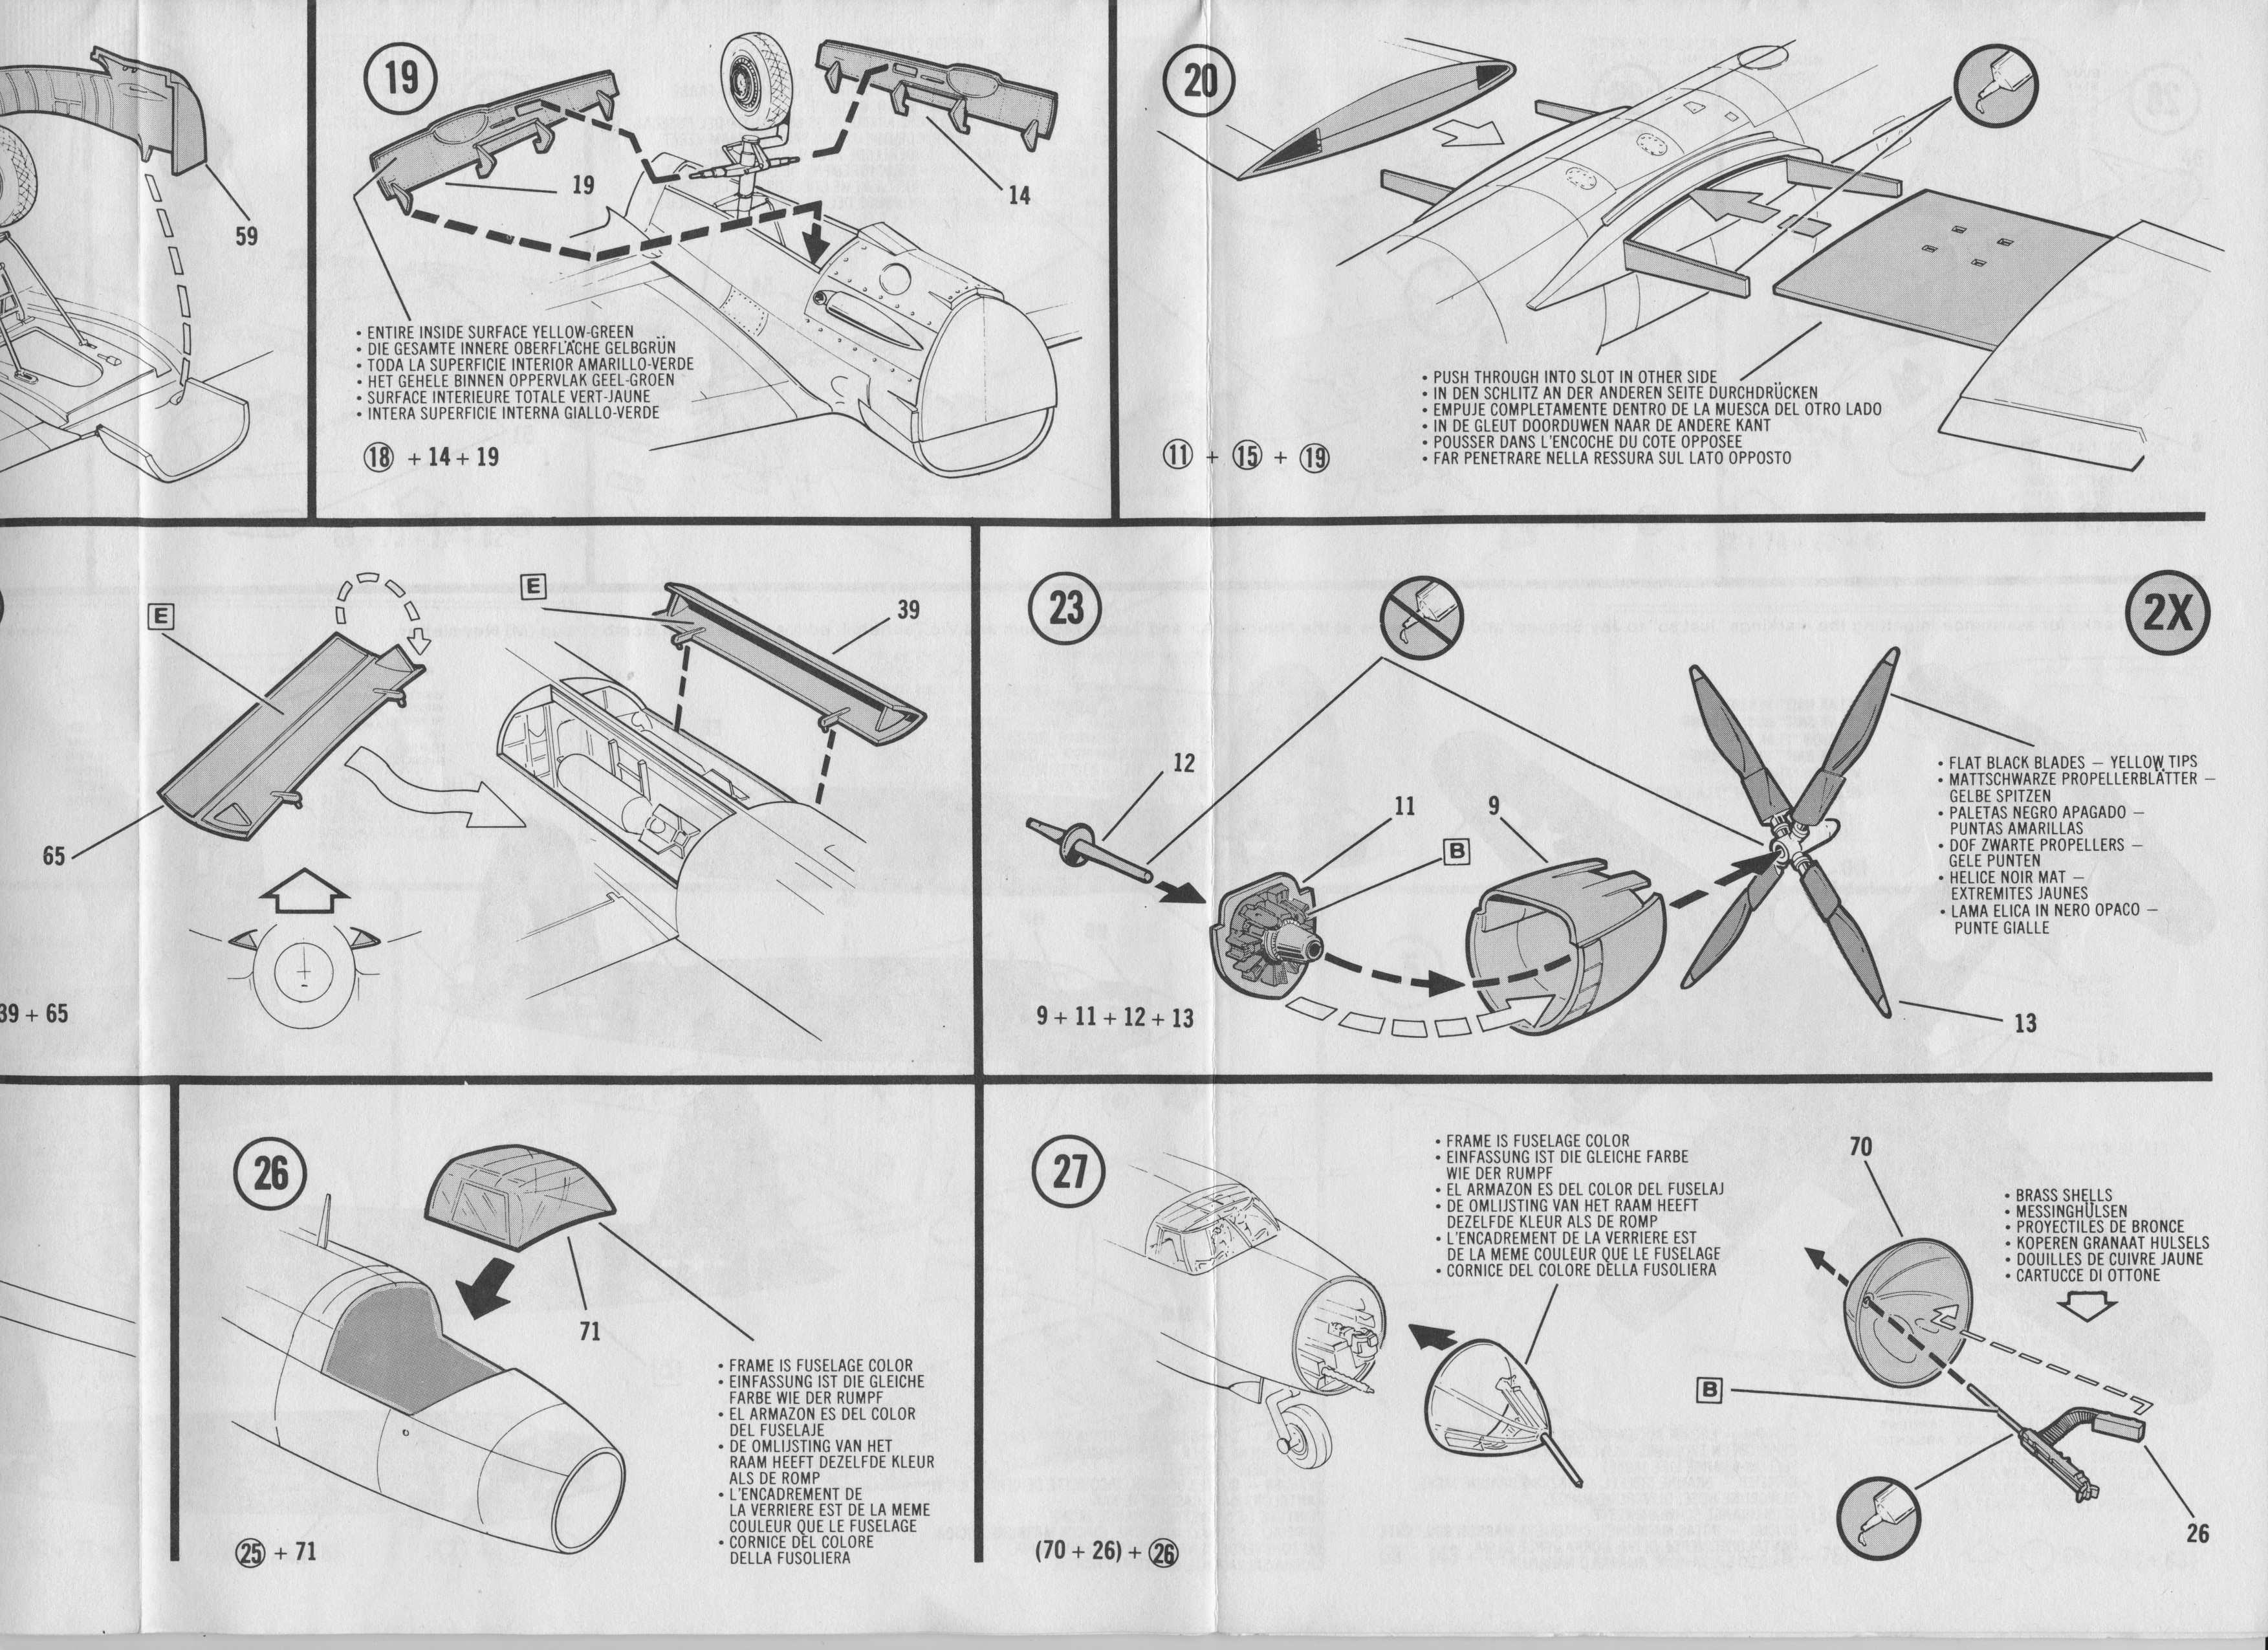
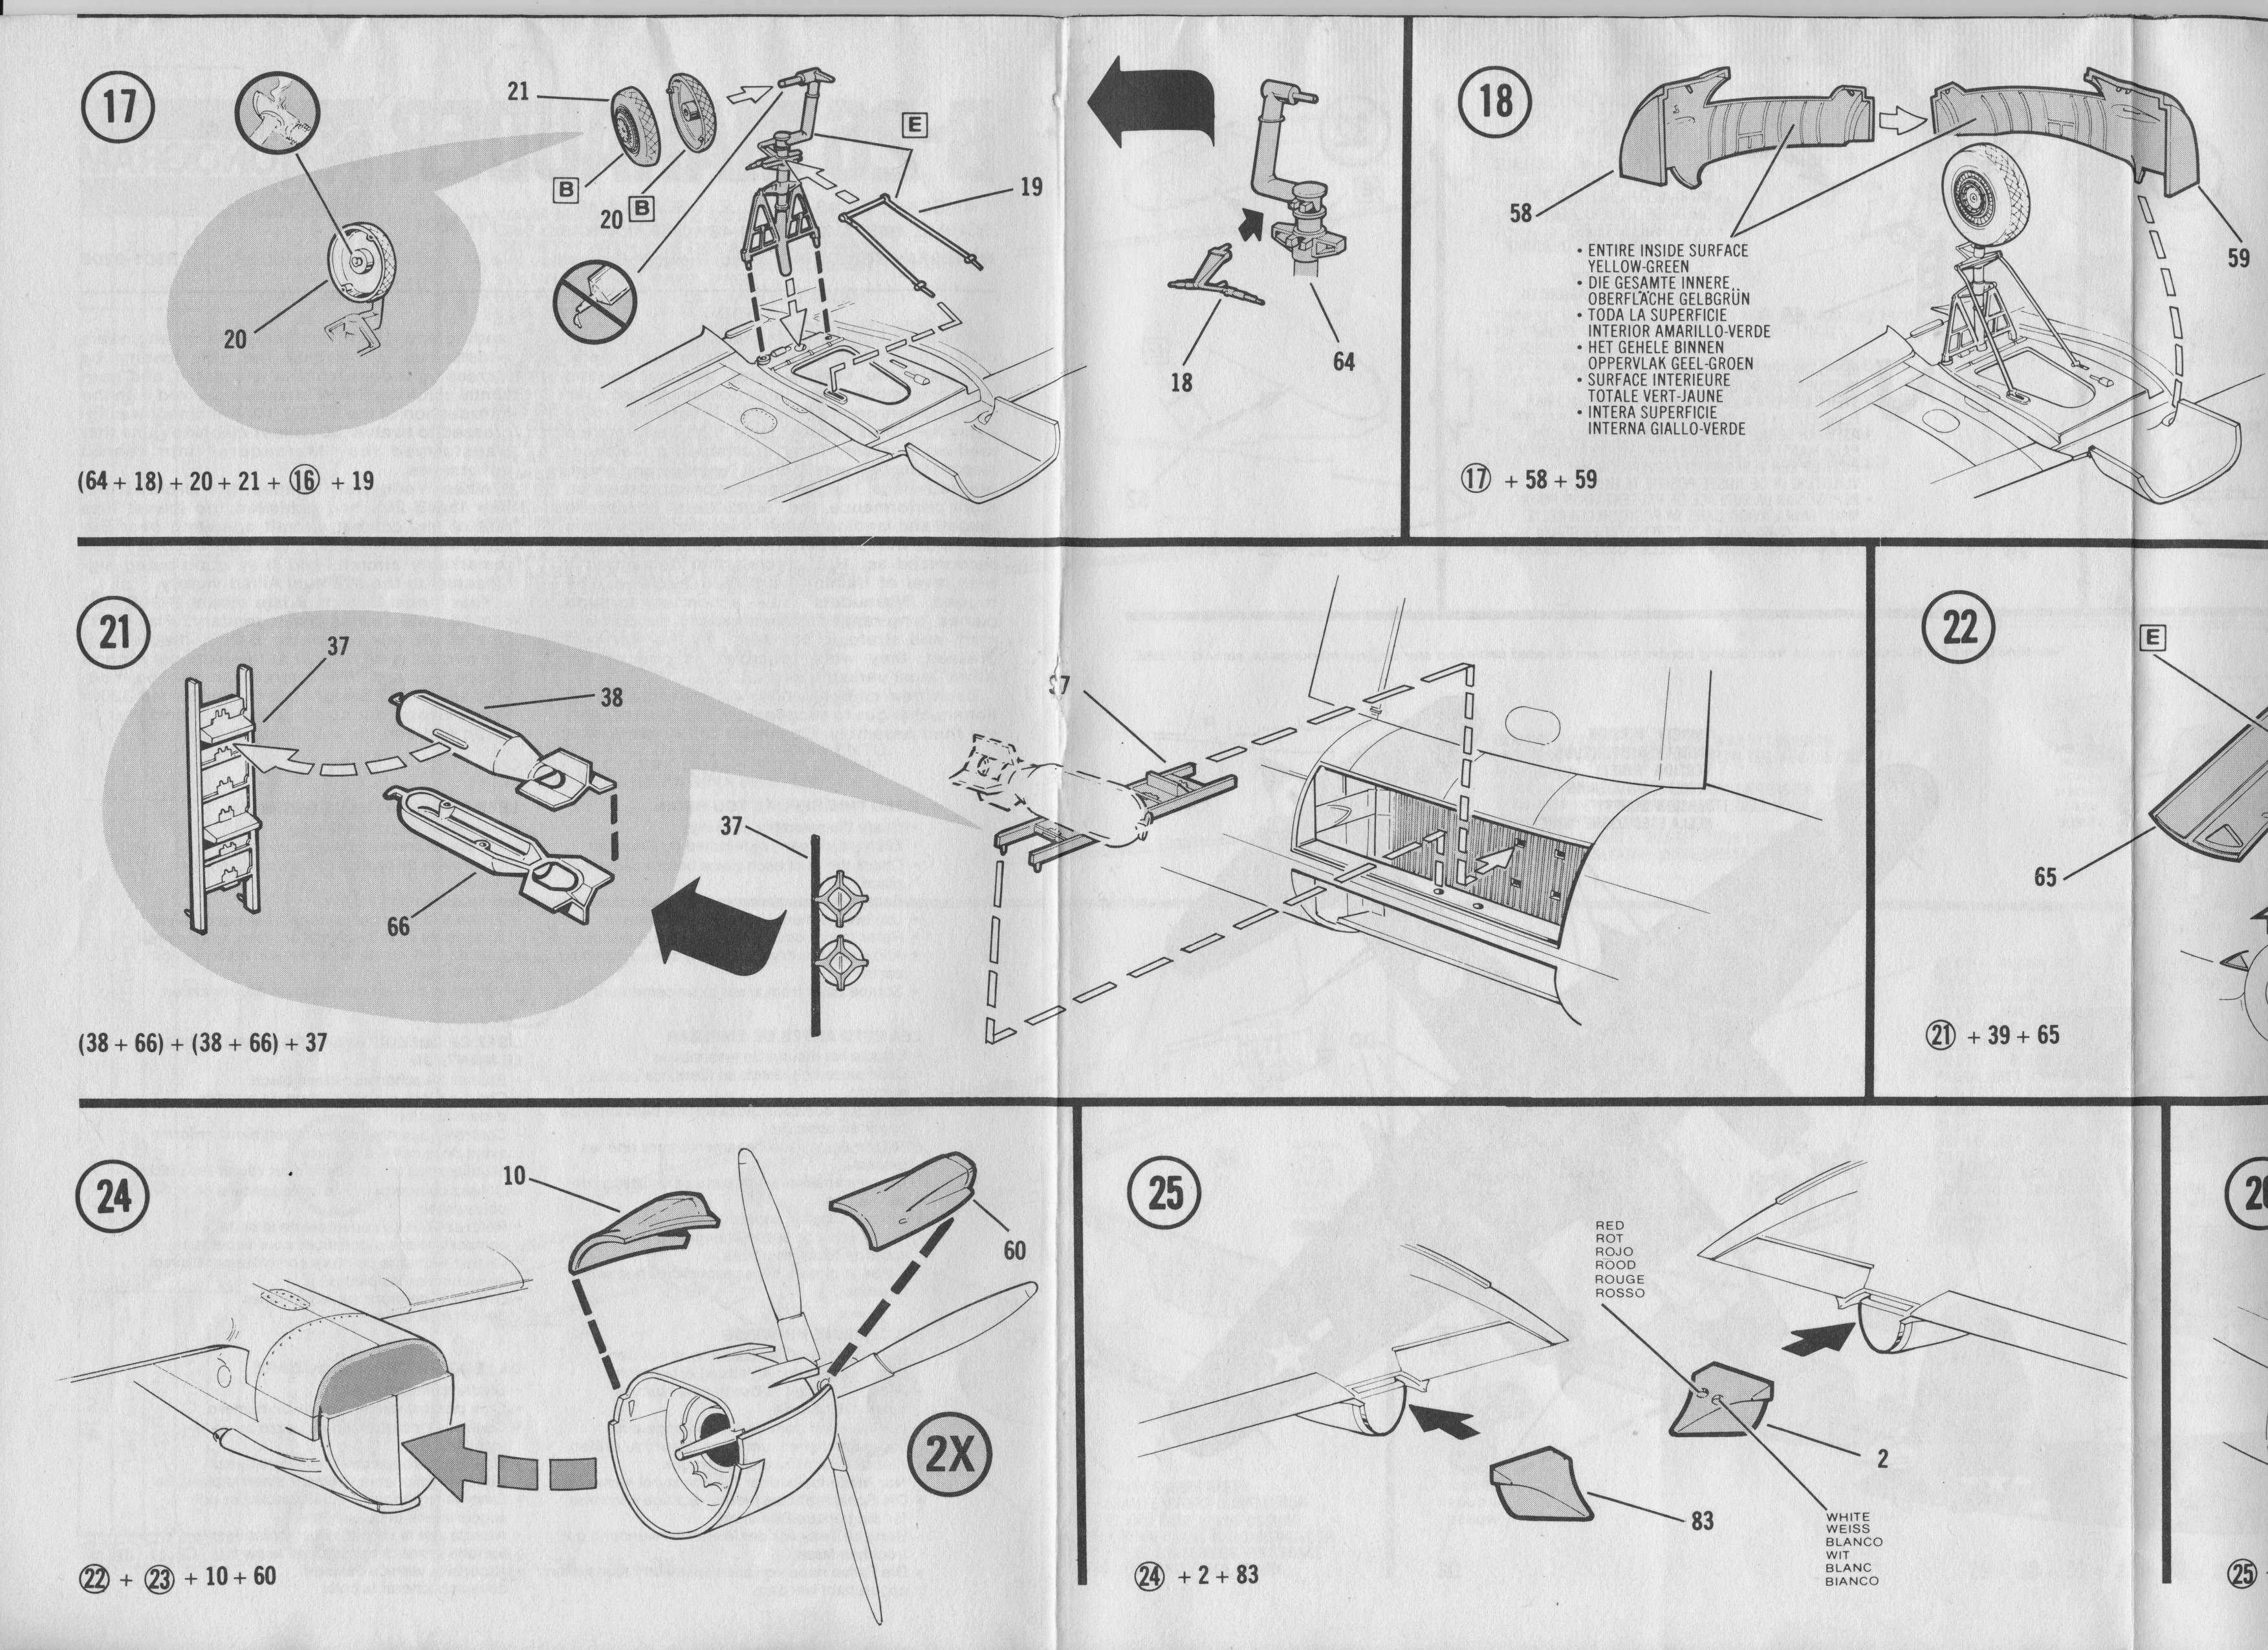
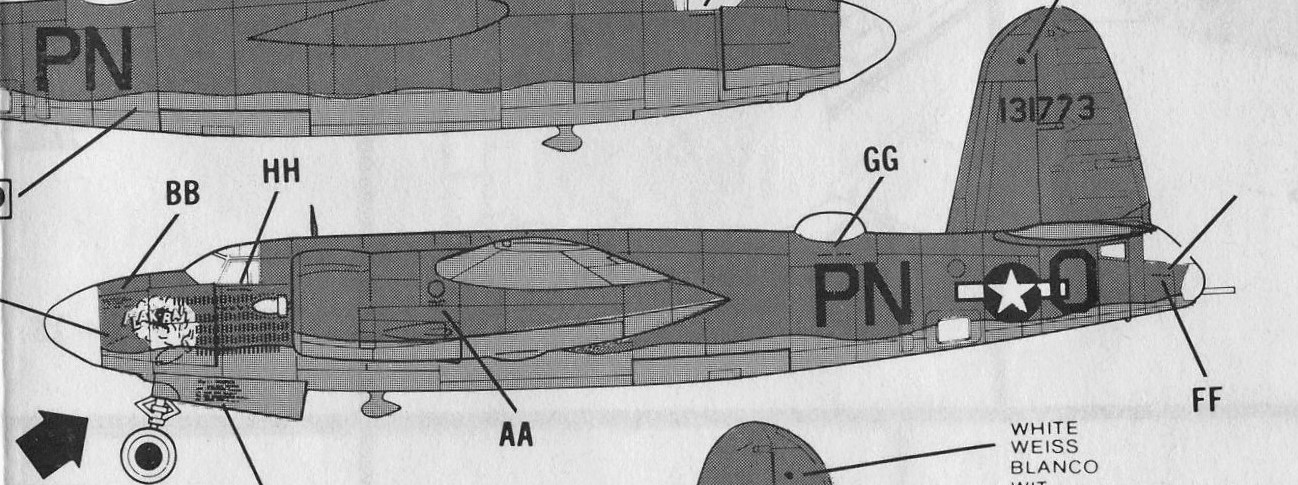
One way I have found to get me going is to scan the instruction sheet.
Perhaps one of the most maligned combat aircraft ever created, the sleek Martin “Marauders” overcame the controversies that surrounded them to compile an enviable combat record. Martin designers created the B-26 in response to an Army Air Corps request for a high-performance medium bomber. They assembled an elegant aircraft that had a cylindrical fuselage and short, tapered wings. Though capable of impressive inflight performance, the “Marauders” possessed takeoff and landing deficiencies that made them infamous with inexperienced pilots. B-26s were recognized as “Hot” aircraft that demanded a high level of training from their aircrews. The rugged “Marauders” saw action as torpedo planes, long-range fighters, ground support aircraft, and strategic bombers. As the war progressed, they were regarded as one of the Allies’ most versatile aircraft.
Each new combat endeavor spawned evolutionary changes to succeeding “Marauders” during their assembly. Cognizant of the persistent landing and takeoff problems, Martin engineers endeavored to decrease the wing loading by increasing the areas of the wings, tail, and horizontal stabilizers. This change occurred with the introduction of the B-26B-10. Armament was increased to twelve .50 caliber machine guns that transformed the “Marauders” into feared adversaries.
When World War II ended, the aircrews that flew the B-26s had achieved the lowest Ioss rate of any combat aircraft operating over Europe. Martin produced more than 5100 of these remarkable aircraft, and they contributed significantly to the eventual Allied victory.
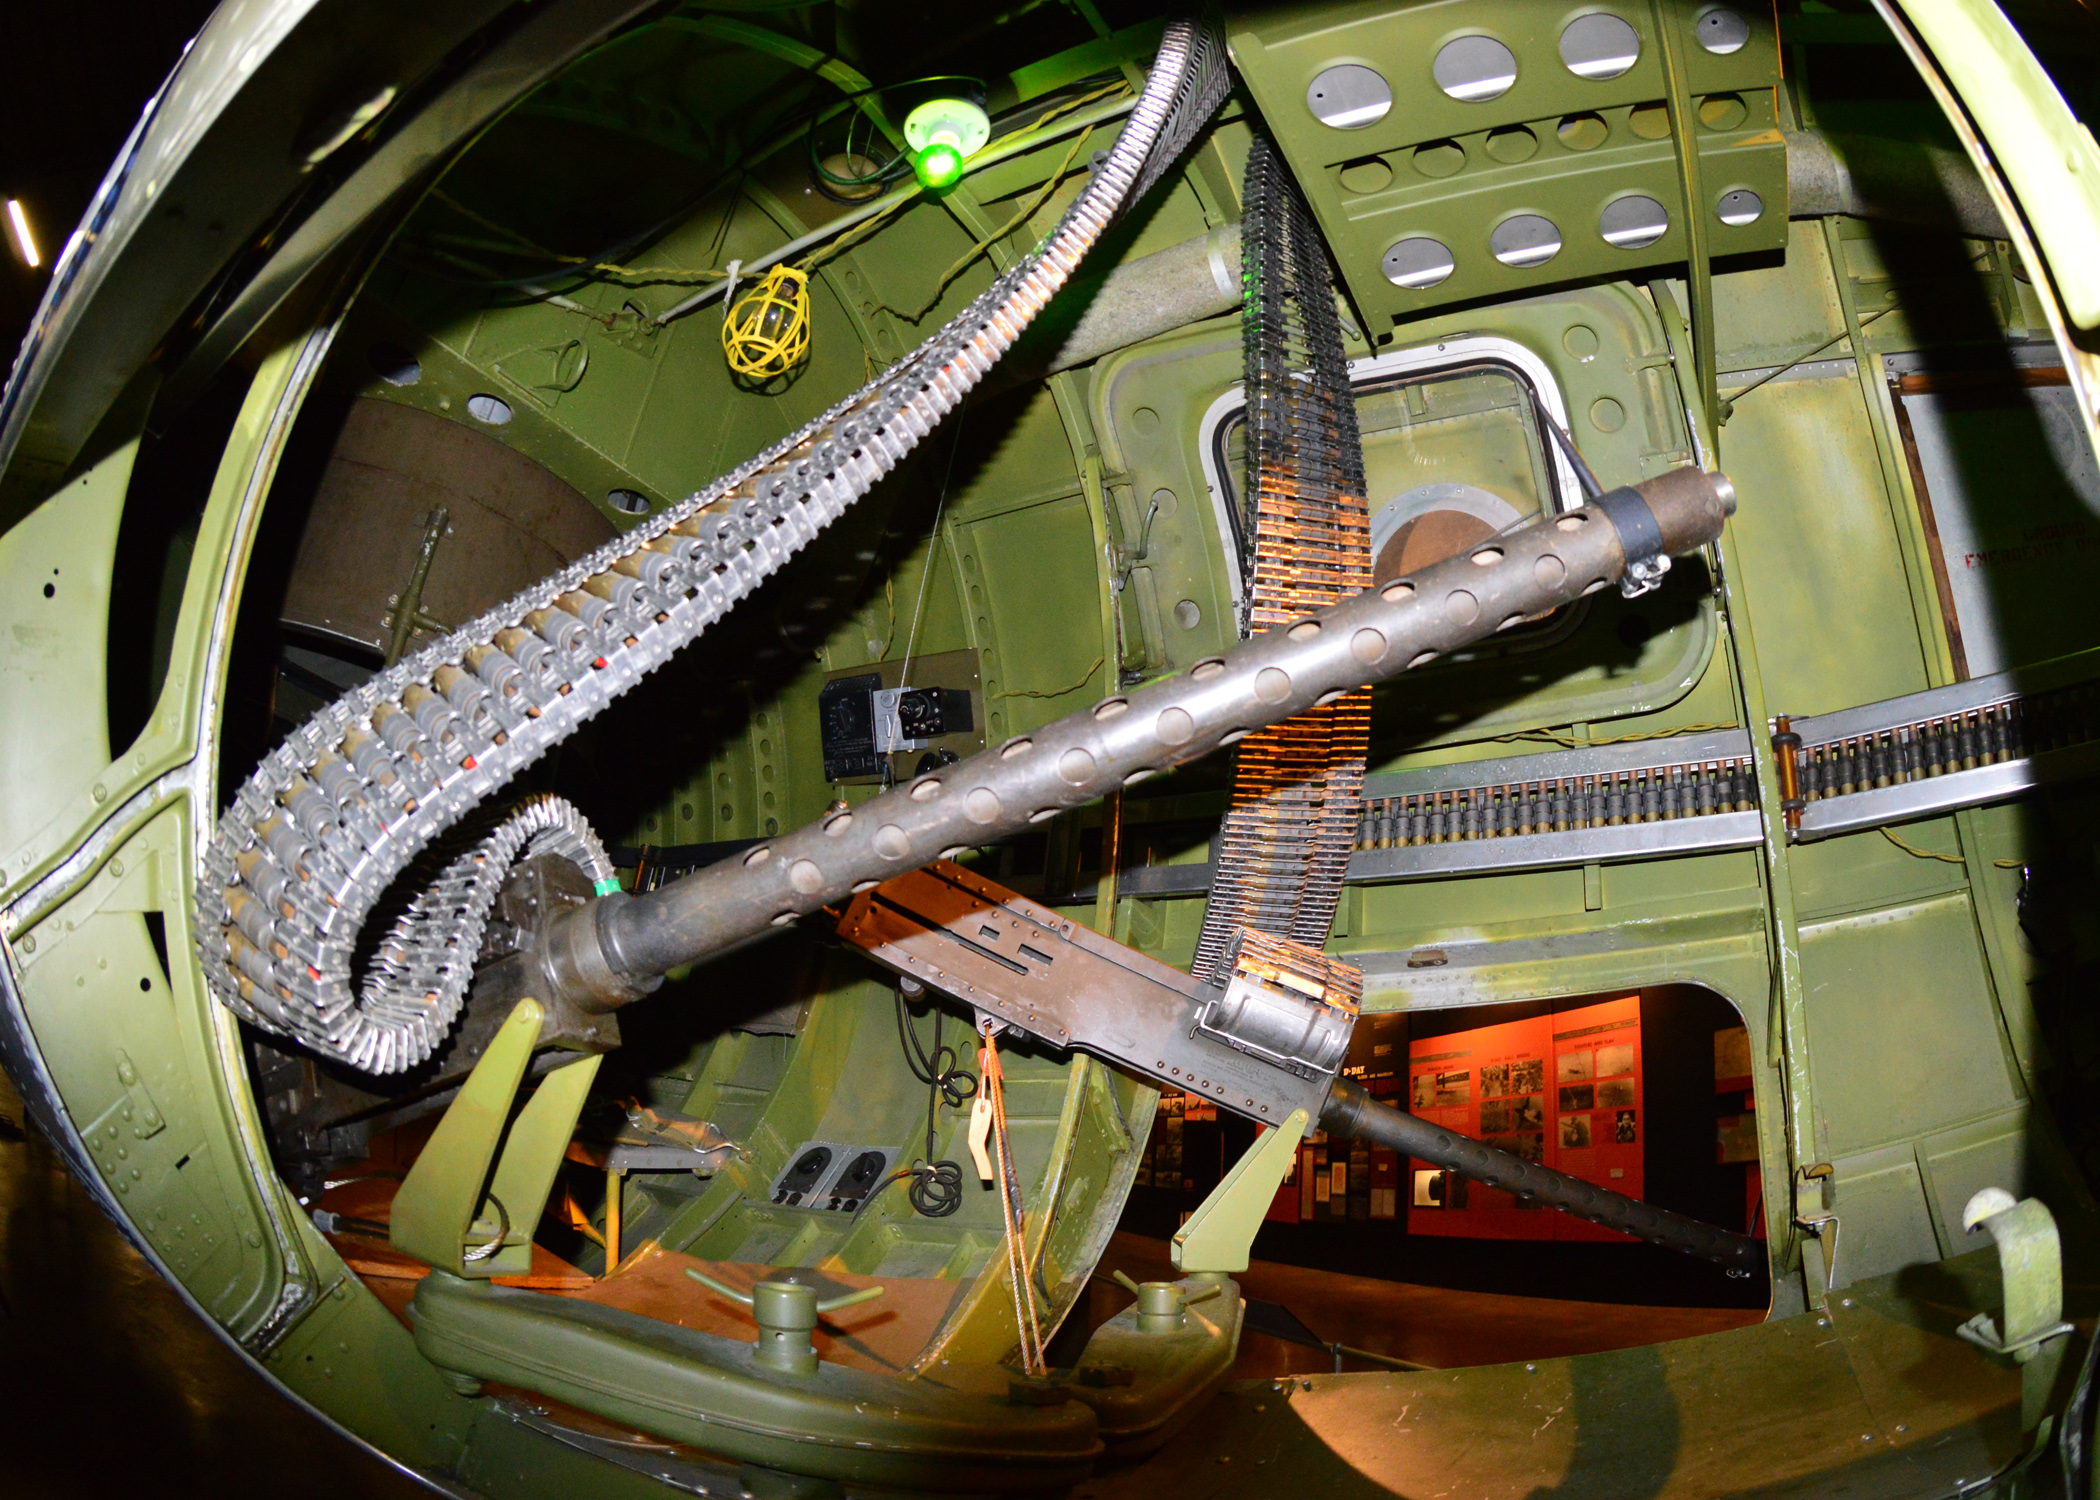
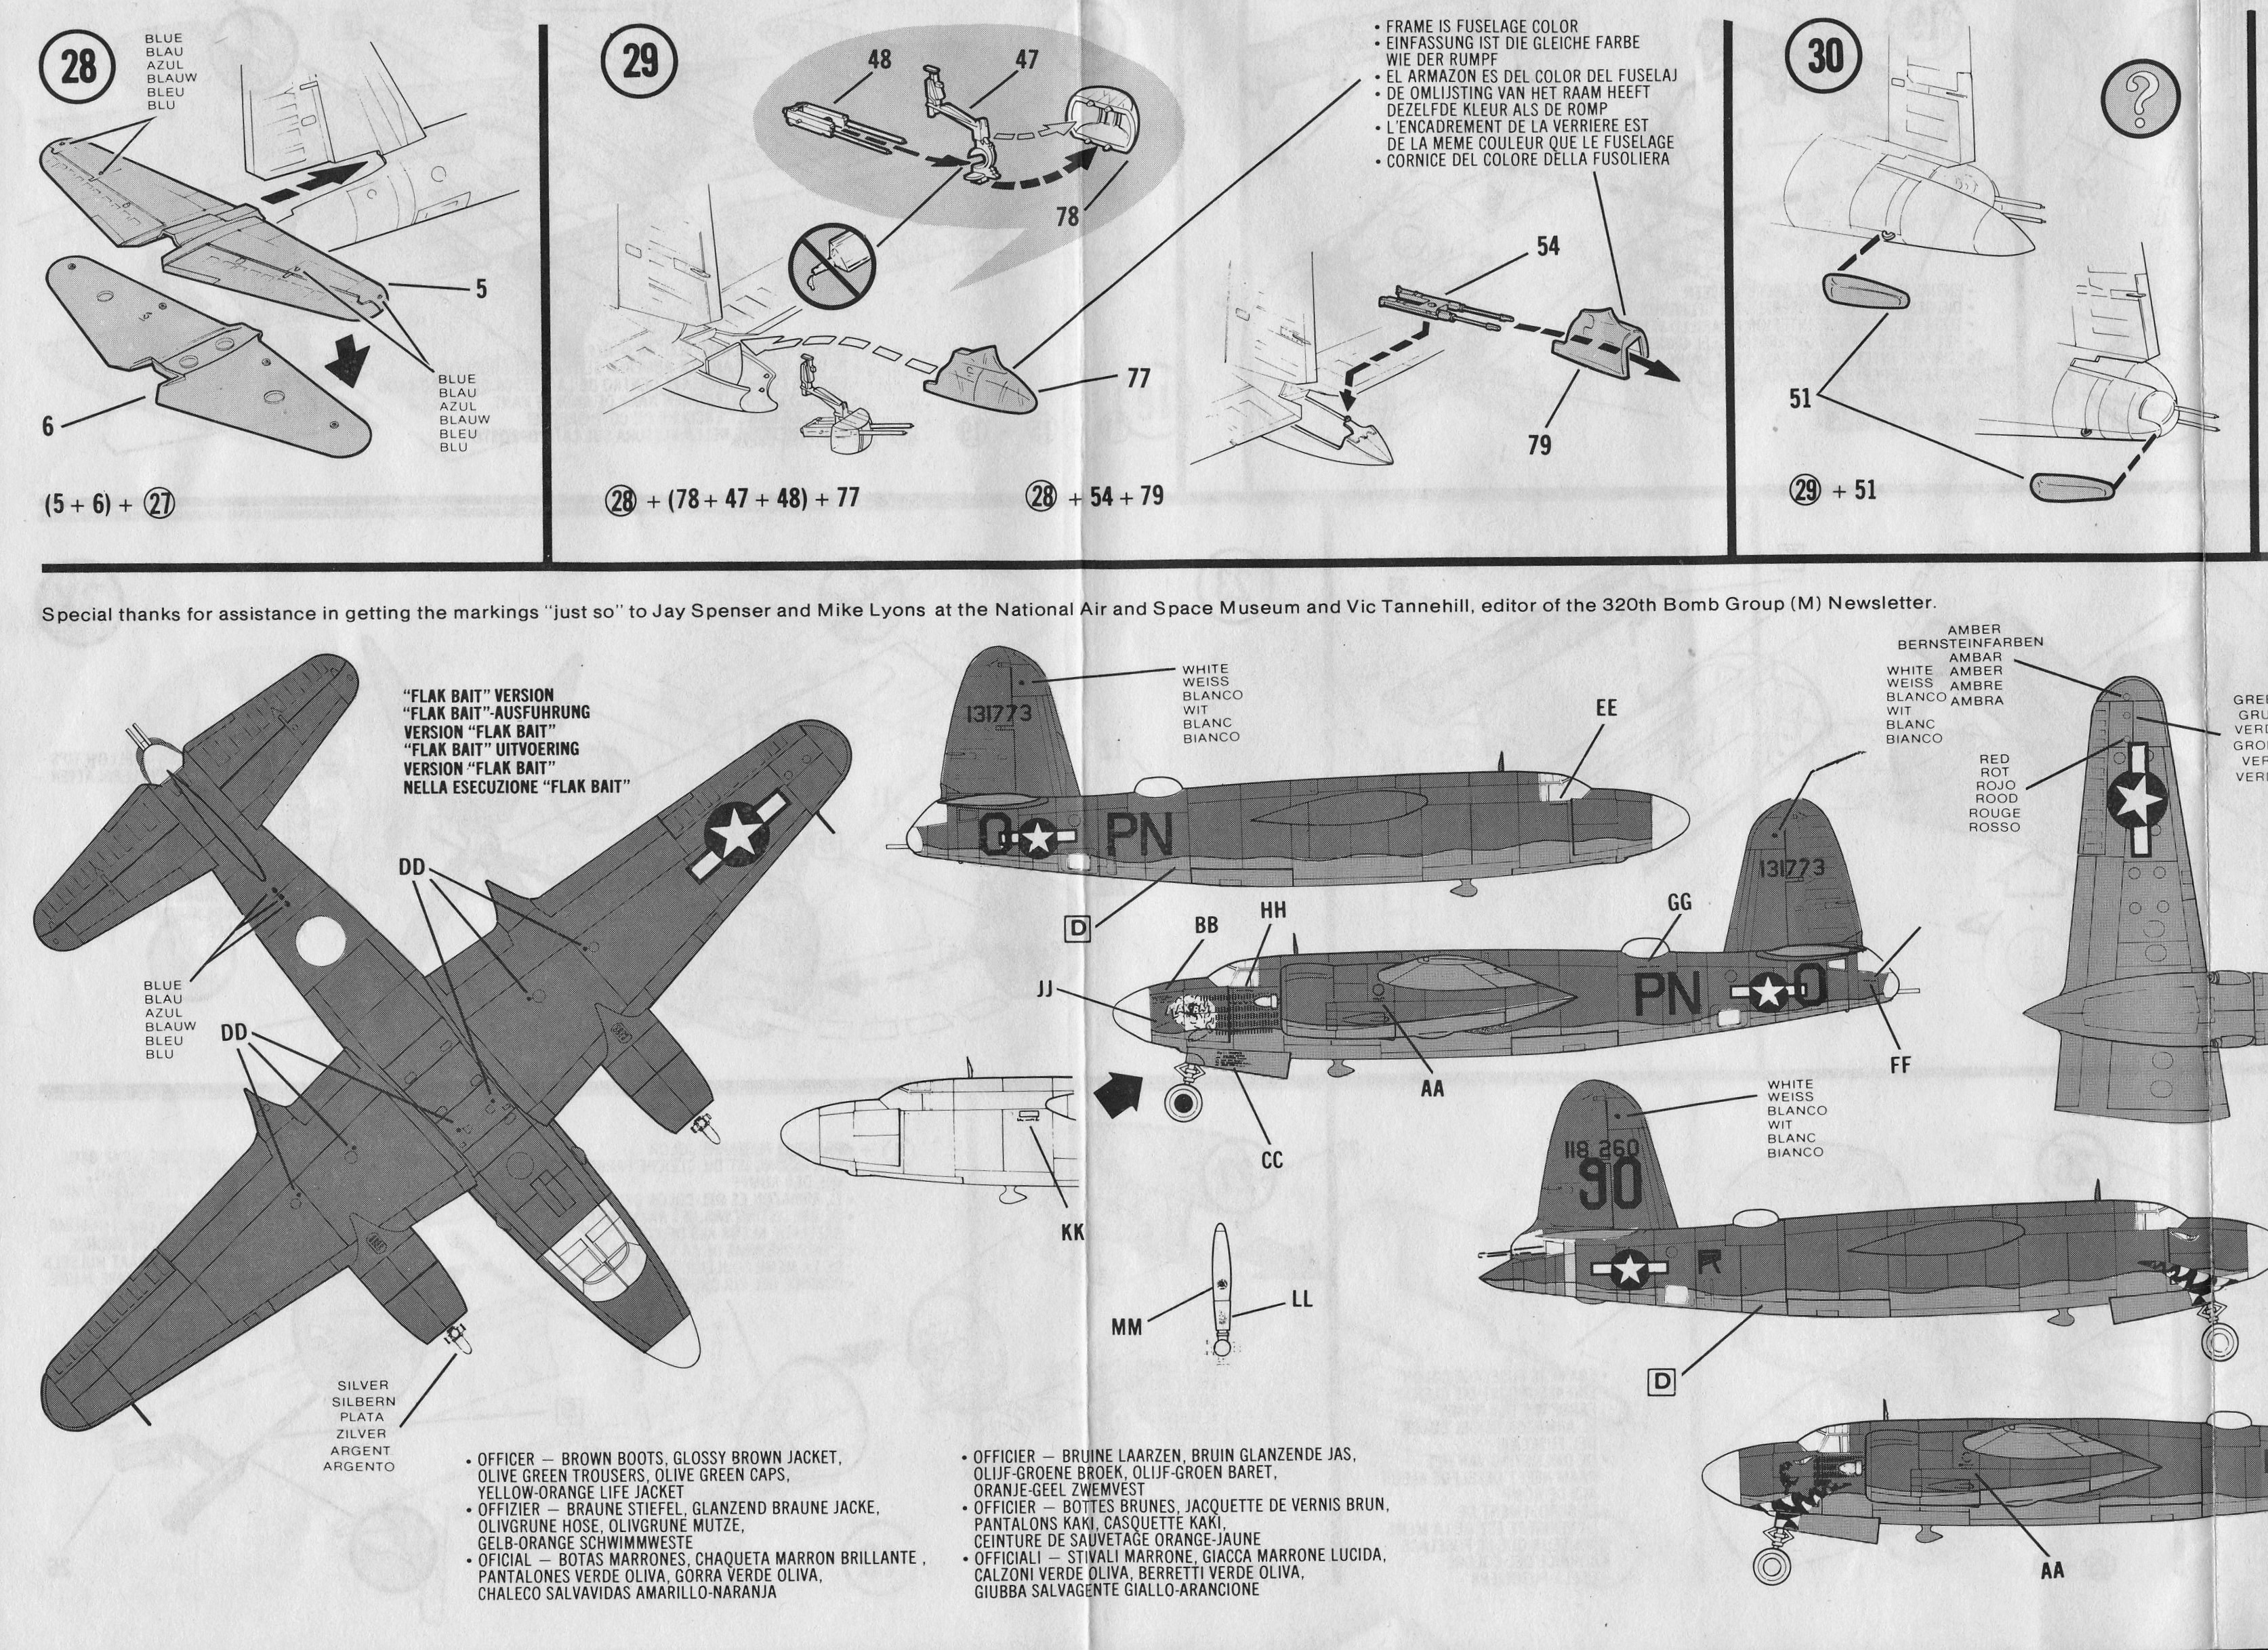
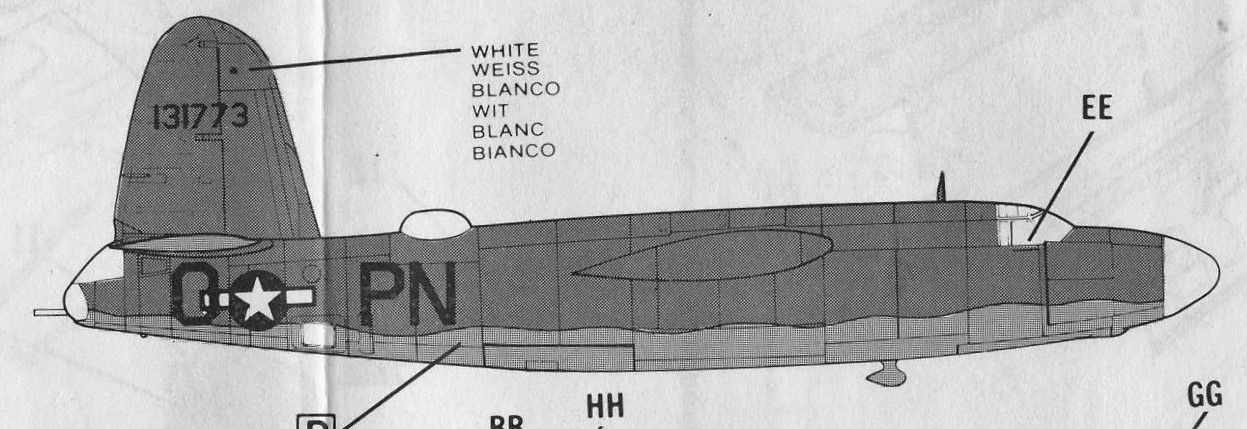
Your model depicts a late model B-26B that can be modeled as the legendary “Flak Bait”. One of the few remaining B-26s, the nose of this aircraft is on display at the National Air and Space Museum.
One-half left side, close-up view of Martin B-26B Marauder “Flak-Bait” (A19600297000) as displayed in the World War II Aviation gallery at the Smithsonian National Air and Space Museum’s National Mall Building, Washington, DC
This aircraft can also be modeled as a B-26B assigned to the renowned 320th Bomb Group during the Second World War to begin and end the war flying B-26s.
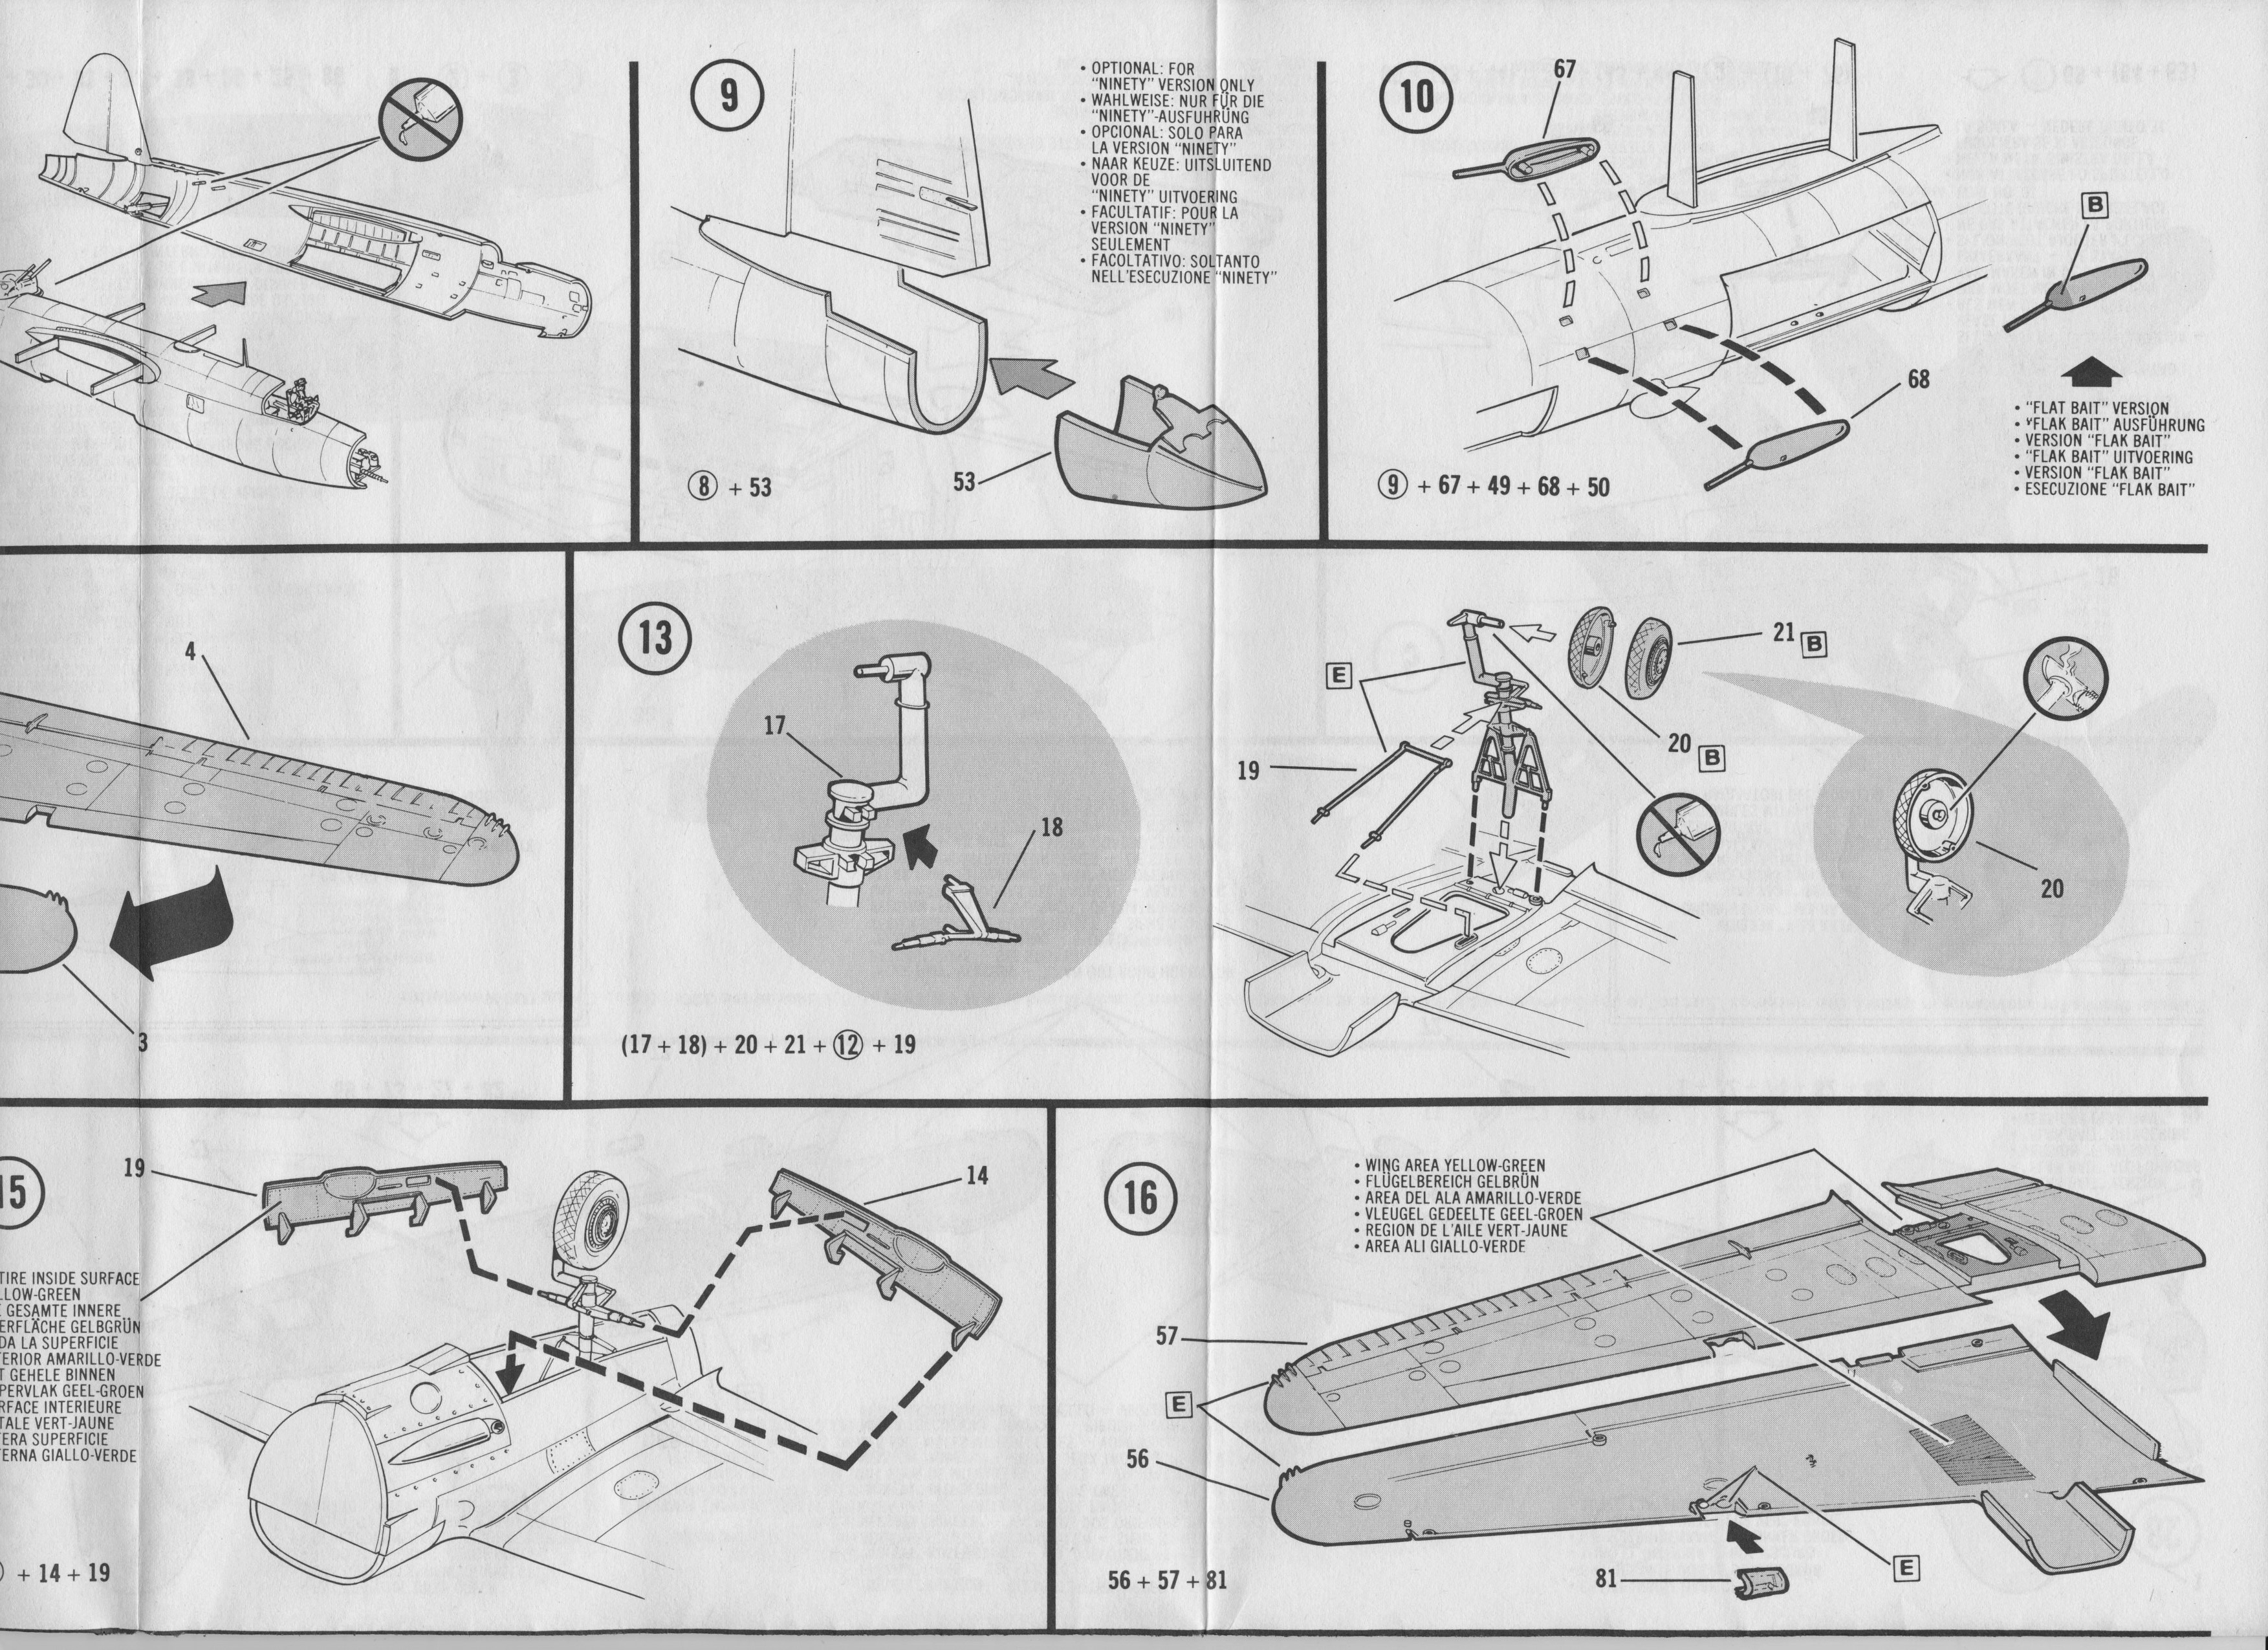
When I scan the instruction sheet I can zoom in on the images and this helps me figure out how to assemble some parts. This is true if I have to cut into the plastic as in step 1.
The instructions are still vague but it’s something I am getting to be used to.
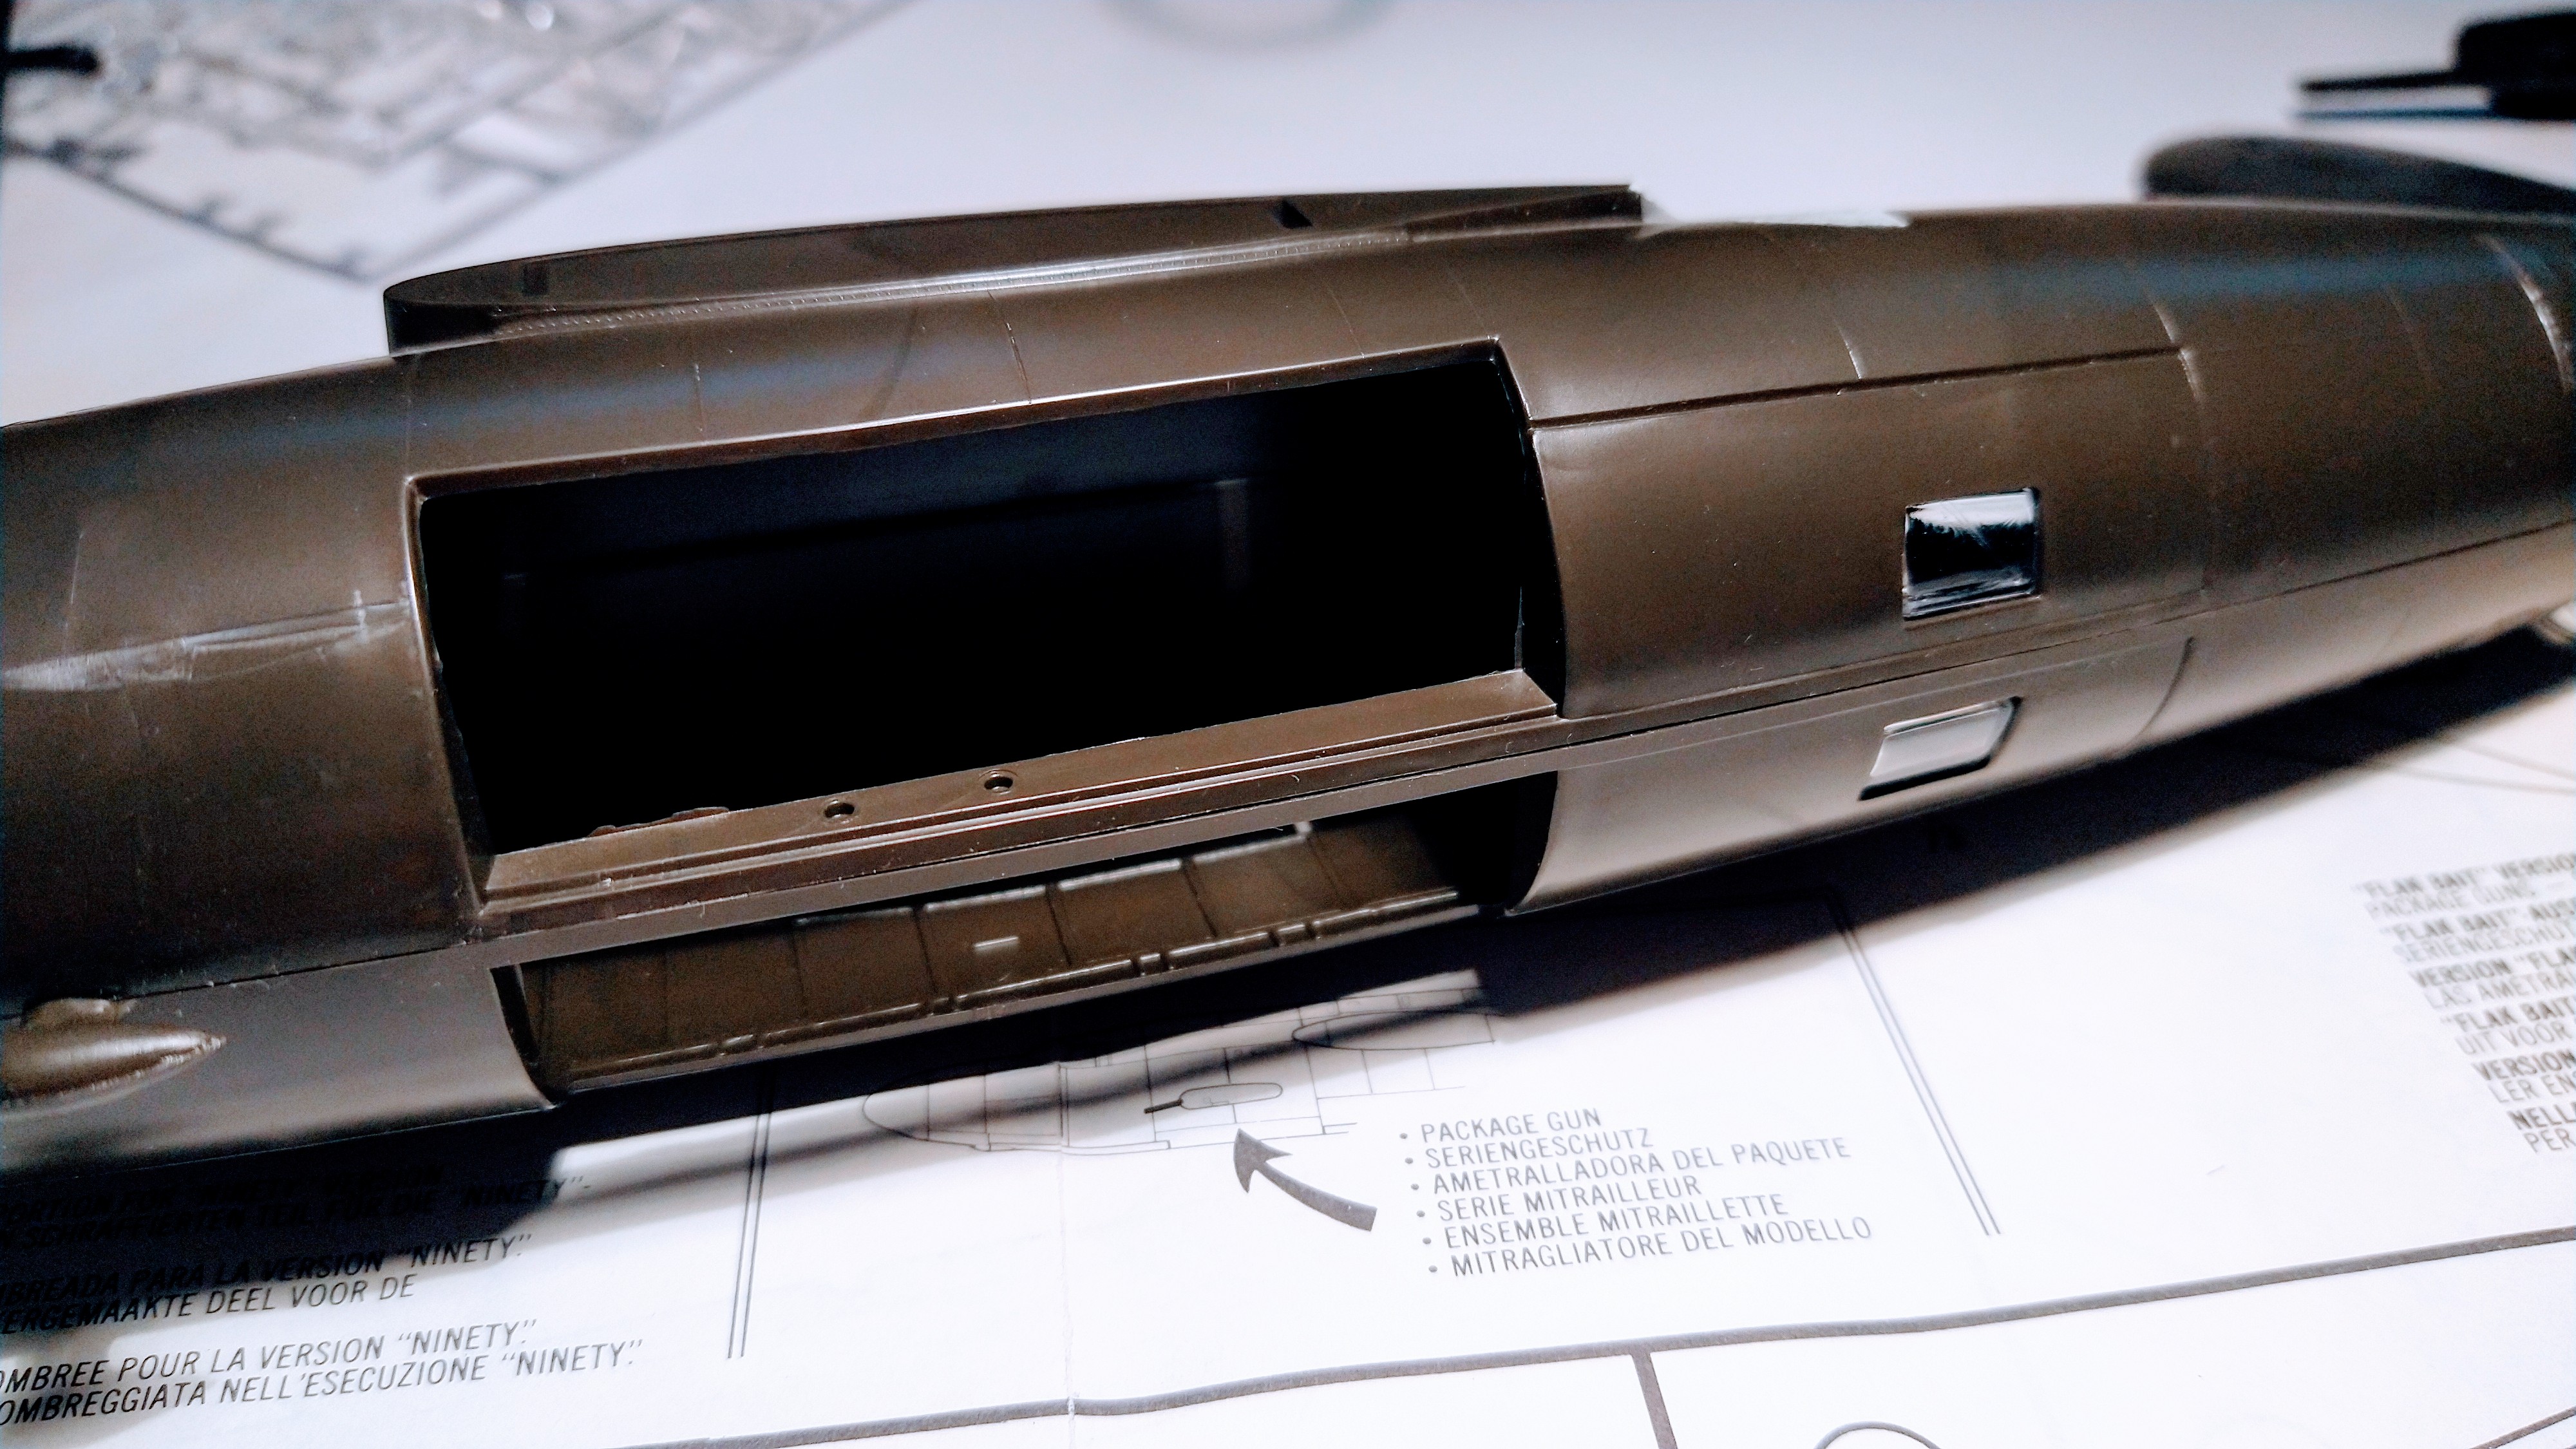
To cut or not to cut?
Now I get it!
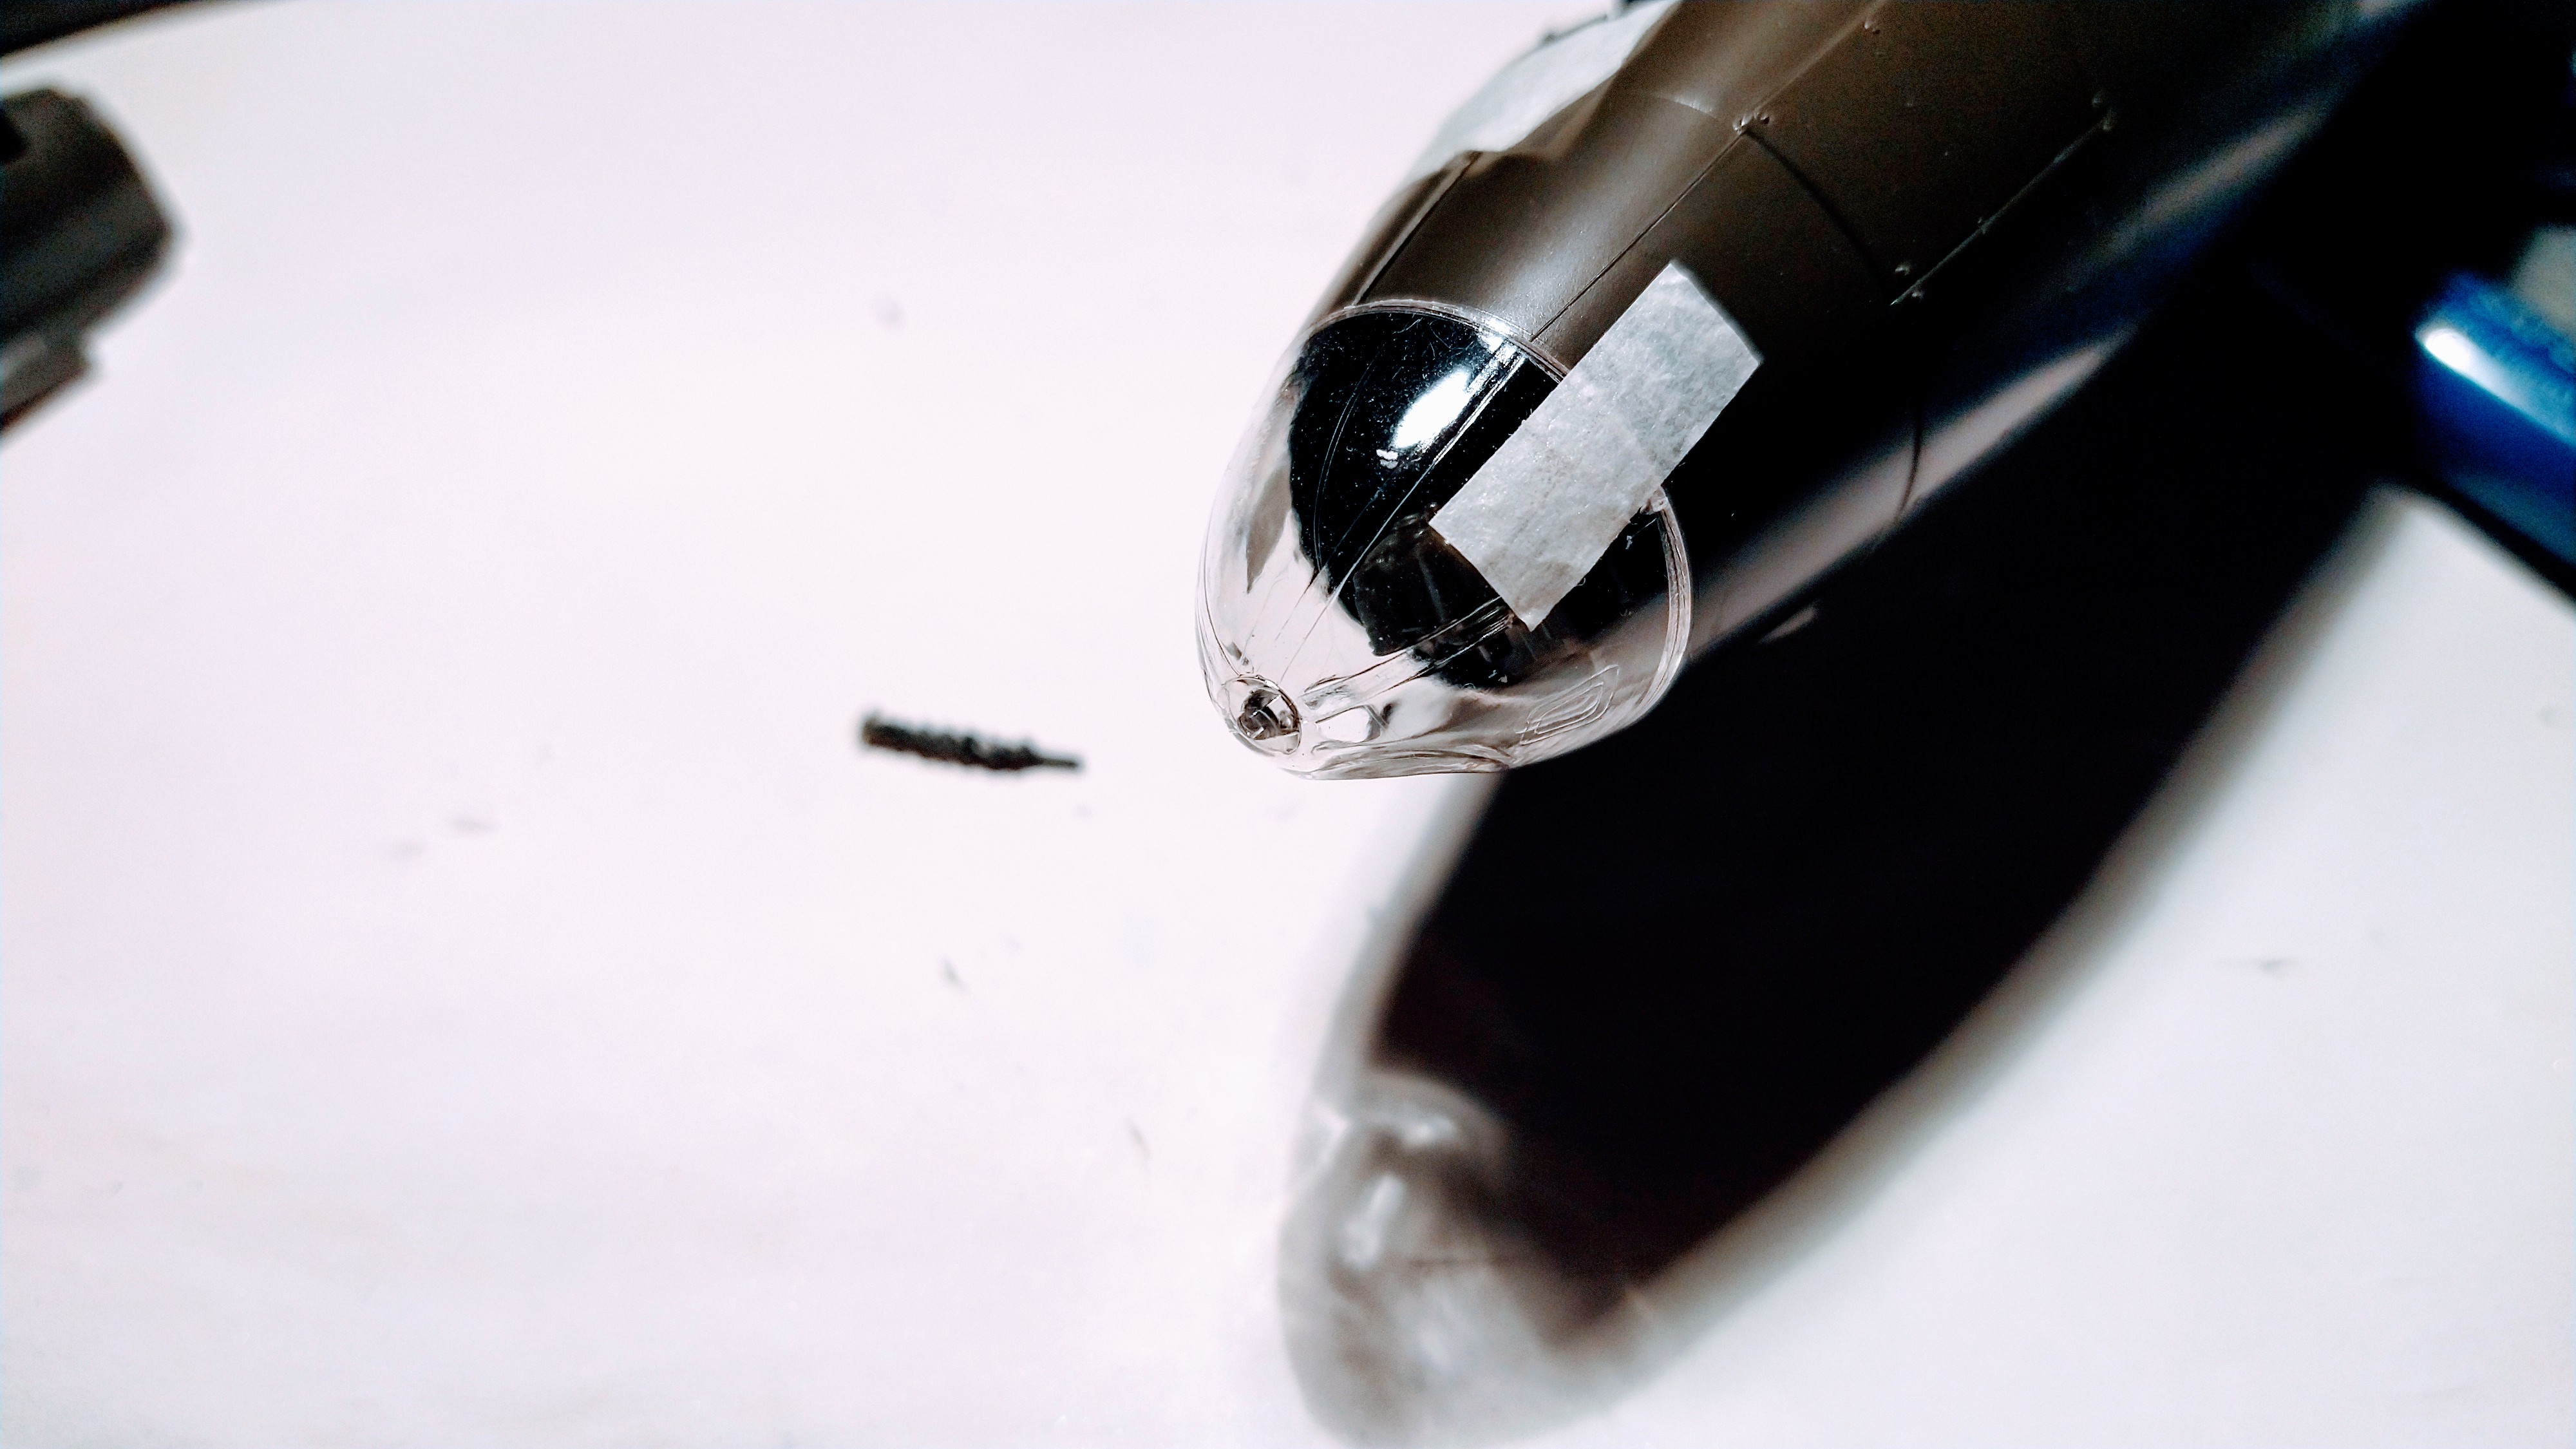
Also I can make sure where every little clear part fits.
I can check if I have missed something before joining the fuselage halves.
Every step can be challenging if you forget to triple check by dry fitting before glueing.
You can also decide not to follow the instructions leaving the wing assemblies for later.
This is something I am now doing making it easier to paint the model kit.
Scanning the instruction sheet allows me also to properly position the decals.
Now how about cleaning that dusty B-25 while I decide when to start…
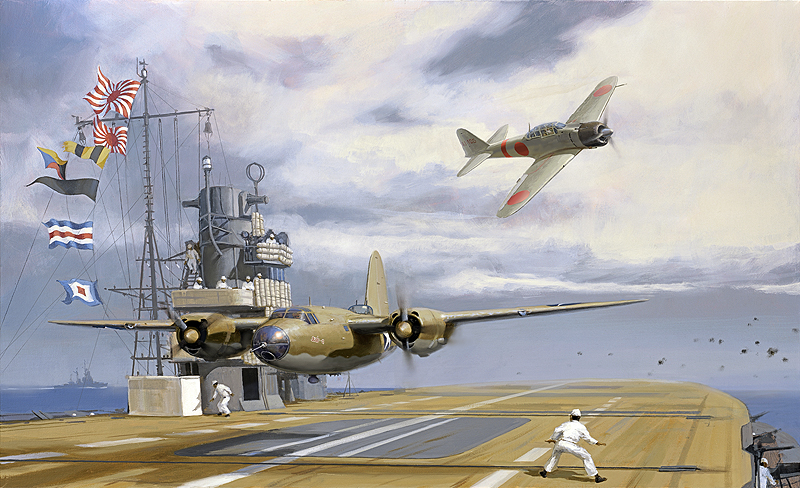
Early on the morning of June 4, 1942, the Japanese Combined Fleet, with four aircraft carriers, was approaching Midway Island in the Central Pacific with the intention of seizing the island. They expected to surprise the Allied base, but due to a broken Japanese code the Allies had advance warning, and sent every available bomber in Hawaii to Midway’s defense. Among this eclectic mix were four B-26 Martin Marauder fast medium bombers, now equipped to carry aerial torpedoes: two from the 22nd Bomb Group and two from the 38th Bomb Group. Navy ships, including two carriers, were also now approaching the scene. But even without the element of surprise, the Japanese had more ships, more carriers, and more aircraft armed to take down opposing ships.
While Midway Island was subjected to a terrific pounding by an initial Japanese air attack, the B-26s participated with Midway-based Navy attack aircraft in a desperate but spirited counterattack on the carriers. The strike ended badly for this American strike force and two of the B-26s were shot down during their target runs. The other two were so badly shot up that they barely made it back to Midway, where they crash-landed and never flew again. While attempting to evade the Akagi’s Zero fighters after releasing his torpedo at the ship, Lt. James Muri of the 408th Bomb Squadron, 22nd Bomb Group, in B-26 #40-1391 SUZIE Q, ended up flying just feet above the Akagi’s flight deck. Vice Admiral Chuichi Nagumo, leader of the Midway assault, witnessed the American counterattack, saw the Marauder fly a few feet above the ship’s deck, and incorrectly surmised that the planes stationed on the island’s airbase were the biggest threat to his precious carriers. Accordingly, he re-armed his force of attack aircraft with ordnance intended to destroy land targets. What Nagumo didn’t realize was that at the moment that Lt. Muri was hurtling down the flight deck of Akagi, mere feet away, two yet undetected US carriers had arrived to engage the Japanese fleet.
The shocking discovery a short time later of US carriers preparing to strike the Japanese fleet forced Nagumo to once again download the ordnance on his waiting planes and reload them for attacking ships. Aside from the breaking of the Japanese code that allowed the US Navy to respond to the Japanese invasion fleet, this fateful decision was responsible, more than anything else, for the US Navy’s stunning victory over the Japanese Naval forces in the Battle of Midway. While the Japanese planes were sitting on the flight decks, busy reloading, the Americans had already launched their attack aircraft. Had the Midway-based attack not been so aggressive, or if Lt. Muri had not so audaciously buzzed the Admiral’s flagship, the Japanese attack aircraft may well have kept their anti-ship ordnance and been in the air when the American carrier attack planes were launched. By the end of the day, all four of the Japanese carriers had been sunk; the USS Yorktown was the only carrier loss suffered by the United States Navy in this battle, which was the turning point in the Pacific war.
Building model airplanes is like taking history lessons and learning more about those who served their country.
I had no idea in 1978 that Lt. James Muri had buzzed the Akagi.
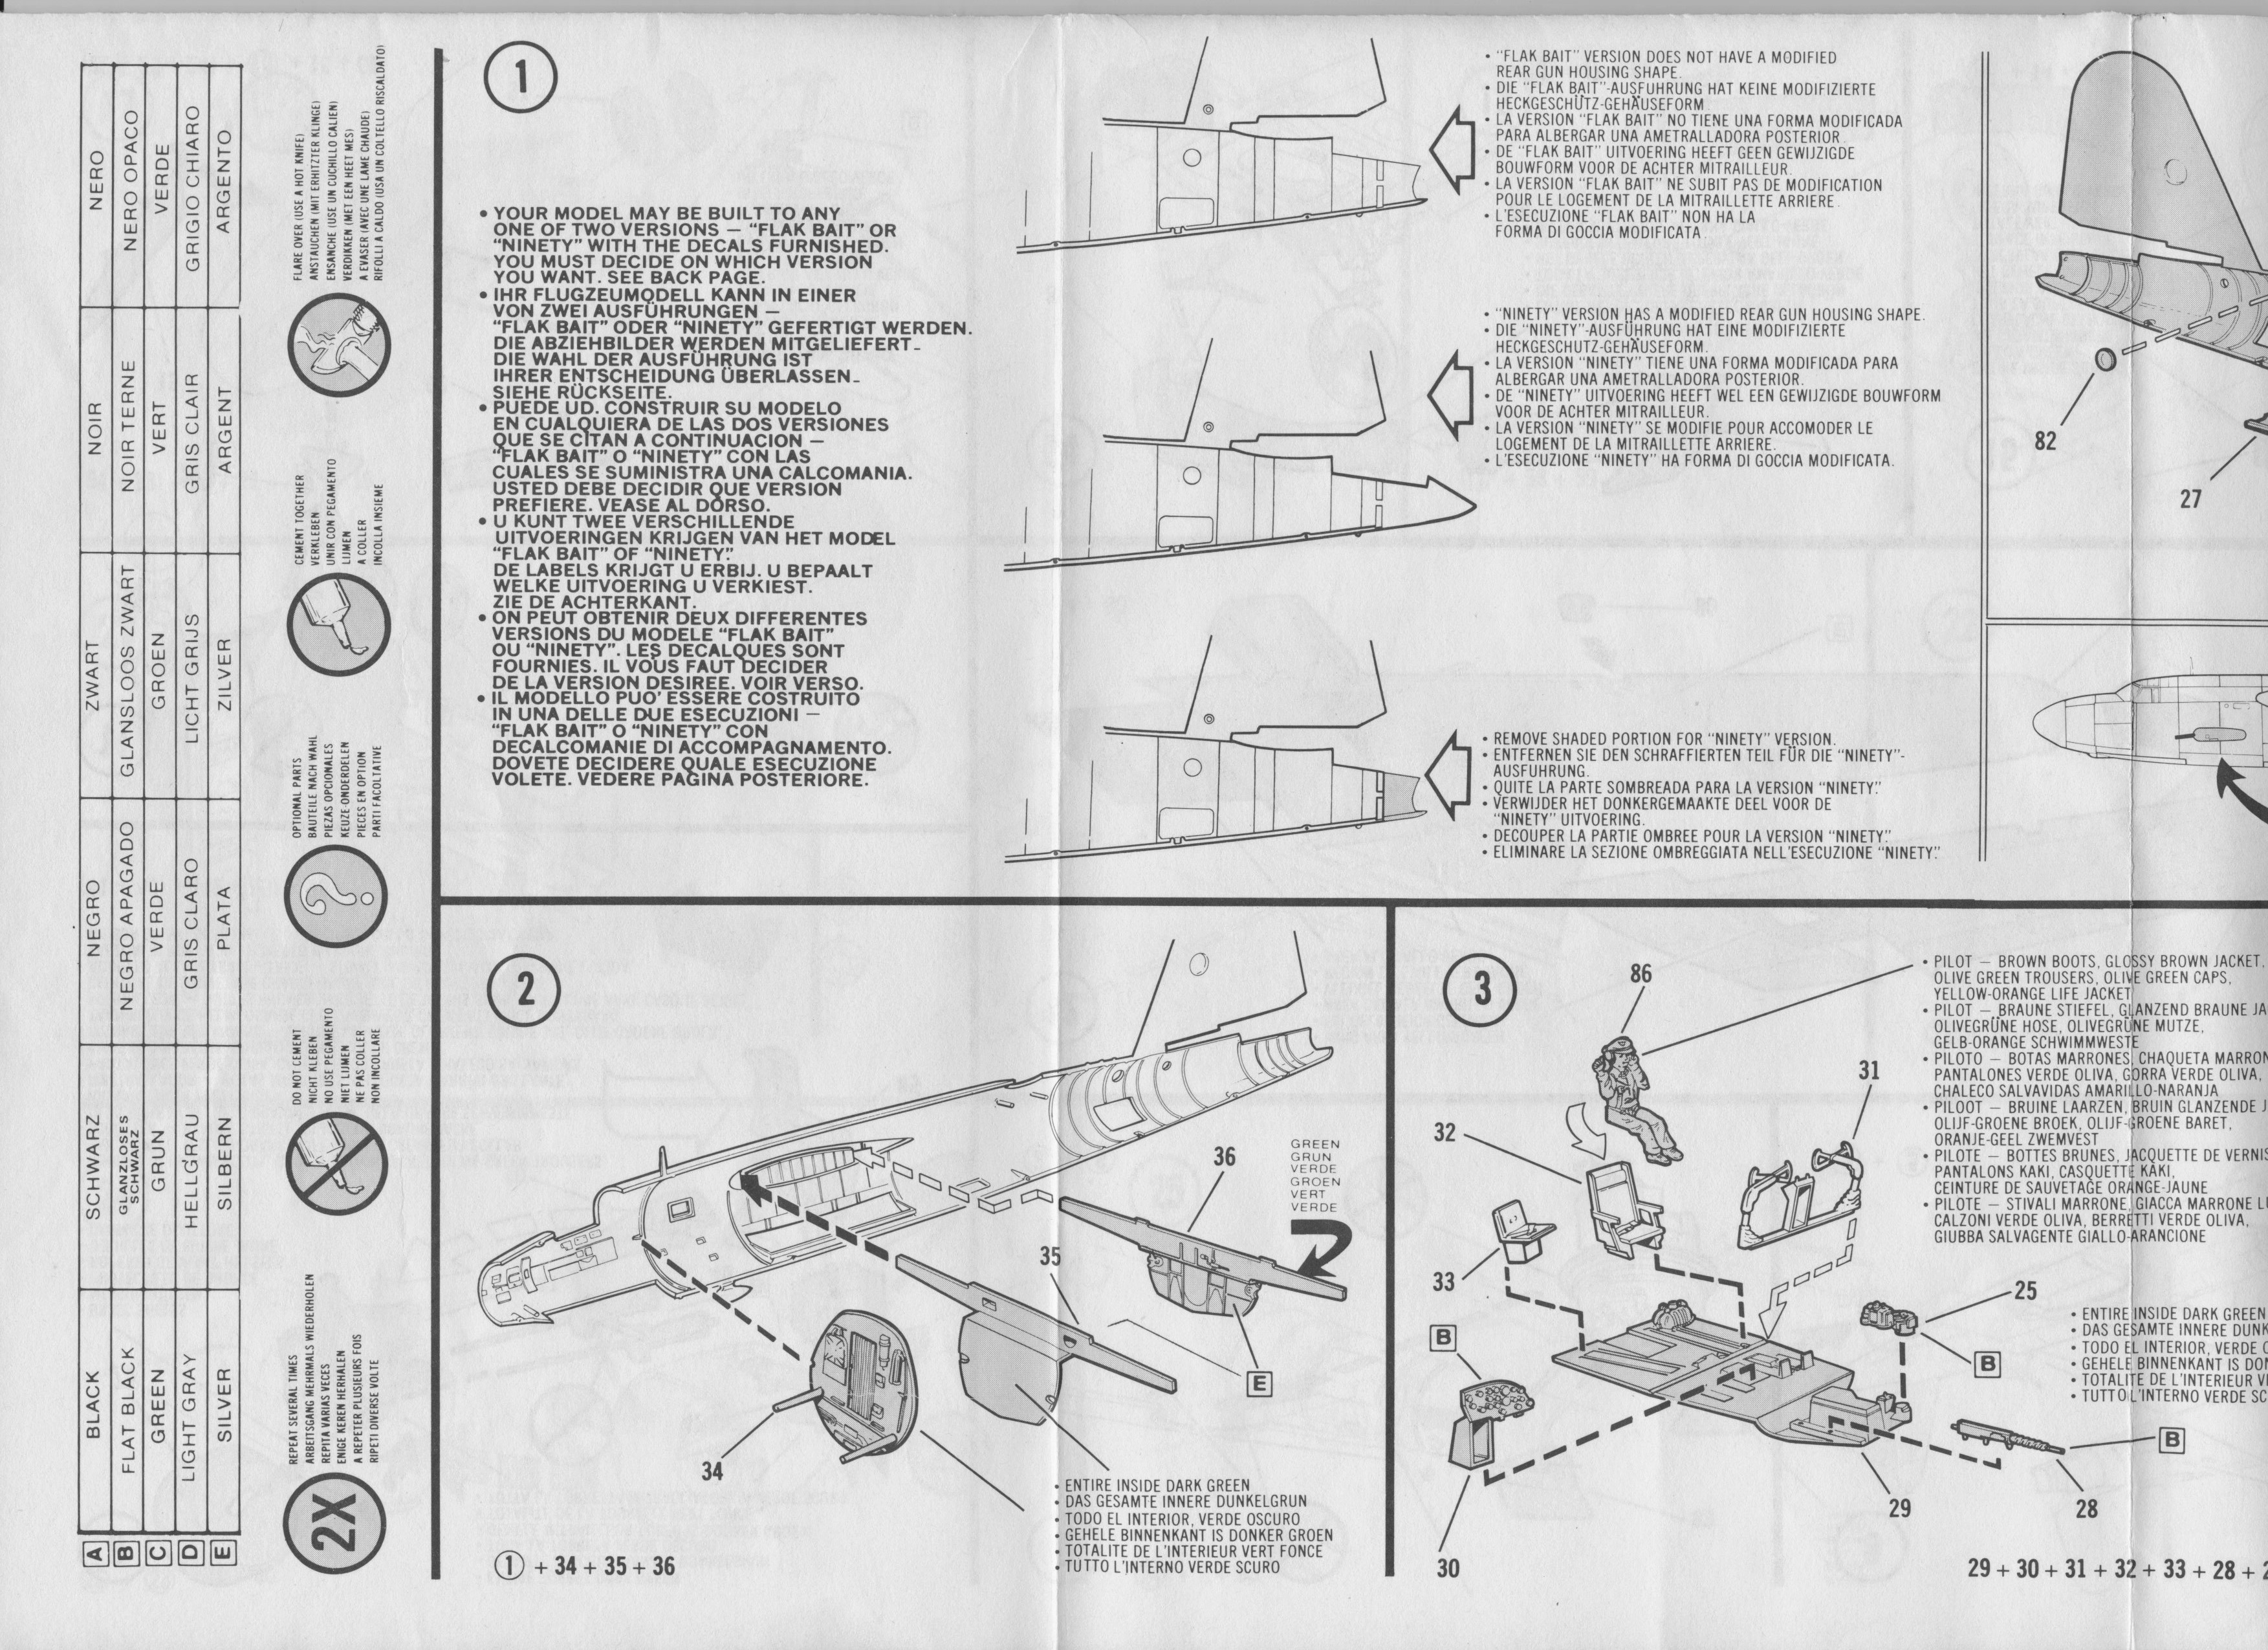
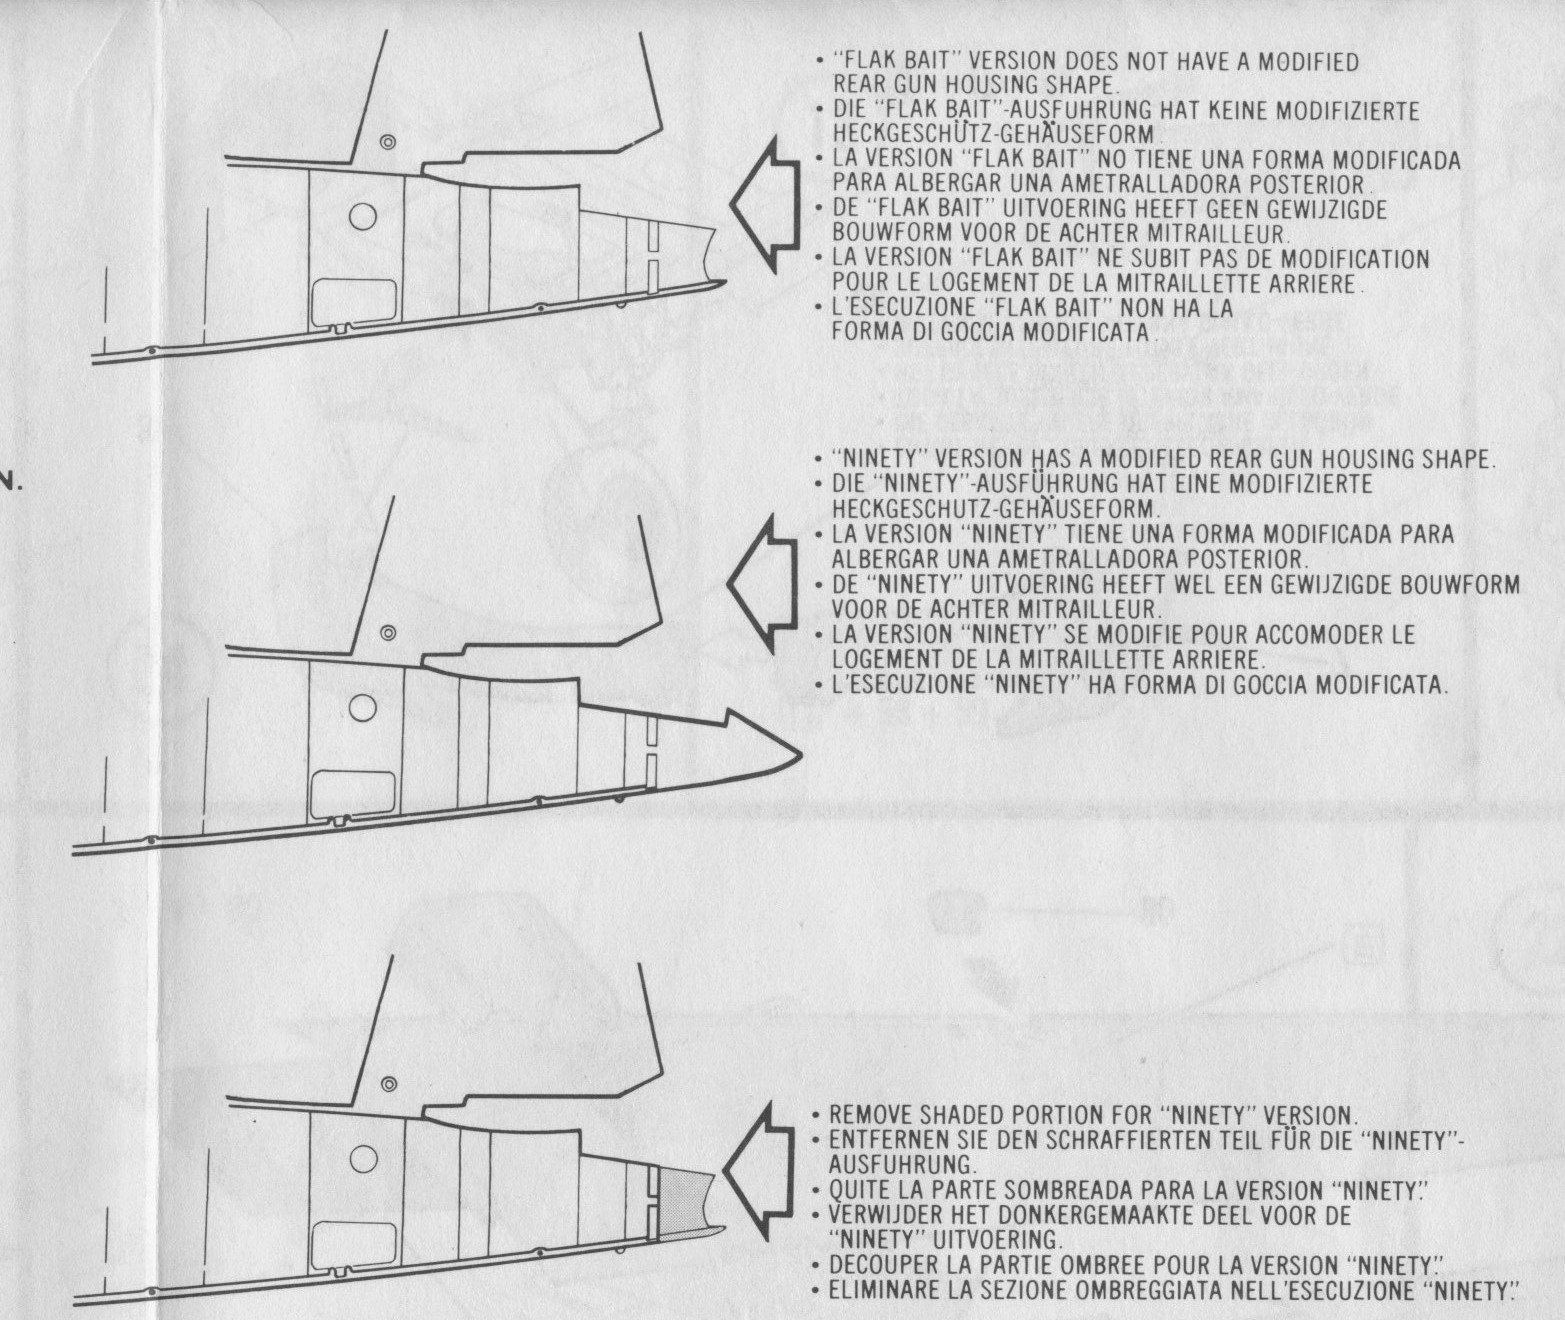
What I knew was that Monogram offered two versions of the B-26 with different types of rear turret.